Drawing Curved Walls Under Curved Stairs
Reference Number:
KB-00712
Last Modified:
November 9, 2021
This article also applies to the following legacy products:
Pro | Architectural | Suite
Pro | Architectural | Suite
QUESTION
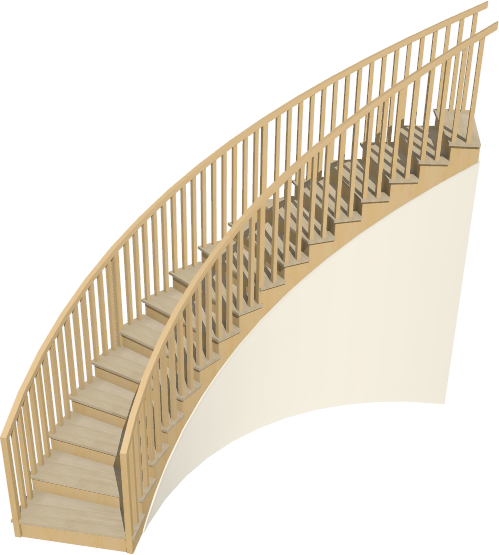
I have created curved stairs in my plan and would now like to create curved walls underneath. What is the easiest way to accomplish this in Home Designer?
ANSWER
Curved walls can be created directly beneath curved stairs using the Curved Wall tools.
Note: To learn how to created curved staircases in Home Designer, please see the Related Articles section below.
To draw curved walls beneath curved stairs
- In a floor plan view, select the curved staircase using the Select Objects
 tool and Open
  it to specification.
- In the Staircase Specification dialog that displays:
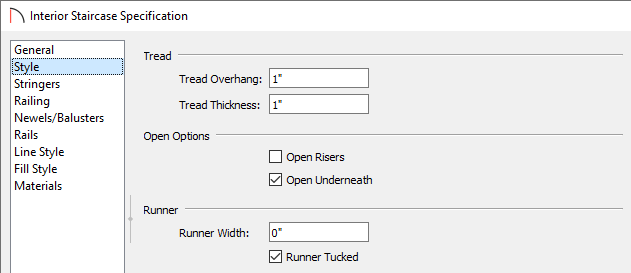
- On the Style panel, uncheck the Open Risers box and check the Open Underneath box.
- On the Fill Style panel, set the Fill Pattern to No Pattern using the drop-down menu.
- Make any other desired adjustments to the staircase, then click OK.
- On the Style panel, uncheck the Open Risers box and check the Open Underneath box.
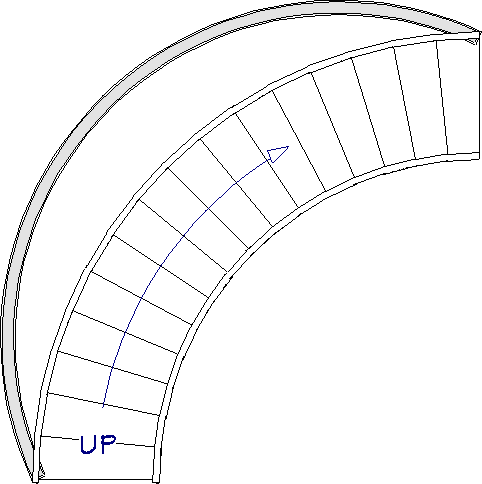
- Next, select Build> Wall> Curved Interior Wall
 , then click and drag to draw a curved wall, as demonstrated in the image below.
Notice that the start and end point of the wall will snap to the staircase. If you have difficulty properly aligning the start and end point of the curved wall with the staircase, try drawing the wall in the opposite direction. For example, if the wall was drawn starting from the bottom of the staircase, try drawing it from the top instead.
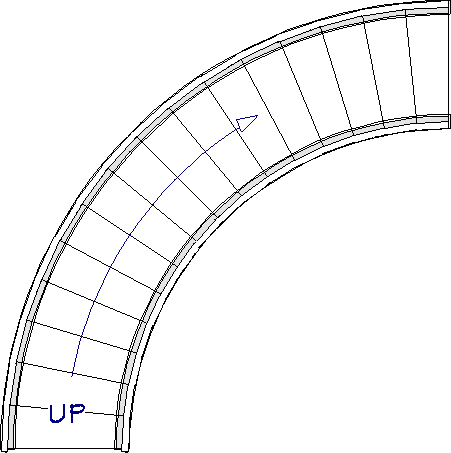
- Using the Select Objects tool, click on the curved wall that was just created, then use the smaller triangular edit handle to change the radius of the wall to match the curve of the stairs.

- Repeat steps 3 and 4 to draw a parallel wall on the other side of the staircase, if necessary.
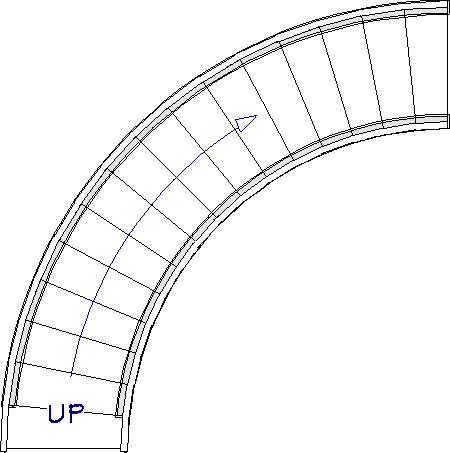
- At this point, the curved wall segments will likely conflict with the start of the staircase, which can be verified in a camera view. When this occurs, select the curved wall segments using the Select Objects tool, then adjust their length so they start at the second tread of the staircase.
Note: You may find it helpful to hold down the Ctrl/Command key while adjusting the length of the walls. Doing this will temporarily disable the program's angle snap setting, allowing you to adjust the length without any restrictions.
You can also navigate to Edit> Snap Settings and disable the Angle Snaps without the need to hold down a key on the keyboard. Remember to re-enable the Angle Snaps setting when you're finished adjusting the walls.
- Take a Camera
 view to see the results.
Related Articles