Placing a Spiral Staircase and Stairwell
Pro | Architectural | Suite
QUESTION
I would like to create a spiral, or circular, staircase using Home Designer. However, when I click on the Stair Tools parent tool and then click on either the Curve to Left or Curve to Right child tool, I cannot seem to figure out how tocreate a spiral or circular staircase. How is this accomplished?

ANSWER
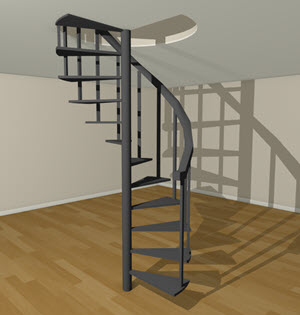
Spiral staircases can be added to your plans using the symbols located in the library.
To place a spiral stair
- If the Library Browser is not already open, navigate to View> Library Browser
 .
.
- Once in the Library Browser, navigate to Home Designer Core Catalogs> Architectural> Staircases> Spiral.
In Home Designer Suite, navigate to Home Designer Core Catalogs> Architectural> Spiral Stairs instead.
- Select the Large Circular Stairs or the Small Circular Stairs symbol.
- Click in your plan to place the stairs.
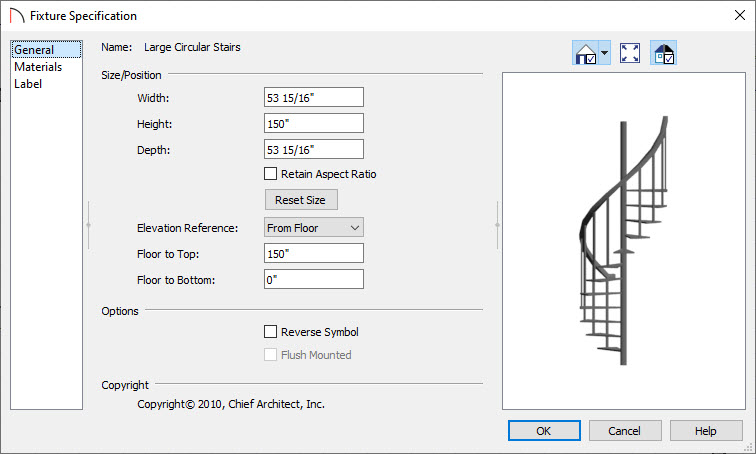
- You can now use the edit handles to move and adjust the spiral staircase, or use the Select Objects
 tool to select the stairs, and click on the Open Object
  edit tool to adjust the Size and Materials.
Now that we have our spiral staircase placed, we are ready to create the stairwell.
To create the stairwell
- If the plan does not already have two floors, use the Build> Floor> Build New Floor
 menu item to create a second floor based on the one below it. If your plan already has a second floor, select the Up one Floor
  button to continue on to the next step.
- Turn on the Reference Display by clicking Tools> Floor/Reference Display> Reference Display
 .
.
The Reference Display can also be turned on by pressing F9 on the keyboard.
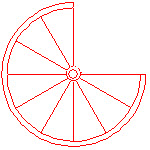
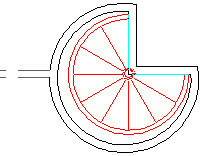
- Select Build> Railing and Deck> Straight Railing
 , then create two straight railing segments and line them up with the circular staircase as shown below.
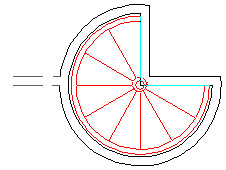
- Next, complete the enclosure using the Build> Railing and Deck> Curved Railing
 tool draw a circular railing.
It will look similar to the image above.
- Resize the curved railing section to correctly line up with the staircase. To do this, select the railing, click on the center handle, and to drag it to the center of the staircase.
- Now that you have the center of the wall placed correctly, you may need to adjust the size a bit. To do that drag the other square handle to get the size you want.
Now you should have the railing set in the location you want.
Note: Once you have enclosed the stairwell room with railings, an invisible wall is automatically created connecting that room to one of the other walls in the structure.
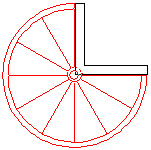
- Next, select Build> Door> Doorway
 , then click and place where the stairs will end on Floor 2.
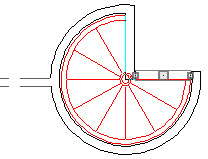
Your drawing should look similar to the image above.
- Using the Select Objects tool, click in the center of the stairwell room that you have created to select the room and click on the Open Object edit button to display the Room Specification dialog.
- On the General panel:
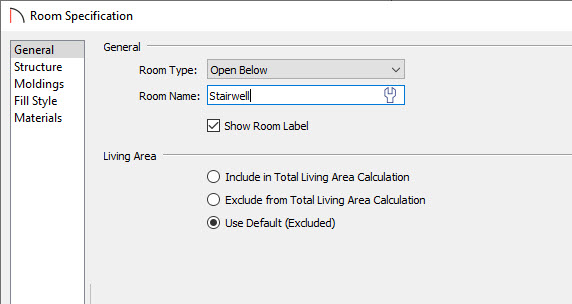
- Change the Room Type to Open Below.
- Set the Room Name to Stairwell.
- Click OK to close the dialog and apply the changes.
- Change the Room Type to Open Below.
- Navigate to 3D> Create Camera View> Full Camera
 , then click and drag out a camera view to see the results.
In Home Designer Pro, navigate to 3D> Create Perspective View> Full Camera instead.
The upper floor level (Floor 2 in this example) should look similar to the image below.
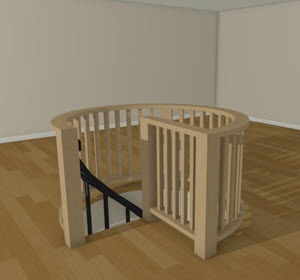
You can customize the materials applied to the Railings in their Specification dialogs.
The lower floor level (Floor 1 in this example) should look similar to the following image.