Changing Wall Heights
Pro | Architectural | Suite
QUESTION
How can I change the height of walls in my plan?
ANSWER
There are several different methods for adjusting the height of walls in your plan, depending on what it is that you want to achieve.
In this article, you will learn about:
- Setting the default ceiling height
- Changing the height of all walls in a single room
-
Changing the height of a single wall
- Creating a room with a shelf ceiling inside of a larger room
There is a Floor Defaults dialog for each floor in a plan, and ideally the defaults for Floor 1 should be set before you start drawing. The defaults for the current floor can be accessed and modified by following the steps in the first section below.
To set the default ceiling height
- Select Edit> Default Settings
 from the menu, expand the Floors and Rooms category, expand Floor Levels, click on the floor you'd like to change the ceiling height for, then click Edit.
- In the Floor Defaults dialog:
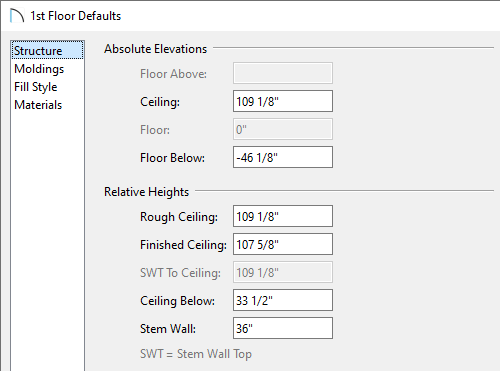
- Under Relative Heights, set the Finished Ceiling height value of the tallest standard room in your plan.
If you have a loft or grand entry area, you will use an Open Below room to create this instead of a raised ceiling. To learn more, see the Related Articles section below.
- Once your desired value is set, click OK.
- Under Relative Heights, set the Finished Ceiling height value of the tallest standard room in your plan.
If needed, you can modify an individual room's ceiling height in its Room Specification dialog to be a different value than the default. This is covered more in the next section.
To change the height of all walls in a single room
- Using the Select Objects
 tool, click inside of the room you want to have a different value than the floor defaults value, then click the Open Object
  edit button.
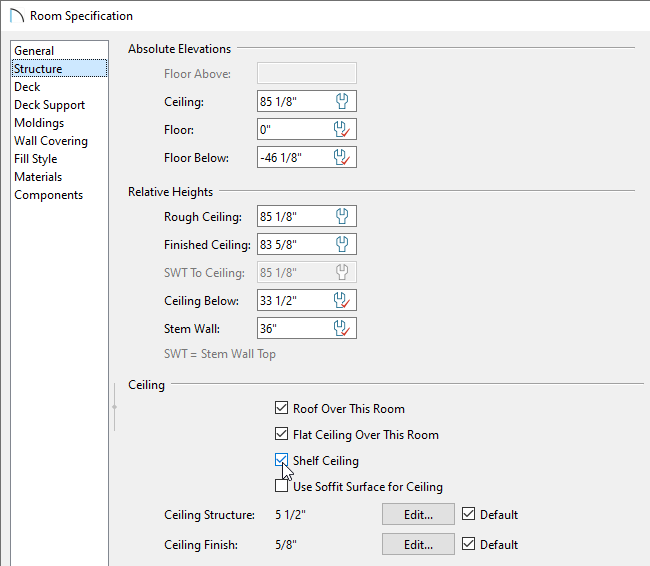
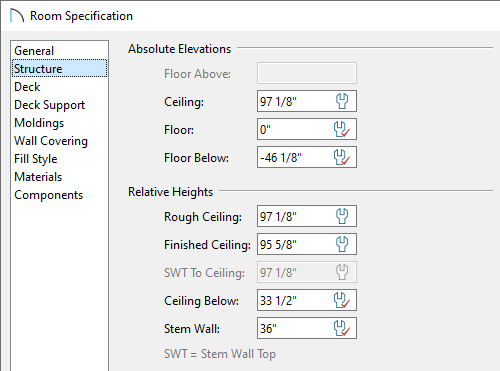
- On the Structure panel of the Room Specification dialog that opens:
-
Set the Finished Ceiling height value, and notice that some of the wrench icons update to reflect that these values are no longer using the default values.
- Once your desired value is set, click OK to apply the change.
-
Set the Finished Ceiling height value, and notice that some of the wrench icons update to reflect that these values are no longer using the default values.
- Repeat this process for any other remaining rooms in your plan that need to be set to have a lower or higher ceiling.
To learn more about controlling floor and ceiling heights, see the Related Articles section below.
To change the height of a single wall
- If you have already drawn these walls using a wall tool, delete them and instead use Build> Wall> Straight Half-Wall
 , then click and drag to create new half-walls at the appropriate locations.
- Select one of the newly created half-walls, then click the Open Object edit button.
- On the Newels/Balusters panel of the Railing Specification dialog that displays, set the Railing Height to adjust the height of the half-wall.
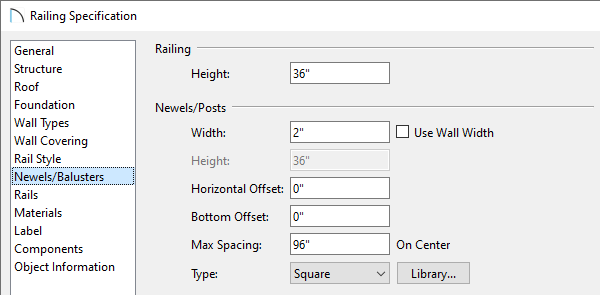
- Select the Materials panel to set the materials for the Interior Wall Surface, Exterior Wall Surface, and top Rail, then click OK to apply the changes.
- Repeat this process for any other half-walls in the plan.
To learn more about half-walls, see the Related Articles section below.
To create a room with a shelf ceiling inside of a larger room
- Use the Select Objects tool to select the room that you'd like to have a shelf ceiling, then click the Open Object edit button.
- On the Structure panel of the Room Specification dialog that displays, check the Shelf Ceiling box, specify a lower value for the Finished Ceiling, then click OK.
To learn more about shelf ceilings, see the Related Articles section below.