Placing a Railing in a Doorway
Pro | Architectural | Suite
QUESTION
I have a doorway in which I would like to be able to place a railing, but don't want to place individual panels as objects from the Library Browser. I can't seem to place it when there is already a wall there. What can I do?

ANSWER
The Railing tool can be placed within a doorway by enabling the No Room Definition setting and then moving it into the doorway.
To place a railing in a doorway
- Select Build> Railing and Deck> Straight Railing
 .
.
- On the outside of the doorway, click and drag out a small railing segment that will fit in the doorway once moved.

- Use the Select Objects
 tool to select the railing, then click the Open Object
  edit tool.
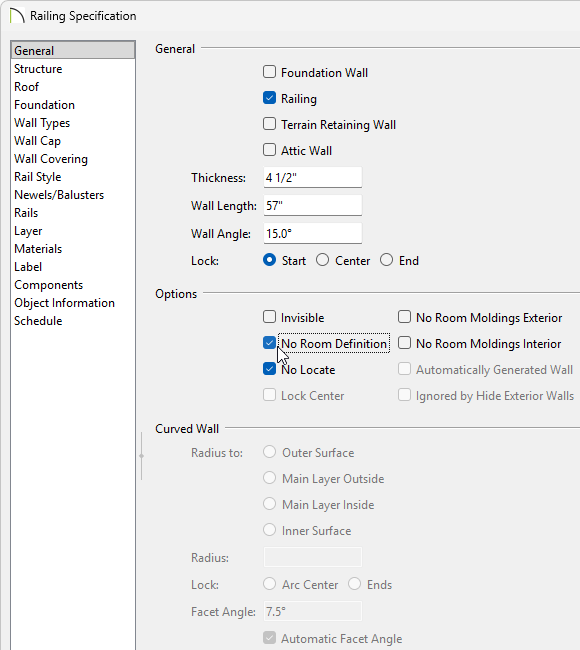
- On the General panel of the Railing Specification dialog that displays, check the No Room Definition box.
- On the Rail Style panel, specify the type of Railing that you want to have placed.
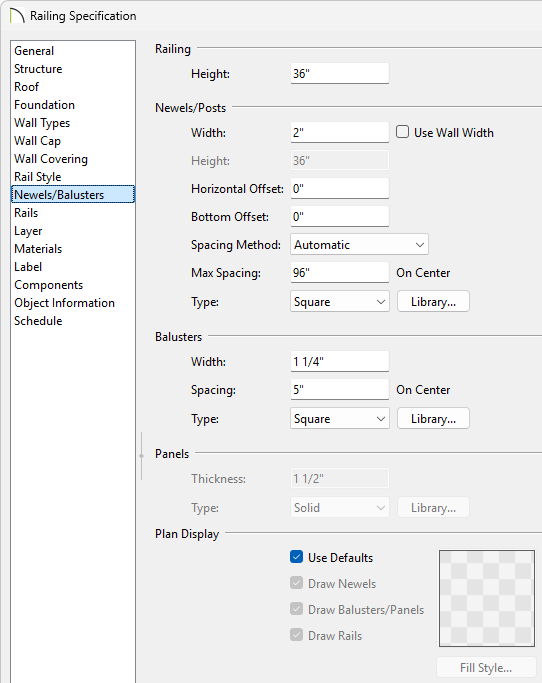
- On the Newels/Balusters panel, set how tall the railing should be with the Height option, as well as properties for the Newels/Posts.
If the newels or posts match the width of the wall type of the railing, select the box for Use Wall Width.
- Go to the Materials panel and specify the materials of the components for the railing.
- Click OK when you have completed making changes in this dialog.
- Next, use the Select Objects tool to select the railing. With it selected, hold down the Ctrl/Command key on you keyboard, place your mouse cursor over the square Move
 edit handle, and carefully move the railing segment within the doorway opening.
Holding down the Ctrl/Command key on your keyboard while moving an object allows for unrestricted placement. For more info, see the Related Articles section below.
Once the railing has been placed into the doorway you will likely need to use the Select Next Object Edit tool to cycle your selection through the wall/doorway/railing.
- Take a Camera
 view to see the results.