Creating a Garage Shop Space
Reference Number:
KB-00776
Last Modified:
December 24, 2024
This article also applies to the following legacy products:
Pro | Architectural | Suite
Pro | Architectural | Suite
QUESTION
How can I create a space in my garage that can be used as a shop or work area?

ANSWER
Using the Cabinet tools and library fixtures and furnishings, you can create a space in your garage to meet a variety of needs. Work areas for vehicle maintenance, storage, gardening or other hobbies can easily be designed using the same tools and basic techniques.
In this article, we will cover the following:
To create a garage
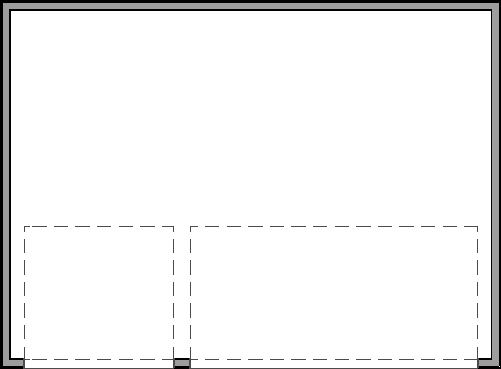
- In the file where you want to design the garage, go to Build> Wall> Straight Exterior Wall
 tool, then click and drag to draw out four walls to create a garage.
In this example, a simple 22' x 30' garage will be used.
- Using the Select Objects
 tool, click in the room that will be used as your garage, and use the Open Object
  edit tool to open the Room Specification dialog.
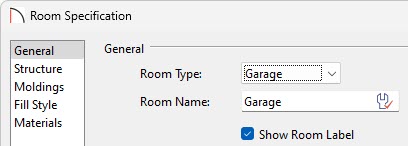
- In the Room Specification, on the General panel, set the Room Type to Garage, and then click OK.
-
Navigate to Build> Door> Garage Door
 and place one or more garage doors in your garage.
In this example, we placed a single 9' garage door, along with a double 16' garage door.
- Next, select View> Library Browser
 to open the Library Browser and navigate to Home Designer Core Catalogs> Exteriors> Vehicles to find and place 3D vehicles in your garage.
There are various vehicle bonus catalogs available, which can be downloaded from the 3D Library.
Note: More information on downloading library catalogs can be found in the Related Articles section below.
- With vehicles in place, it will be easy to judge how much room you have to add other objects.

To place garage cabinets
- Select Build> Cabinet> Base Cabinet
 from the menu, then click in the garage to place a base cabinet at that location.
- Click on the base cabinet to select it, and select the Open Object edit button to open the Cabinet Specification dialog.
- On the General panel, specify the Floor to Bottom height as 4" to raise the cabinet above the floor and make any other desired modifications.
-
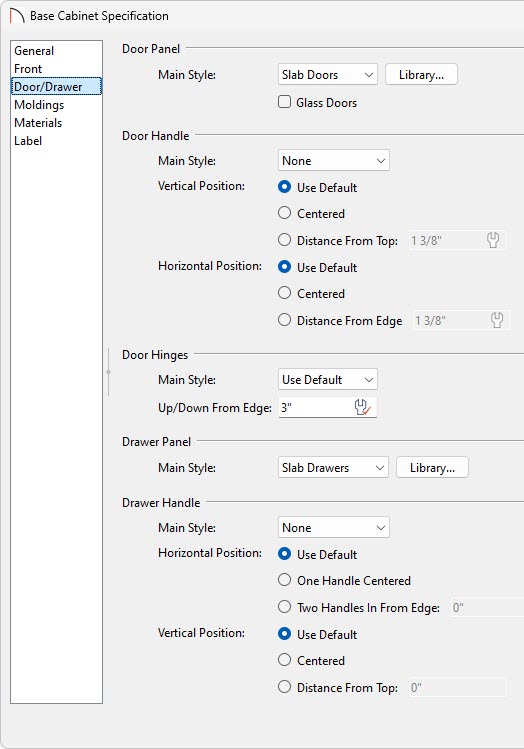
On the Door/Drawer panel, select the Door Style drop-down menu and select Slab Doors from the list.
Perform the same procedure to set the Drawer Style to Slab Drawers.
Remove the handle from both Doors and Drawers by selecting None from the drop-down menus.
- On the Materials panel, select the material of your each of the cabinets components.
- To remove the toekick, backsplash, drawer, countertop, or other cabinet component, select it in the 3D preview to the right, and on the Front panel, select the Delete button.
- Click OK to close the dialog and apply your changes.
- On the General panel, specify the Floor to Bottom height as 4" to raise the cabinet above the floor and make any other desired modifications.
- To create copies of this customized cabinet, use the Select Objects tool to select it, use the Copy/Paste
 edit tool, and then clicking in the drawing area to paste a copy.
- Enable Sticky Mode
 to make multiple copies of the object instead of just one.
- Alternatively, you can use the Object Eyedropper
 and Object Painter
  tools within a 3D camera view, if you'd like to set your already created cabinets to be the same as a customized cabinet.
More information on the Object Eyedropper and Object Painter can be found in the following training video: Using the Object Eyedropper.
- Enable Sticky Mode
- Perform this same procedure for any Wall
 and Full Height Cabinets
  you may want in the garage.
As with base cabinets, you can specify a door style, size, and other attributes in the Wall Cabinet and Full Height Cabinet Specification dialogs.
Storage shelves, tool boxes and other accessories can be added to your plan through the library browser.
To add storage furniture and accessories
- Select View> Library Browser from the menu to open the Library and browse to Home Designer Bonus Catalogs> Tools and Shop.
The Tools and Shop bonus catalogs can be downloaded from the 3D Library.
The Garage Accessories bonus catalog is also available for purchase if you'd like additional garage items.
Note: More information on downloading library catalogs can be found in the Related Articles section below.
- Click on an item to select it, then move your cursor into the drawing area and click to place the object at that location.
- To place objects on a storage shelf, begin by placing them on the ground in front of the shelf.
- Create a Full Camera
 or Elevation
  view of the shelves and adjust the height of the objects so that they are the right height to sit on the shelves.
- Select File> Close View to return to floor plan view and use the Move
 edit handle to move the objects into the same space as the shelf.
- If you bump into other objects, hold down the Ctrl key on your keyboard while you move the object to override any movement restrictions.
- Create a Full Camera
- Select 3D> Create Camera View> Dollhouse View
 to see the results.
Related Articles