Using the Flare and Curve Stairs Edit Tools
Pro | Architectural
QUESTION
How do I create flared stairs and stairs with curved treads?

ANSWER
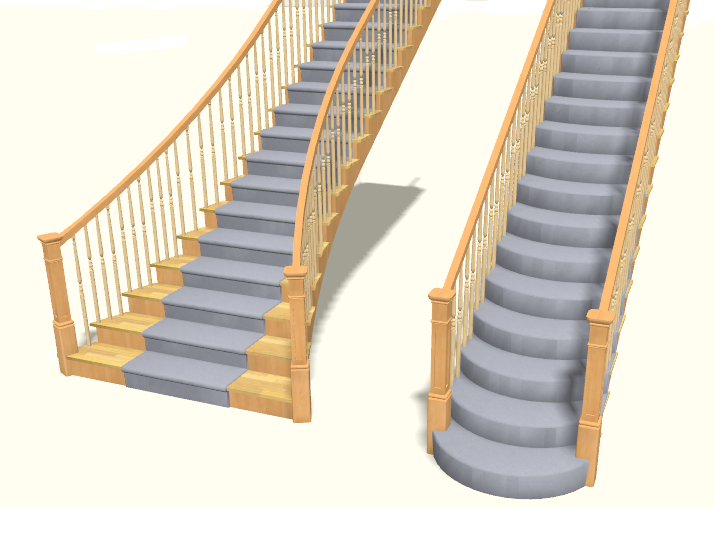
Both flared stairs and stairs with curved treads can be created easily using the Flare/Curve Stairs edit tool.
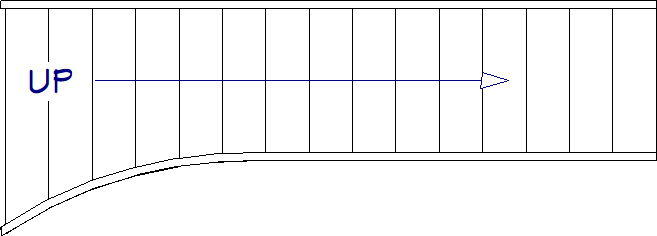
Flared stairs grow wider near one end, typically sweeping outward at the bottom. Stairs can also be flared at the top or on both ends.
To create flared/curved stairs
- Select Build> Stairs> Draw Stairs
 from the menu, then click and drag to draw a staircase.
- Click on the staircase to select it, then click the Open Object
 edit button.
- On the General panel of the Staircase Specification dialog that opens, make your desired changes to the Length, Width, and other properties/fields located here, then click OK.
It's generally best to have these structural aspects of the stairs finalized before making them flared.
For additional control over the various fields within this dialog, you may want to adjust the settings under the Advanced Options section. Please review your program's documentation for additional information.
- With the staircase selected, notice the edit handles that display:
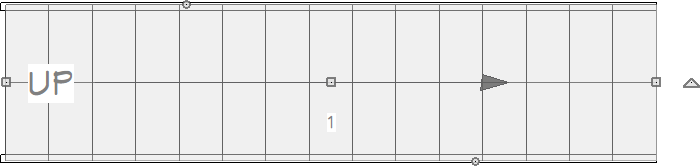
- The Sizing

 handles on each edge allow you to resize the stair.
- The Move
 handle at the center allows you to move the stair.
- The triangular Rotate
 handle lets you change the direction of the stair.
- The Sizing
- With the staircase still selected, click the Flare/Curve Stairs
 edit button.
- Notice the new set of edit handles that now display on the staircase:
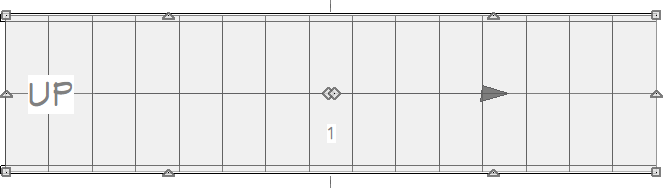
- The square handles that display at each corner of the staircase are the flare handles.

- The triangular handles that display along the long edges of the staircase are used to adjust the flare radius.

Use the dimension information that displays in the Status Bar as a reference to create symmetrical flares on both sides.
- The handles located at the center of the staircase allow you to control the origin of the flare on each end of the stairs.

Only exposed sides of a stair section can be flared. If one side of a stair section is against a wall or wrapped, only the exposed end can be flared.
- The handles that display along the short edges of the staircase are used to create curved risers.

When treads are curved, all treads in the section show some degree of curvature. Treads close to the curved end have a greater curve than those at the opposite end, but both ends can be curved.
- The square handles that display at each corner of the staircase are the flare handles.
To create a flare with specific measurements*
*Applies to Chief Architect Premier, Chief Architect Interiors, and Home Designer Pro only.
If you would like to create a flare with a specific chord and radius, first draw the desired arc using the CAD drawing tools for use as a reference. While it isn't possible to specify a staircase with this exact information, you can model it closely and display an annotation with the desired measurements
The steps below describe how the arc of a flare can be defined. The same tools can be used to define the arc of a curved tread, as well.
- Create a staircase as described in Step 3, above.
- Select CAD> Lines> Draw Line
 from the menu, then click and drag three lines:
- One line extending from the front edge of the stairs.
- A second line running parallel to the edge you wish to flare.
- A third line running parallel to the first but closer to the staircase center.
- One line extending from the front edge of the stairs.
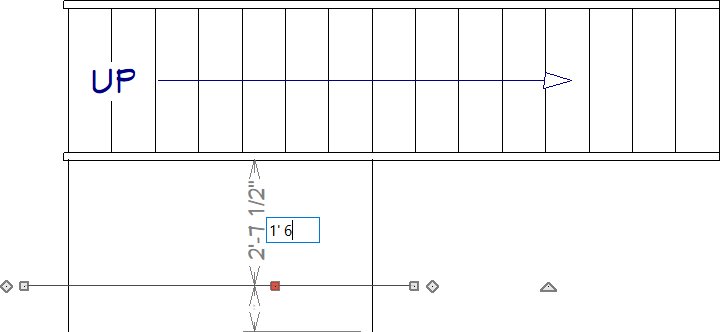
- Click on the second CAD line, running parallel to the stair edge, move you mouse over the dimension until the Pointer
 cursor displays, then click on the temporary dimension that displays.
- In the Move Object Using Dimension in-line text box, specify the desired distance that you would like the flare to extend at its widest point, then click Enter on your keyboard to move the line the specified distance from the stairs.
- If a temporary dimension does not display when you click on the line, either it is not exactly parallel to the stairs, or Temporary Dimensions are toggled off. Select View> Temporary Dimensions
 from the menu to turn this feature on, then try again.
- Repeat this process with the third line drawn, this time specifying the length down the stairs that you would like the flare to extend.
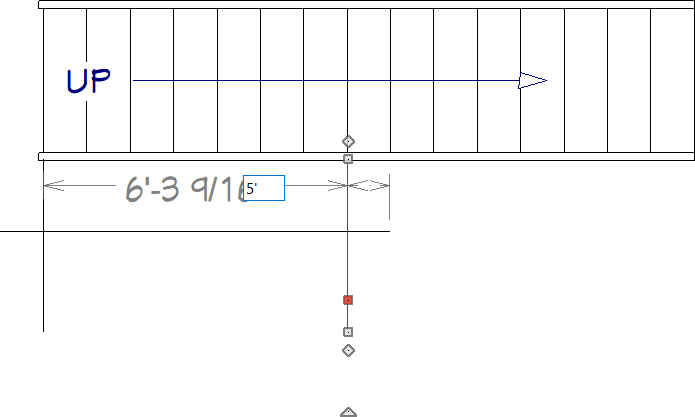
- In the Move Object Using Dimension in-line text box, specify the desired distance that you would like the flare to extend at its widest point, then click Enter on your keyboard to move the line the specified distance from the stairs.
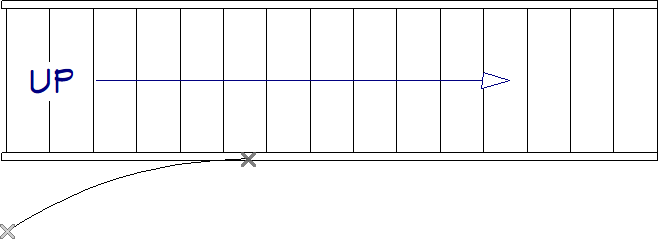
- Select CAD> Points> Place Point
 from the menu, then click once at the point where the first and second lines meet, and once where the third line meets the edge of the staircase.
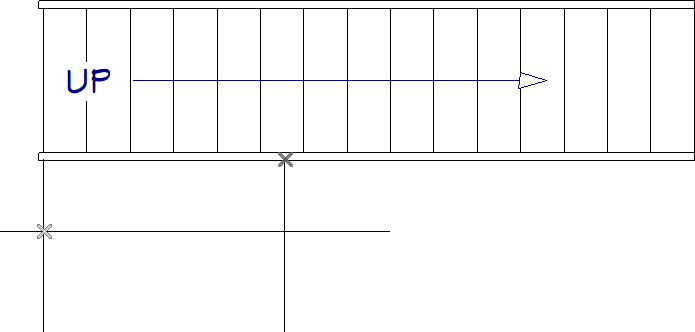
- These two points indicate where the flare's arc will begin and end.
- For accurate placement, be sure that Object Snaps
 are enabled.
- These two points indicate where the flare's arc will begin and end.
- Using the Select Objects
 tool, click on each of the CAD lines and Delete
  them.
them.
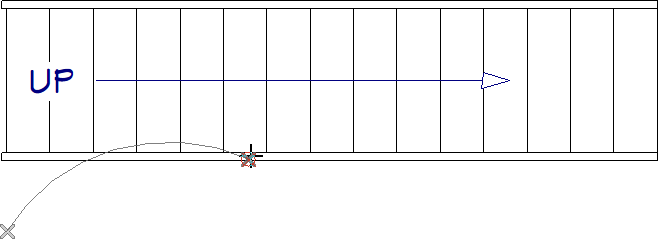
- Select CAD> Arcs> Draw Arc
 from the menu, then click and drag an arc beginning on one CAD point and ending on the second one.
- Click on the arc to select it, then click the Open Object edit button.
- On the Arch panel of the Arc Specification dialog:
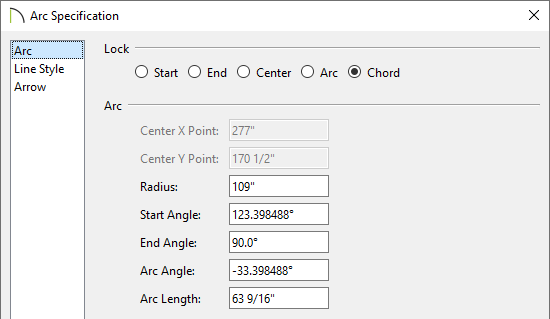
- Click the radio button beside Chord to lock the arc's direction.
- Specify the desired Radius or End Angle for this arc.
- Click OK to close the dialog and apply your change.
- Click the radio button beside Chord to lock the arc's direction.
- Click on the staircase to select it, then click the Flare/Curve Stairs edit button.
- Use the flare edit handle to extend the front edge to meet the CAD point.
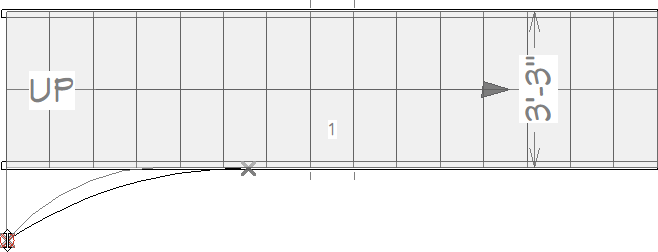
- Use the side and center edit handles closest to the flare to adjust its curve so that it closely matches that of the CAD arc.
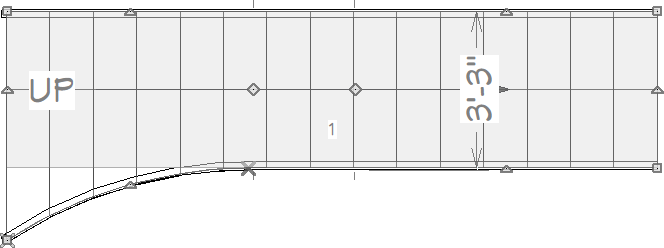
- Once the flare is exactly to your liking, de-select the staircase.
- Use the flare edit handle to extend the front edge to meet the CAD point.
- Select CAD> Points> Delete Temporary Points
 to delete the points.
- To display the length of the chord and its radius, select the CAD arc, click the Open Object edit button, and on the Line Style panel of the Arc Specification dialog, check the Show Length box, then click OK.
Note: You may want to move the arc away from the edge of the staircase flare so the length information doesn't display over the stairs.
If you'd like, you can also change the arc's color to your background color so that it is not visible.