Creating a Landing Between Two Sets of Stairs
Reference Number:
KB-00756
Last Modified:
July 18, 2024
This article also applies to the following legacy products:
Pro | Architectural | Suite
Pro | Architectural | Suite
QUESTION
I would like to draw two staircases and connect them with a landing. How do I accomplish this?

ANSWER
There are different ways to create a stair landing. The quickest is to use the Draw Stairs tool to create two runs of stairs then click to place a landing between them.
To create a landing using the Draw Stairs tool
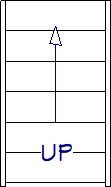
- Select Build> Stairs> Draw Stairs
 from the menu, then click and drag to create the first section of the stairs.
- Release the mouse button at the approximate location where you would like this stair section to join the landing.
- With the Draw Stairs tool still selected, click and drag to create the second, higher stair section.
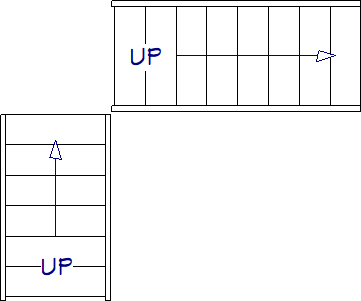
- Begin at the approximate location where this stair section will meet the landing.
- Leave an appropriate gap for the landing.
Note: When the landing is generated, the two stair segments will move to connect the landing squarely, it is important to not only leave an adequate gap for the landing to generate, but also make sure the two segments are not too far apart.
- Begin at the approximate location where this stair section will meet the landing.
- With the Draw Stairs tool still active, place your cursor in the area between the end of the first landing and the beginning of the second and click once.
- The program will create a landing between the two stair sections at a logical height and will make slight adjustments to the stair locations, if needed, to produce a finished result.
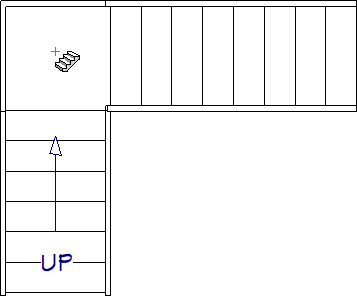
- Click on one of the stair sections to select it, then click the Auto Stairwell
 edit button. The program will create an opening in the ceiling above the staircase, allowing access to the floor above.
The Auto Stairwell tool actually creates a room directly above the staircase that is defined by Railings and is specified as Open Below in the Room Specification dialog. You will receive an error if you attempt to create a stairwell when there is no floor above.
- Stair sections can be added to the User Catalog by first selecting a stair section, then clicking the Add to Library*
 edit tool. Landings cannot be added to the User Catalog.
*Applies to Chief Architect Premier X16 and newer versions.
For more information on adding objects to the User Catalog, please see the Related Articles section below.
To create an L or U shaped stair with a landing
- Select the Build> Stairs> L-Shaped Stair
 or U-Shaped Stair
  tool to quickly place an L or U shaped stair.
- Choose the default direction for L-Shaped and U-Shaped stair sections and the gap to create between the two sets of stairs for a U-Shaped staircase.
You can add winders to L-Shaped stairs, which will split the landing into two sections or create a split landing on U-Shaped stairs, which will split the landing in half by default.

- With the L Shaped or U Shaped stair tool selected, bring your cursor into your plan view. Notice how the L or U shaped stair will rotate and snap to different possible locations.

- Click to place the stair at the desired location and the stair will be placed with a landing connecting the different stair sections.
Related Articles