Customizing Stair Stringers
Pro | Architectural | Suite
QUESTION
How do I customize the number and placement of stair stringers?

ANSWER
Stair stringers can be customized on the Stringers panel of the Stair Specification dialog or Stair Defaults dialog in X12, Home Designer 2021, and newer versions. In X11, Home Designer 2020, and prior, a limited number of stringer options can be found by accessing the Style panel.
To customize stair stringers
- Using the Select Objects
 tool, click on a staircase you would like to edit the stringers for and click the Open Object
  edit tool.
In Chief Architect Premier and Chief Architect Interiors, you can also navigate to Edit> Default Settings , expand the Stairs and Ramps category, click on Interior or Exterior Stairs in the list, then click the Edit button.
Any changes made in the Stair Defaults dialog will only apply to staircases created in the plan going forward. Changes made in the Stair Defaults dialog will not retroactively apply to already existing staircases.
- In the Staircase Specification or Stair Defaults dialog that opens, click on the Stringers panel.
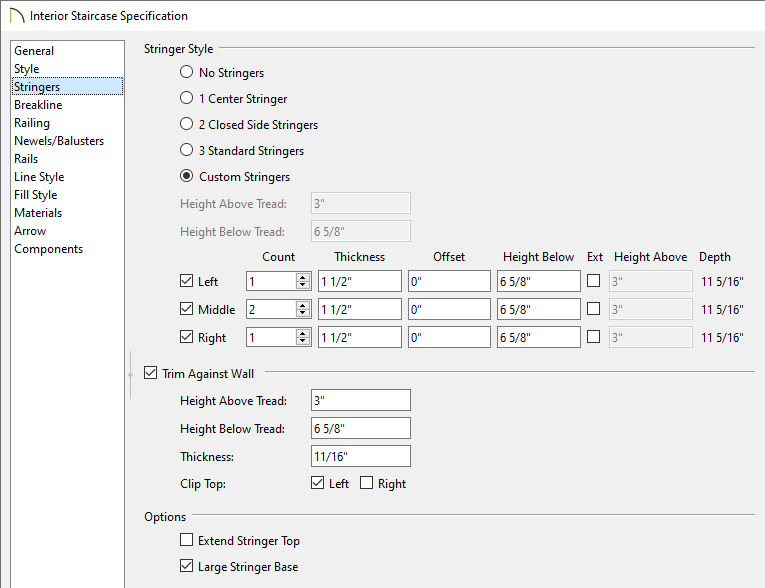
- Specify the Stringer Style.
Note: The Height Above Tread field is only available when the "2 Closed Side Stringers" option is selected, and is measured straight down from the top outer edge of the tread nosing to the top of the stringer.
The Height Below Tread field is not available when the "Custom Stringers" option is selected, and is measured straight down from the back bottom edge of the tread to the bottom of the stringer.
- If you would like to specify custom stringers, select the Custom Stringers* option and notice the Left, Middle, and Right boxes are enabled and no longer grayed out. Specify the Count, Thickness, Offset, and Height Below values for each stringer. Check the Ext box to specify exterior stringers, then specify the Height Above value.
For more information on each of these options, click on the Help button at the bottom of the dialog.When multiple left and right stringers are specified using the Count field, the stringers are butted side to side. However, when multiple middle stringers are specified, they are evenly spaced.
- Check Trim Against Wall if you would like a trim board to generate when a staircase is butted up against a wall and specify the desired Height Above Tread and Height Below Tread values. The Thickness* of the trim, and whether or not it has a Clip Top* can also be specified.
-
Extend Stringer Top will extend a triangular portion of the stringer under the landing or platform at the top of the stairs, and checking Large Stringer Base will widen the stringers at the foot of the staircase, which may be helpful in cases when walls are created below the stairs.
*Applies to Chief Architect Premier, Chief Architect Interiors, and Home Designer Pro.
- Specify the Stringer Style.
- Once all desired changes have been made, click OK.
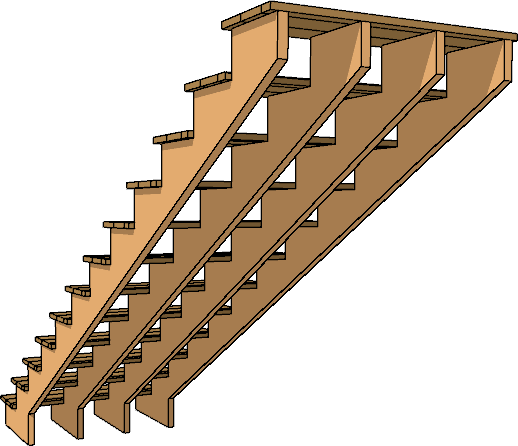
- Take a Camera
 view to see the results.
- If you intend to use this stair in another plan, first select the stair, then click the Add to Library*
 edit tool to add the individual stair section to the User Catalog. Landings cannot be added to the User Catalog. Please see the Related Articles section to learn more.
*Applies to Chief Architect Premier X16 and newer versions.