Creating a Stair Rake Wall
Pro
QUESTION
I'd like to create a solid wall that follows the slope or angle of the stairs, but also has a railing on top of it. Is this possible?

ANSWER
Stair rake walls can be created using a railing that is set to be a pony wall, and then enabling the Follow Stairs setting.
To create a stair rake wall
-
Open
 the plan containing the stair section you'd like to create a rake wall in.
- Navigate to Build> Railing and Deck> Straight Railing
 and create a railing beside your stairs.
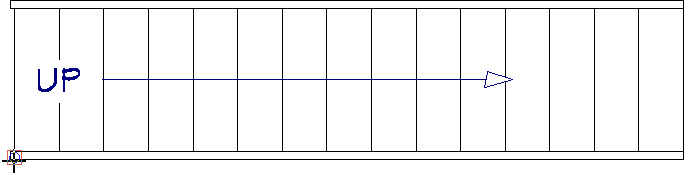
It's important that you don't create or move the railing beneath the stairs. If you're having trouble precisely placing the railing beside the stair section, navigate to Edit> Snap Settings and ensure that your Object Snaps are enabled.
- Using the Select Objects
 tool, select the railing and click on the Open Object
  edit button.
- On the Wall Types panel of the Railing Specification dialog that opens:
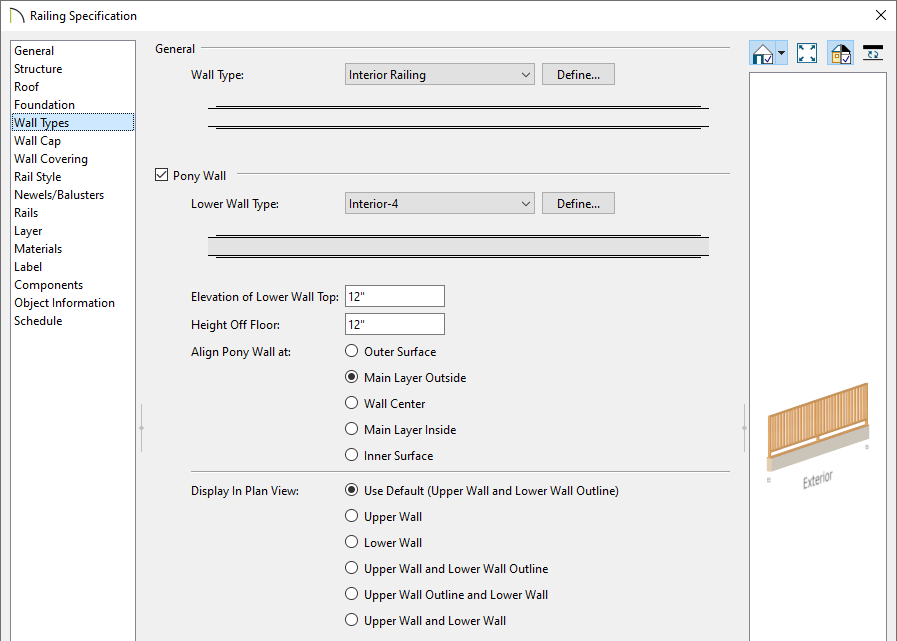
- Check the Pony Wall box.
- Specify the Upper and Lower Wall Type.
In this example, the Interior Railing and Interior-4 wall types are used.
- Adjust the Elevation of Lower Wall Top or Height Off Floor value to your liking.
Note: It's important to note that the Elevation of Lower Wall Top field is an absolute value, which is measured from the top height of the subflooring on Floor 1. The Height Off Floor field will use absolute values if the railing is unconnected, or freestanding. But if the railing is connected to a wall that is part of the room it's contained within, this value will be relative to the floor it was placed on.
- Check the Pony Wall box.
- On the Rail Style panel:
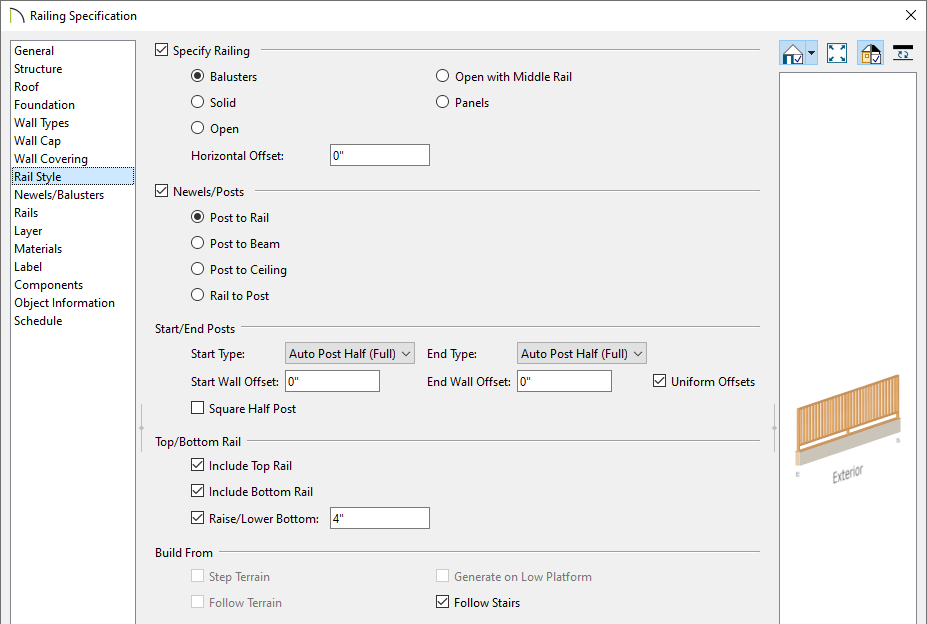
- Check the Specify Railing box if it's not already checked and choose your desired railing type.
In this example, the Balusters option is selected as we want a stair railing with balusters to follow the stairs. If you would like a solid framed wall, however, choose the Solid option instead.
- Check the Follow Stairs box to have the railing and the lower framed wall follow the pitch of the stairs.
- Choose what rails to include, along with any other properties located on this dialog panel.
- Check the Specify Railing box if it's not already checked and choose your desired railing type.
- Select the Newels/Balusters panel to adjust the baluster and newel properties to your liking, along with the railing height.
- By default, a wall cap will be placed on top of the framed wall portion. This can be adjusted by accessing the Wall Cap panel.
- Make any other desired modifications, such as to the Materials that are used, then click OK to confirm the changes and close the dialog.
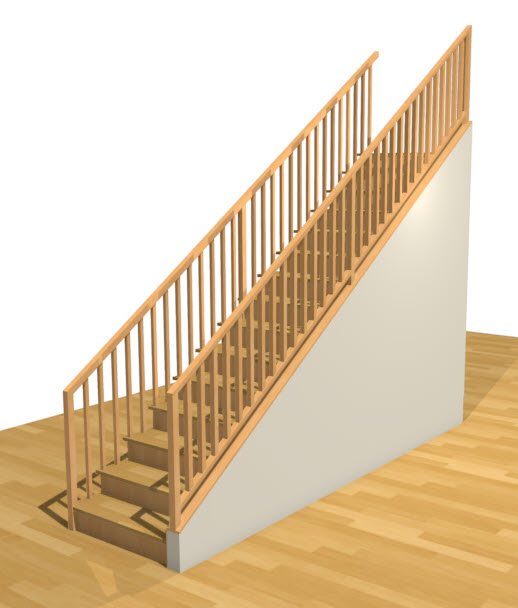
Creating a manual railing that follows the slope of the stairs, like shown in this example, may override the automatically generated stair railings, depending on the height that is set for the lower framed wall type.
- Take a Camera
 view to see the results.
Several railing and wall variations can be created alongside stairs. For example, you may want a railing to follow the angle of the stairs, but then die into a full height wall. Please view the Stair Wall Options: Partial Railing, Wall Under Stairs, Stairwell video to learn more.