Building an A-Frame Structure
Pro | Architectural | Suite
QUESTION
How can I build an a-frame structure?

ANSWER
Building an a-frame structure requires making several roof modifications, including a higher than normal pitch value.
For this example, we will walk you through creating a basic a-frame structure in a new plan created using the Default style template. Once you understand this process, you can then take that knowledge and apply it to your own design.
To build the structure
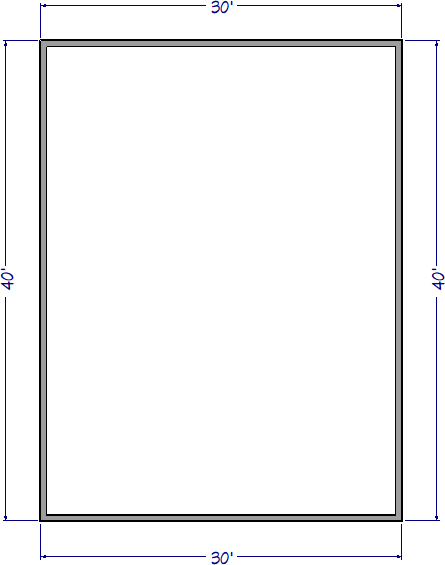
- Use the Straight Exterior Wall
 tool to draw a basic 30' x 40' rectangular structure.
- On the first floor, use the Select Objects
 tool to select one of the 30' exterior walls, then click on the Change to Gable Wall
  edit tool located in the Edit toolbar.
You can also Open the wall up to specification and select the Full Gable Wall option located on the Roof panel.
-
Repeat Step 2 to change the opposite 30' wall to be a Full Gable wall as well.
- Navigate to Build> Floor> Build New Floor
 from the menu, and in the New Floor dialog, select Derive new 2nd floor plan from the 1st floor plan, then click OK.
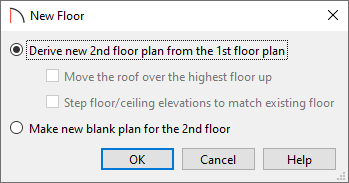
- The 2nd Floor Defaults dialog will display. Click OK to build the second floor without making any changes.
Once you have created a fully enclosed structure with multiple floors, you are ready to build the roof.
To build the roof
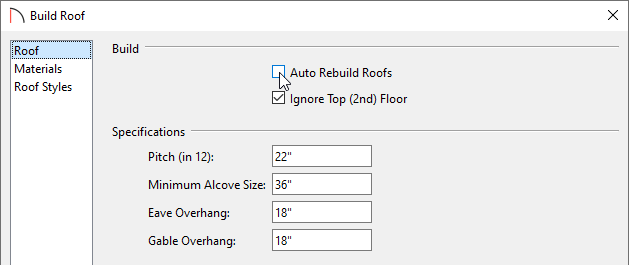
- Select Build> Roof> Build Roof
 from the menu.
- On the Roof panel of the Build Roof dialog:

-
Check the Ignore Top (2nd Floor) box.
-
Increase the Pitch (in 12) to an appropriate value for an a-frame structure.
In this example, we set the Pitch (in 12) to 22".
-
Check the Ignore Top (2nd Floor) box.
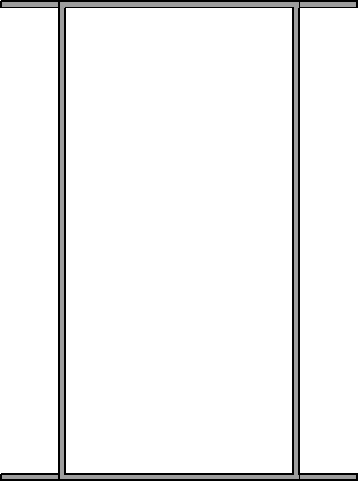
- Click OK to build the roof using the new pitch, and notice the dashed lines that now display on the second floor, which represent ceiling break lines.
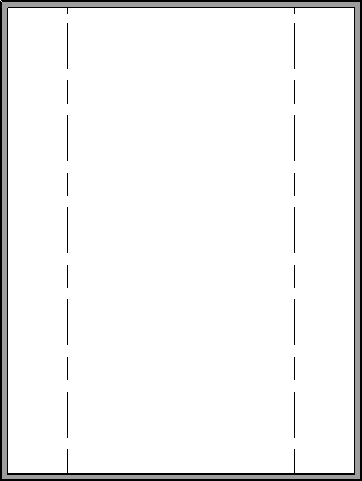
- Using the Select Objects tool, select each of the 40' walls and move them inwards until they meet the ceiling break lines.
In this example, the 40' walls on the second floor were moved 5' (60") inwards.
-
(Optional) If you don't want a flat ceiling for the second floor, select the room on the second floor using the Select Objects tool, then click the Turn Off Ceiling
 edit tool located on the Edit toolbar.
You can also Open the room up to specification and uncheck the Flat Ceiling Over This Room box located on the Structure panel.
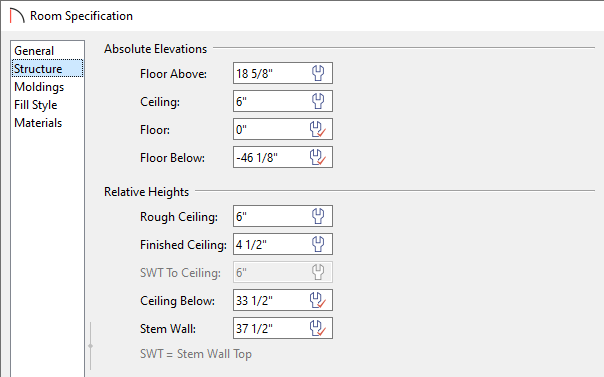
- Navigate to the first floor, use the Select Objects tool to select the room here, then click on the Open Object edit tool.
- On the Structure panel of the Room Specification dialog, lower the Ceiling to 6", then click OK.
-
Take a Camera
 view to see the results.
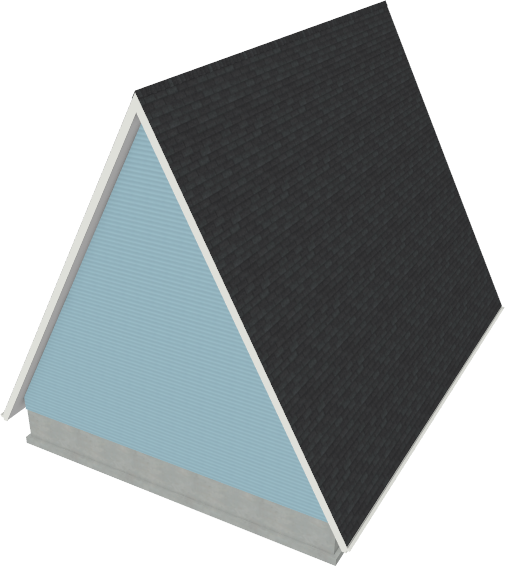
If you do not see a gable roof at this point, or the roof is too high, either the ceiling was not lowered in the room on the first floor, or Auto Rebuild Roofs is disabled.
With the a-frame established, you will now want to disable the automatic generation of your roof planes and reset the ceiling height for the first floor back to the default, or preferred, value.
To disable automatic roof generation and reset the ceiling height for the first floor
- Select Build> Roof> Build Roof from the menu.
- In the Build Roof dialog that displays, uncheck the Auto Rebuild Roofs box, then click OK.
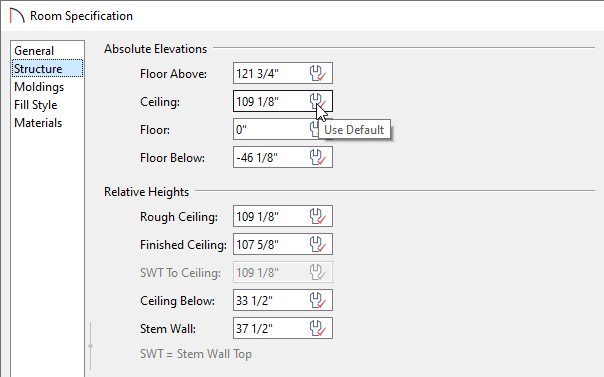
- Now that roofs will no longer regenerate, return to the floor plan view, use the Select Objects tool to select the room on the first floor again, then click on the Open Object edit tool.
- On the Structure panel of the Room Specification dialog, click once on the wrench icon next to Ceiling to use the default ceiling value, then click OK.
Note: If the 30' walls located on the second floor are protruding through the roof, they may not have been moved inward an appropriate distance. Please refer to Step 4 in the section above.
- You are now ready to customize your design by adding interior walls, fixtures, furniture, etc.
Lofts are quite common in a-frame structures. To learn how to design a loft in your design, please see the "Using Open Below Rooms to Define an Opening to a Lower Floor" resource in the Related Articles section below.