Creating an Automatic Dormer
Pro | Architectural | Suite
QUESTION
How do I use the automatic dormer tools?

ANSWER
The automatic dormer tools allow you to quickly and easily place a floating or false dormer on top of a roof plane while still providing control of the style, pitch, and materials.
There are two automatic dormer tools that enable you to create two different structural dormer types:
-
 Auto Floating Dormer: Also known as a false dormer or fake dormer.
The Auto Floating Dormer tool isthe same as the Dormer  tool available in the legacy Home Designerprograms, including Home Designer Suite and Home Designer Architectural.
In this type of dormer, all walls rest on top of the roof plane. The front of this dormer type can connect to an existing wall, and is not typical.
Floating dormers are designed to be placed in the middle of a roof plane and cannot be added to the roof plane if a wall is in the way. If your structure has no walls in the location you need to add a dormer, a floating dormer is the appropriate dormer to use.
-
 Auto Dormer: This is a true structural dormer. The dormer walls cut through the existing roof plane and connect to existing knee walls within the structure.
When creating this dormer type, a knee wall running parallel to the main roof ridge must be present.
Note: This kind of automatic dormer is not available in legacy Home Designer programs, including Home Designer Suite and Home Designer Architectural.
Once a dormer is created, it can be moved accurately using dimensions, resized, and edited within the Dormer Specification dialog. Automatic dormers can then be replicated so that exact copies are placed precisely in the plan.
In this article, we will cover the following:
- Configuring dormer defaults
- Creating an auto floating dormer
- Creating an auto (structural) dormer*
- Editing a dormer
- Replicating identical dormers
Before placing either type of automatic dormer in a plan, specify the size and style of dormer that you would like in the Dormer Defaults dialog.
Configuring dormer defaults
-
Select Edit> Default Settings
 from the menu, then select dormer from the Default Settings list and click the Edit button.
-
In the Dormer Defaults dialog, there are a number of settings that control the appearance of automatic dormers. In this article, we will only edit those that define the basic structure:

-
On the Roof panel, specify the desired Pitch for the roof planes over the dormer.
-
On the Walls panel, specify the desired Height of the ceiling inside the dormer, measured from the floor of the room below the dormer.
-
Specify the desired Width of the dormer.
- Click OK to close the dialog and apply your settings.
Dormer defaults can be edited at any time to change the style of dormerthat is created when the automatic dormer tools are used. Additionally,individual dormers can be edited once they are created.
-
To create an auto floating dormer
- Select Build> Roof> Build Roof
 from the menu. In the Build Roof dialog:
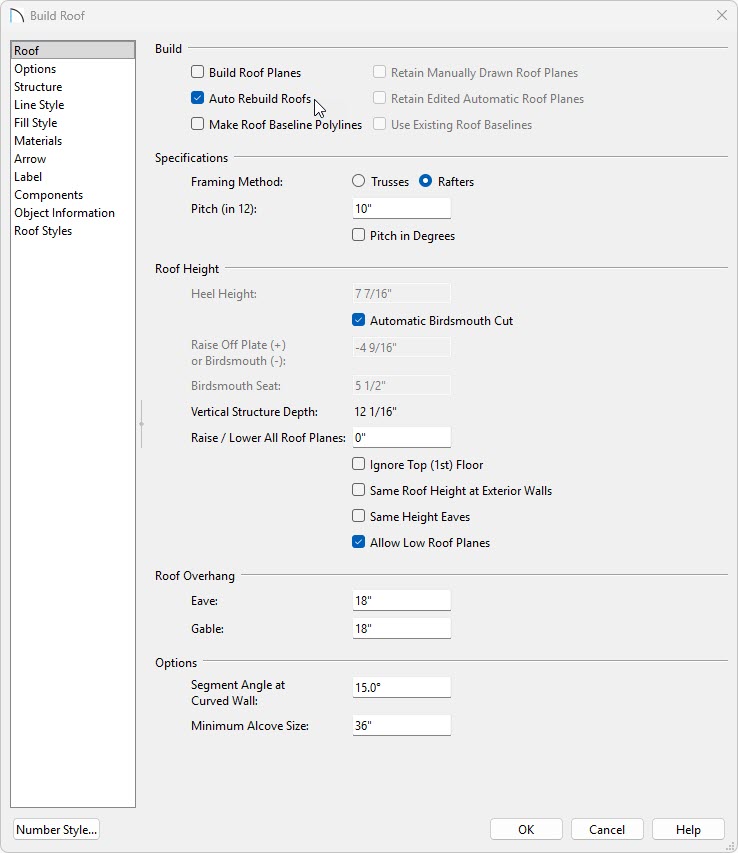
- Check the box for Auto Rebuild Roofs.
- Specify the desired pitch for the main roof. A minimum of 1:12 is required, but when creating a dormer, a pitch steeper than 6:12 is recommended. In this example we will use a pitch of 10:12.
- Click OK to close the dialog and create a roof.
- Check the box for Auto Rebuild Roofs.
- Select Build> Roof> Auto Floating Dormer from the menu, then click within the perimeter the interior walls and also of a single roof plane in your plan.
In legacy Home Designer products, select Build> Roof> Dormer instead.
- Using the Select Objects
 tool, click in the room the dormer was placed into, then use the Open Object
  edit tool to open the Room Specification.
- On the Structure panel of the Room Specification dialog, uncheck the box beside Flat Ceiling Over This Room, then click OK to close the dialog.
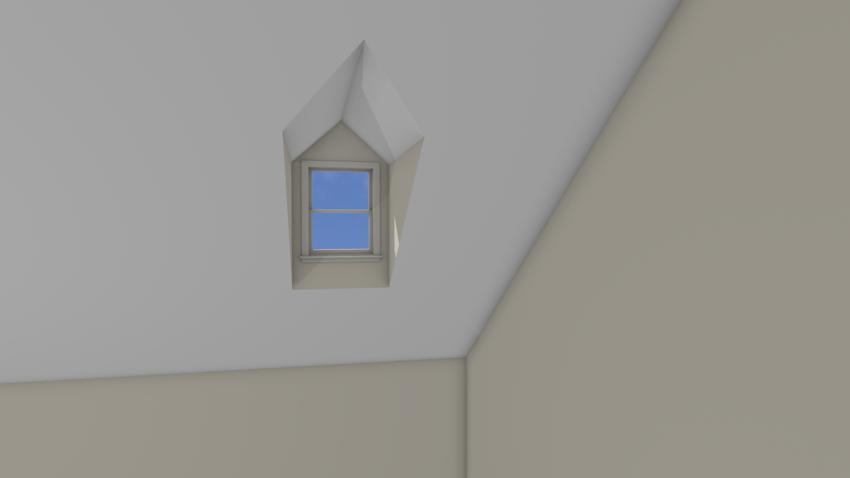
- Select 3D> Create Perspective View> Full Camera
 from the menu, then click and drag a camera view to see the results in 3D. With the ceiling removed, the floating dormer can be seen from the interior. Notice that it builds upward from the roof plane but not downward into the room.
In legacy Home Designer products, select 3D> Create Camera View> Full Camera instead.
To create an auto (structural) dormer*
*Does not apply to legacy products Home Designer Suite and Home Designer Architectural.
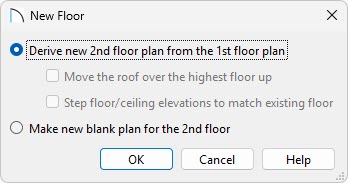
- Auto dormers are typically built in an upper floor loft area, so select Build> Floor> Build New Floor
 from the menu.
- In the New Floor dialog, select Derive new 2nd floor plan from the 1st floor plan, then click OK.
- In the 2nd Floor Defaults, don't make any changes, and click OK.
- Select Build> Roof> Build Roof from the menu. In the Build Roof dialog:
- Check the box beside Auto Rebuild Roofs.
- Specify the desired pitch. A minimum of 1:12 is required, but when creating a dormer, a pitch steeper than 6:12 is recommended. In this example we will use a pitch of 10:12.
- Check the box beside Ignore Top Floor. When you do so the Allow Low Roof Planes checkbox will also become checked.
- Use Raise/Lower All Roof Planes or your Heel Height to set the desired height of your exterior knee walls. In this example I want my roof to rest on my Floor Structure, which is 12 5/8", so I will raise my roof planes by 12 5/8".
- Click OK to close the dialog and create a roof.

- Check the box beside Auto Rebuild Roofs.
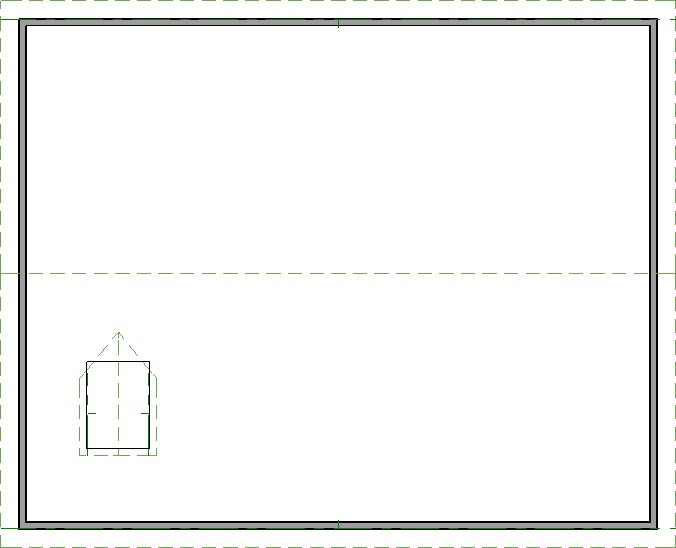
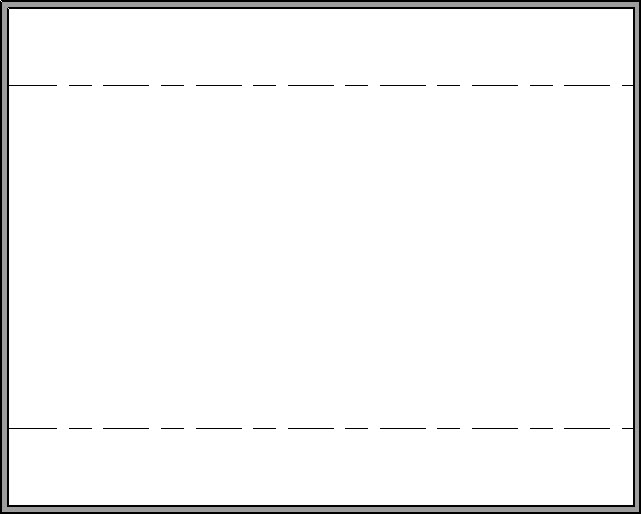
- Notice that the roof planes do not display on the top floor of your plan, but rather on the floor below. The dashed lines that display on the top floor are ceiling indicator lines, which show you where the flat, full height ceiling meets the sloped ceiling directly under the rafters.
- Select Build> Wall> Interior Wall
 from the menu, then click and drag an interior wall that runs parallel to the dashed ceiling indicator lines.
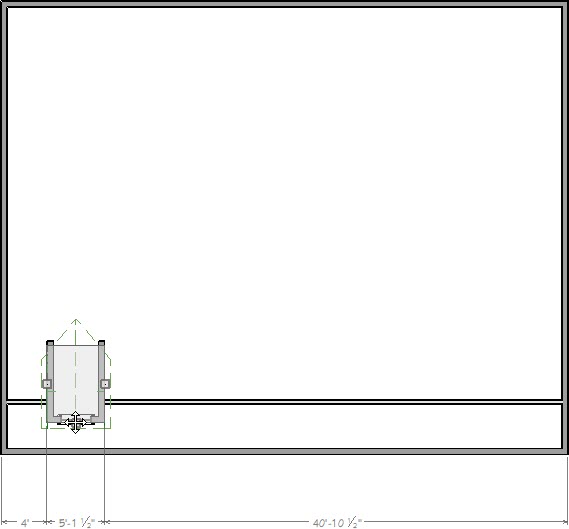
- Click on the wall to select it, click on one of the temporary dimensions that displays, and input the distance of this wall from the exterior wall.
In this example we will set the interior wall 48" from the exterior wall.
Note: If you do not see Temporarydimensions, select View> Temporary Dimensions from the menu. Temporary dimensions will not display if there is already a dimension measuringthe distance.
For more information on moving walls using dimensions, please see the Related Articles section.
- Using the Select Objects tool, click on this wall to select it, then use the Open Object edit tool to open the Wall Specification.
- On the Roof panel of the Wall Specification dialog, check the box beside Knee Wall, then click OK.
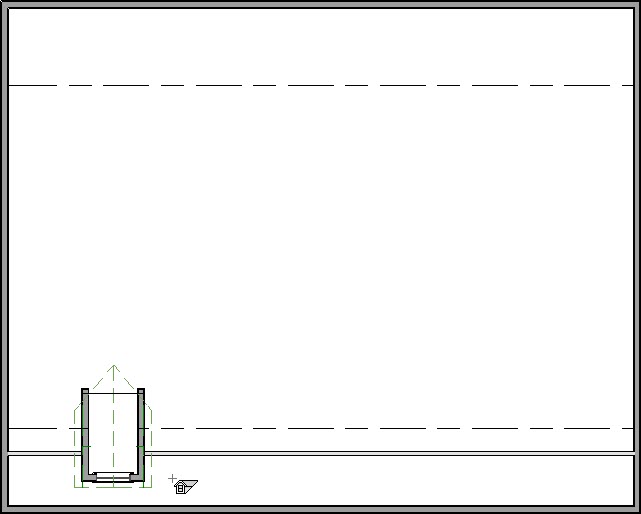
- Select Build> Roof> Auto Dormer from the menu, then click between the knee wall and the exterior wall closest to it to place a dormer at that location.
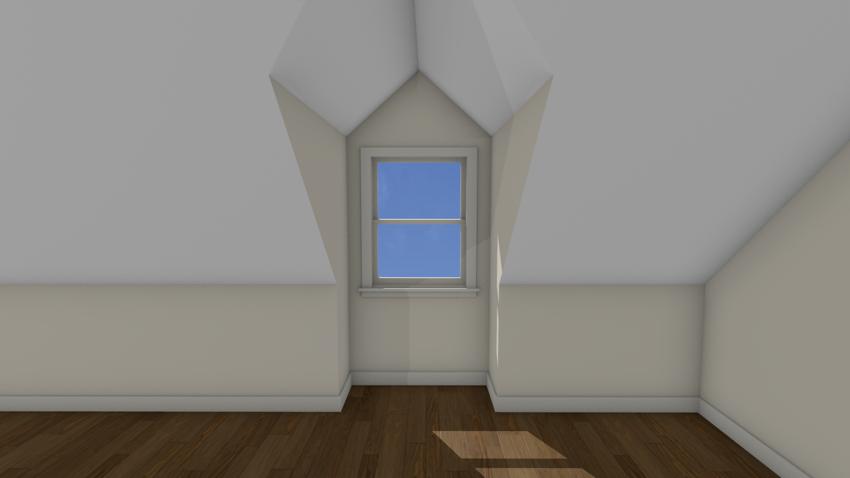
- Select 3D> Create Perspective View> Full Camera from the menu, then click and drag a camera view to see the results in 3D. Notice that auto dormers not only build upward from the roof plane but also downward into the room.
There are a couple of ways to edit an existing dormer, either in floor plan view by using the Dormer Specification dialog, or by permanently exploding the dormer into its individual components.*
*Not available in legacy Home Designer Suite and Home Designer Architectural.
To edit an automatic dormer
- Automatic dormers can be moved and resized in floor plan view using the edit handles. Click on a dormer's side wall to select it, then use the Move
 edit handle that displays over the window to move the dormer to a new location. The side handles allow you to change the dormer's width, as well.
- Using the Select Objects tool, click on the dormer to select it, then use the Open Object edit tool to open the Dormer Specification dialog.
- In the Dormer Specification, on the Roof panel you can adjust many aspects of the dormer roof:
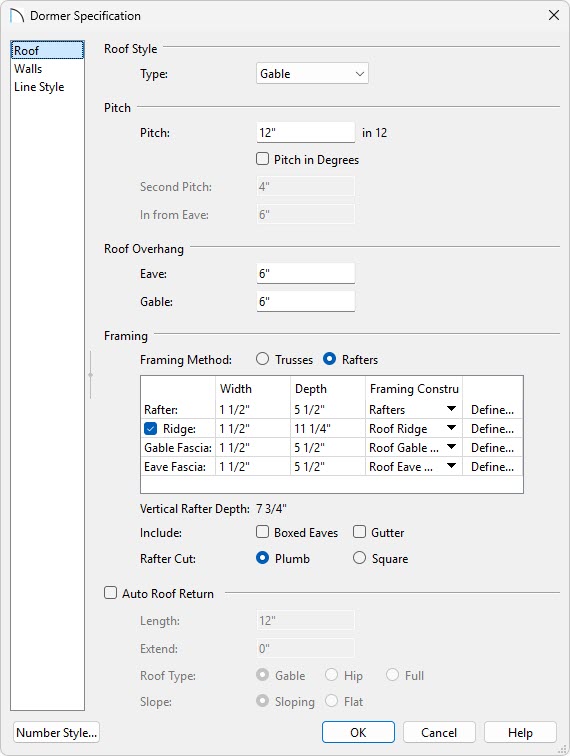
- You can choose the Type of roof that will be placed on the dormer.
- You can adjust the aspects of the dormer roof, such as the Pitch, Roof Overhang, and how the dormer roof is framed.
- By checking the Auto Roof Return checkbox, you can have the dormer roof include a roof return.
- You can choose the Type of roof that will be placed on the dormer.
- In the Dormer Specification, on the Walls panel you can adjust the size of the dormer:
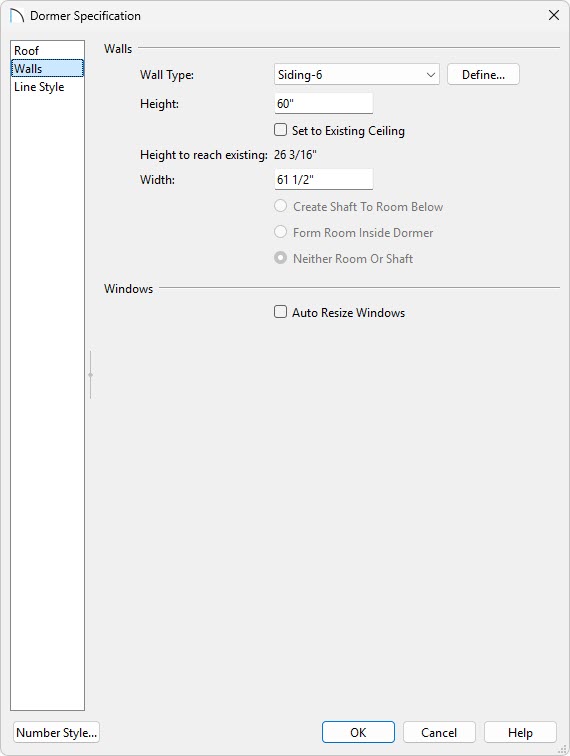
- You can choose the Wall Type that is used to construct your dormer.
- You can adjust the Height and Width of the dormer.
- You can choose to Create Shaft To Room Below, to Form Room Inside Dormer, or Neither Room Or Shaft.
- You can choose the Wall Type that is used to construct your dormer.
- In the Dormer Specification, on the Line style panel you can adjust the 2D display of the dormer:
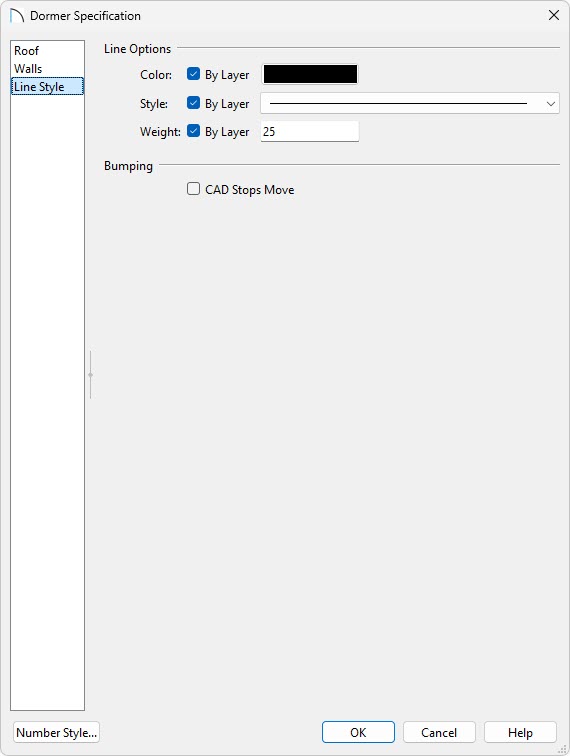
- The Color will adjust the line color in the 2D plan view.
- The Style will adjust the line style that is seen the 2D plan view
- The Weight will control the line weight that is seen in the 2D plan view.
In Home Designer 2026 and newer, as well as Home Designer Pro, you are able to explode the automatic dormer into its individual components. This can be done by selecting the dormer and using the Explode Dormer edit tool. From here you can make changes to the individual walls, roof planes, and the roof hole, as needed. Keep in mind that once the dormer is exploded, it is impossible to re-block it into a single unit again.
More information on working with manual dormers can be found in the Related Articles section.
- The Color will adjust the line color in the 2D plan view.
- The dormer window can be modified from a 2D view by going Up One Floor
 , clicking on the dormer window, and then using the Open Object edit tool to open the Window Specification.
If you select the dormer instead when clicking on the window, use the Select Next Object edit tool to select the window.
The dormer window can be modified from a Camera view by selecting the dormer window and then using the Open Object edit tool to open the Window Specification.
Many plans feature sets of matching dormers, often floating dormers. The Transform/Replicate* edit tool allows you to create matching dormers quickly and easily. Only dormers that have not been exploded can be replicated in this manner. Additionally you can use the standard Copy/Paste operations to create copies of your dormers.
*Not available in legacy Home Designer Suite and Home Designer Architectural
To replicate identical dormers
- Using the Select Objects tool, click on the dormer to select it, then click the Transform/Replicate Object*
 edit tool.
*The Transform/Replicate Object is not available in legacy Home Designer Suite and Home Designer Architectural. Instead you will need to use the Copy  and Paste
  tools to create copies of your dormers.
- In the Transform/Replicate Object dialog:
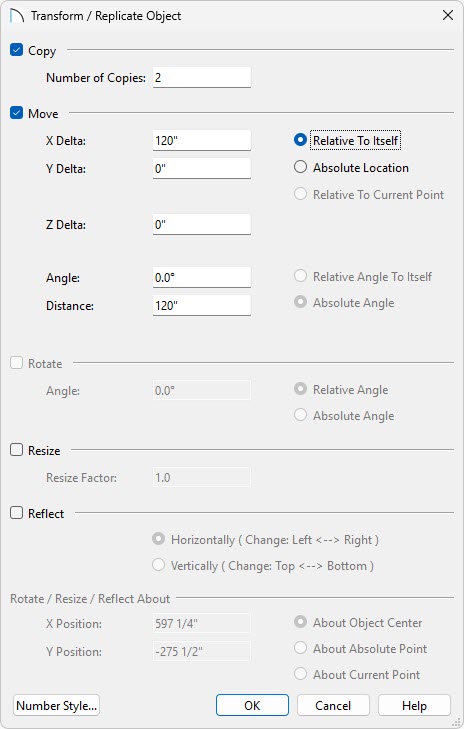
- Check the box beside Copy and specify how many copies you wish to make.
- Check the box beside Move and specify the intervals at which you would like copies to be made in the text field beside the appropriate Delta.
- In floor plan view, the X Delta runs left to right; the Y Delta runs down to up; and the Z Delta corresponds to height relative to the floor platform or ground. Changes made to the Z Delta value are not visible in floor plan view.
- Click OK to close the dialog and create the copies of the dormer at the specified intervals along the roof.

- Check the box beside Copy and specify how many copies you wish to make.
- Select 3D> Create Camera View> Full Overview
 from the menu to see the results in 3D.
