Creating a Breezeway
Reference Number:
KB-02087
Last Modified:
January 17, 2023
This article also applies to the following legacy products:
Pro | Architectural | Suite
Pro | Architectural | Suite
QUESTION
I would like to create a covered breezeway between two separate structures in my plan. How can I model this in Home Designer?

ANSWER
Creating a breezeway with a roof covering is easy to accomplish in Home Designer by defining a separate room using railings or invisible walls.
To create the breezeway room
- First, launch Home Designer and Open
 the plan in which you want to connect the two structures with a breezeway.
- Navigate to the floor that the breezeway room should be created on and Zoom In
 on this area of the plan.
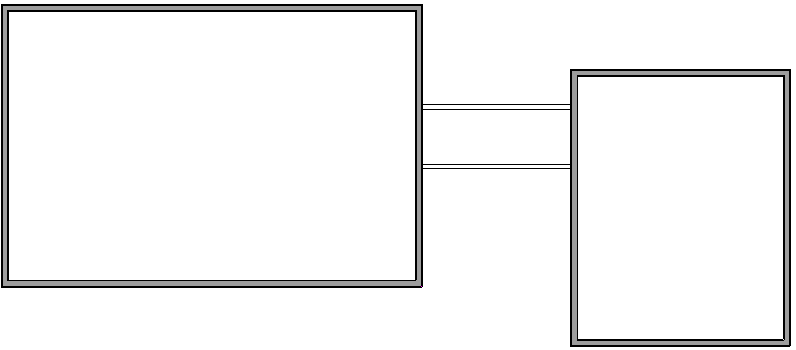
- Next, select Build> Railing and Deck> Straight Deck Railing
 , then click and drag out the railings to create the area that you want to be covered with a breezeway.
Use room dividers (Build> Wall> Room Divider) instead of railings if you would like to manually place columns from the Millwork section of the Library Browser to hold up the breezeway area roof.
- Once the breezeway room is enclosed, use the Select Objects
 tool to click inside of the room, then select the Open Object
  edit tool.
- In the Room Specification dialog:
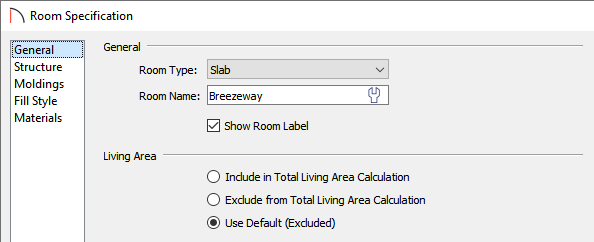
- On the General panel, use the drop-down menu to change the Room Type to Slab.
- Type in "Breezeway" for the Room Name.
- On the Structure panel, check the Roof Over This Room setting, uncheck Flat Ceiling Over this Room, and check Use Soffit Surface for Ceiling.
- Once you have finished making these changes, click OK to apply them and close the dialog.
- On the General panel, use the drop-down menu to change the Room Type to Slab.
Once you have the room defined, you are ready to modify the railings so that they are just posts.
To adjust the railings
- Using the Select Objects tool, click on one of the deck railings to select it, then click on the Open Object edit button.
- In the Railing Specification dialog, switch to the Rail Style panel:
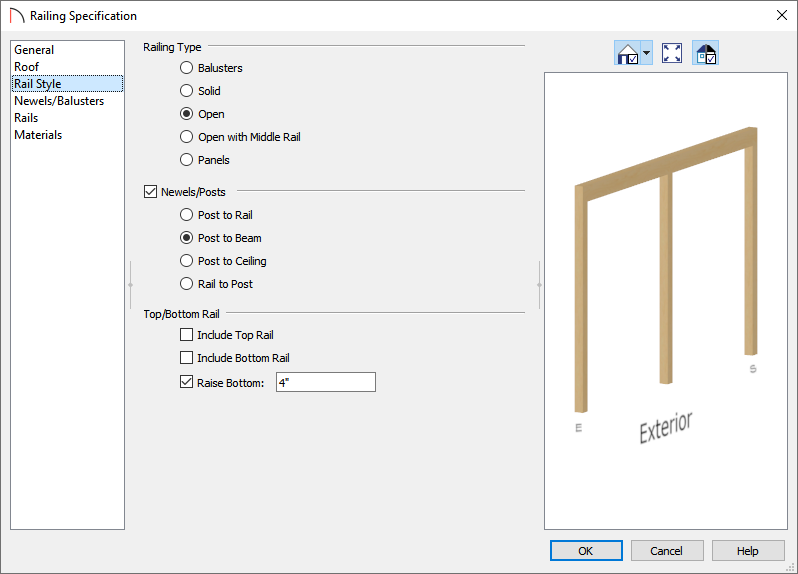
- Change the Railing Type to Open.
- Under Newels/Posts, select Post to Beam.
- Uncheck Include Top Rail and Include Bottom Rail
- Change the Railing Type to Open.
- On the Newels/Balusters panel, set the Spacing for the Newels/Posts.
For the purposes of this example, we will set this to 84".
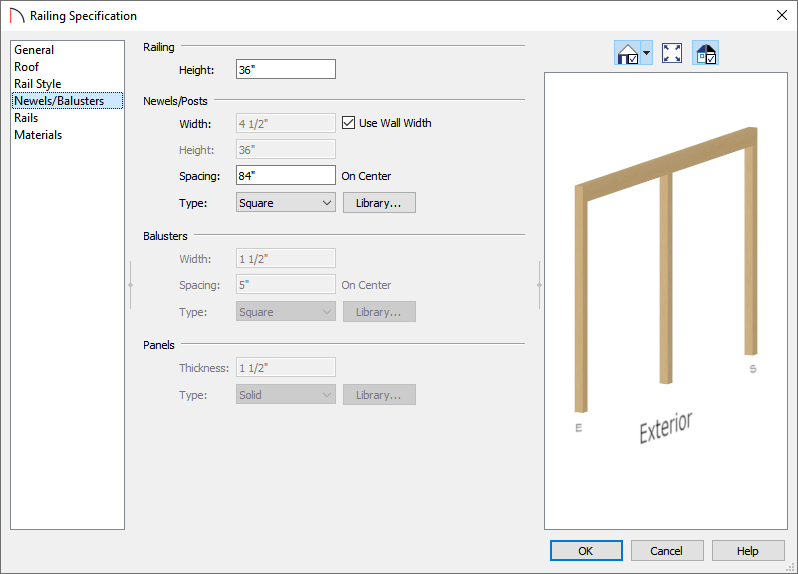
- Click OK when you have finished making these changes to apply them and close the dialog.
- Repeat this process for the remaining railings in your plan that make up the breezeway.
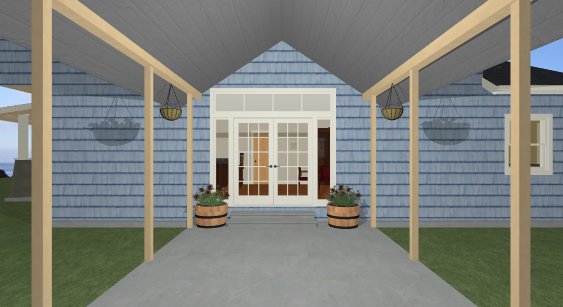
- Finally, take a Camera
 view to see the results of your covered breezeway.
Note: If noticeable wall segments generate above the beams, click to select them and delete them from the plan. Upon doing so, you may be presented with a Question dialog mentioning that the operation modifies one or more automatically generated walls. Click Yes to continue with the operation.
Related Articles