Creating a Split Material Wall
Pro | Architectural
QUESTION
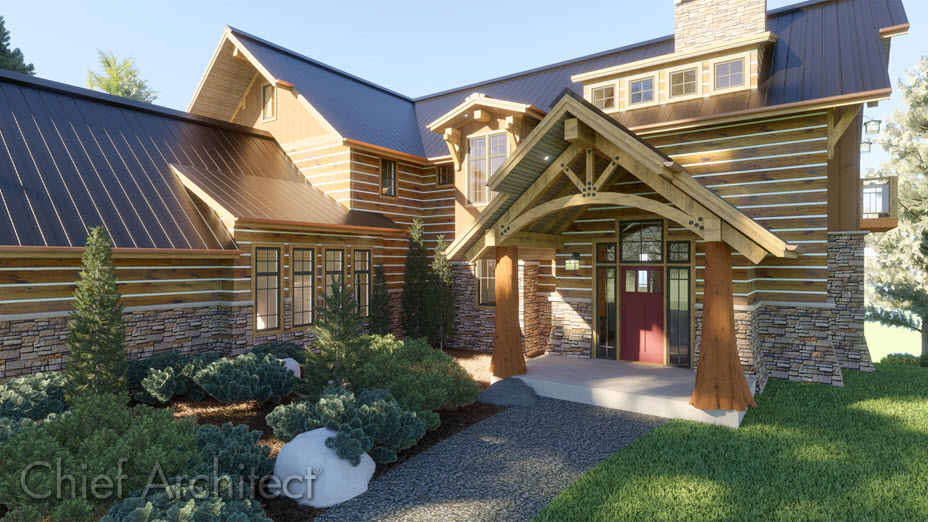
I need to create a split wall with two different materials, such as with brick or stone on the bottom, and siding, stucco, or a different paint material on the top. How can I accomplish this task?
ANSWER
In Home Designer 2026 and newer, as well as in Home Designer Pro and Home Designer Architectural, you have the ability to create Pony Walls, which are walls with two separate wall types, one on top of another.
If you are wanting to simply change the materials on the interior side of walls that are defined the same, such as to apply wallpaper or wainscoting, consider using Wall Coverings; see the Related Articles section to learn more.
To create a Pony Wall
- Select Edit> Default Settings
 , expand the Walls category, select Pony Wall, then click the Edit button.
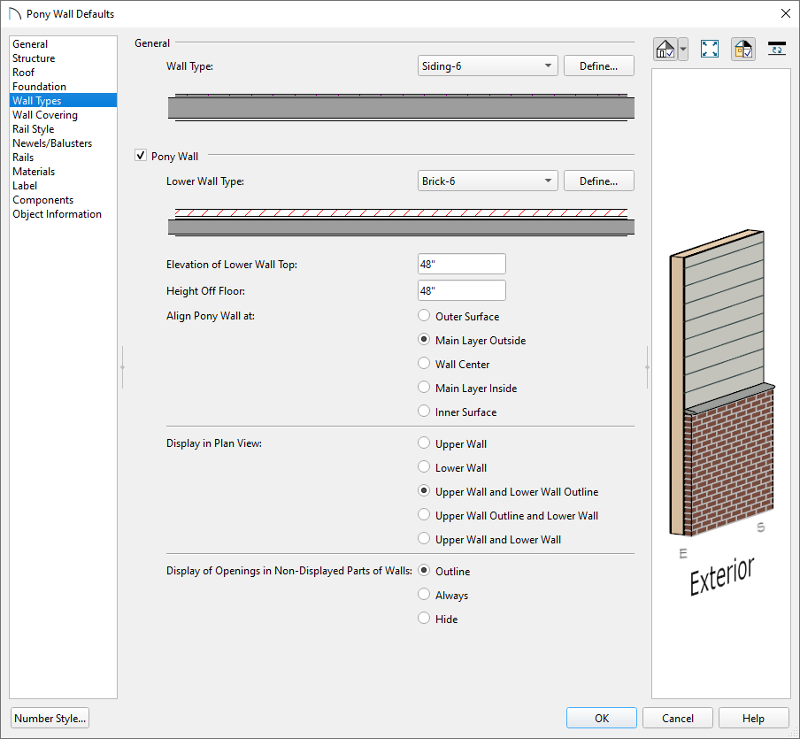
- In the Pony Wall Defaults dialog that displays:
-
Specify the Upper Wall Type and Define it as needed.
If you choose a wall type that is also used elsewhere in your plan and modify it using the Wall Type Definitions dialog, it will update the existing walls already drawn in your plan to use the customized wall type. To learn more about modifying wall types, see the Related Articles section.
-
Set the Lower Wall Type and Define it as needed.
-
Specify the height of the division between the upper and lower walls. These two settings are dynamic: if one is changed, the other will update accordingly.
- Specify the Elevation of Lower Wall Top, which is the division between the upper and lower walls. If the top of the lower pony wall is stepped or raked, this value will be “No Change”. This is an absolute value: regardless of the wall’s location, it is always measured from 0” (mm) - the default floor height for Floor 1.
- Specify the Height Off Floor of the division between the upper and lower walls. This value is measured from the floor height of the room(s) defined by the selected wall. If the wall defines rooms with different floor heights, “No change” will display.
- Specify the Elevation of Lower Wall Top, which is the division between the upper and lower walls. If the top of the lower pony wall is stepped or raked, this value will be “No Change”. This is an absolute value: regardless of the wall’s location, it is always measured from 0” (mm) - the default floor height for Floor 1.
-
Choose how you want the upper and lower portions of the wall to align with each other.
-
Choose whether you want to show the upper or lower wall in the plan, and whether or not you want to hide openings in non-displayed parts of walls.
- Once all of these values are set to your liking, click OK.
-
Specify the Upper Wall Type and Define it as needed.
- Now you are ready to create the walls by selecting Build> Wall> Straight Pony Wall
 . With this tool selected, click and drag out the wall in your floor plan view, just as you would with a standard wall.
In some cases, you may realize that you need to make changes to the Pony Wall after it is drawn, such as to change the materials or to the height of the lower pony wall.
To change the wall types of a Pony Wall
- Using the Select Objects
 tool, click on the Pony Wall that you want to change, then click on the Open Object
  edit button.
- On the Wall Types panel of the Wall Specification dialog that displays:
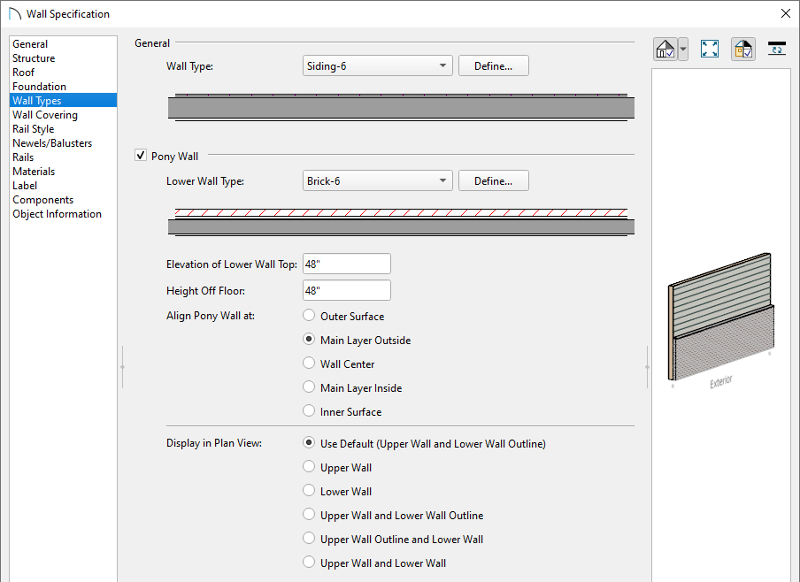
- Use the drop-down menus to choose different Wall Types.
- Use the Define buttons to customize a wall type such as to change a material from brick to stone.
- Adjust the Elevation of Lower Wall Top/Height Off Floor, if needed.
- If you want just this wall to display differently in floor plan view than your default, you can also adjust the radio buttons here.
- Click OK when you have completed making changes.
- Use the drop-down menus to choose different Wall Types.
- Repeat this process for any other Pony Walls in your plan that need to be adjusted.
In Home Designer 2026 and newer, as well as in Home Designer Pro, you can group select multiple Pony Walls and open the Specification dialog to more quickly make changes, rather than making this change one wall at a time.