Rotating the Direction of a Material
Pro | Architectural | Suite
QUESTION
I have found a material that I like and want applied to my floors or elsewhere in my design, but I want it facing in a different direction from one object, or room, to another. How can I accomplish this?

ANSWER
It's easy to modify the orientation, scale, and other properties associated with a material; however, it's recommended that you first copy the material before making such modifications, so as to keep the original material intact.
It's easy to make copies of materials in Home Designer to change elements such as their orientation, scale and even color.
To rotate the direction of a material
-
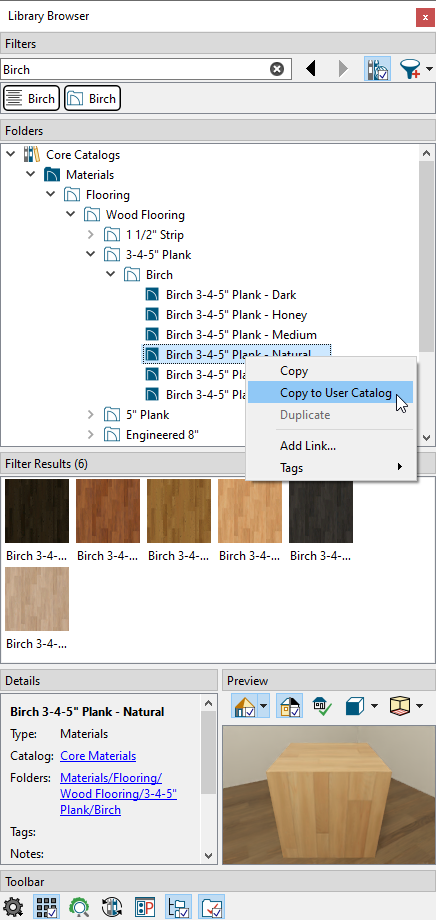
If it's not already open, select View> Library Browser
 to display the side window, then locate the material that you want to rotate.
-
Right-click on the material and choose Copy to User Catalog.
Note: On a Mac, hold down the Control key while clicking to initiate a right-click command. More information about right-click commands on Apple input devices can be found in the following Apple resource: Right-click on Mac.
If the material is located in your User Catalog already, right-click on the material, choose Open Object , then proceed to Step 4.
- Right-click on the copied material and select Open Object .

- On the Texture panel (if available) of the Define Material dialog that displays:
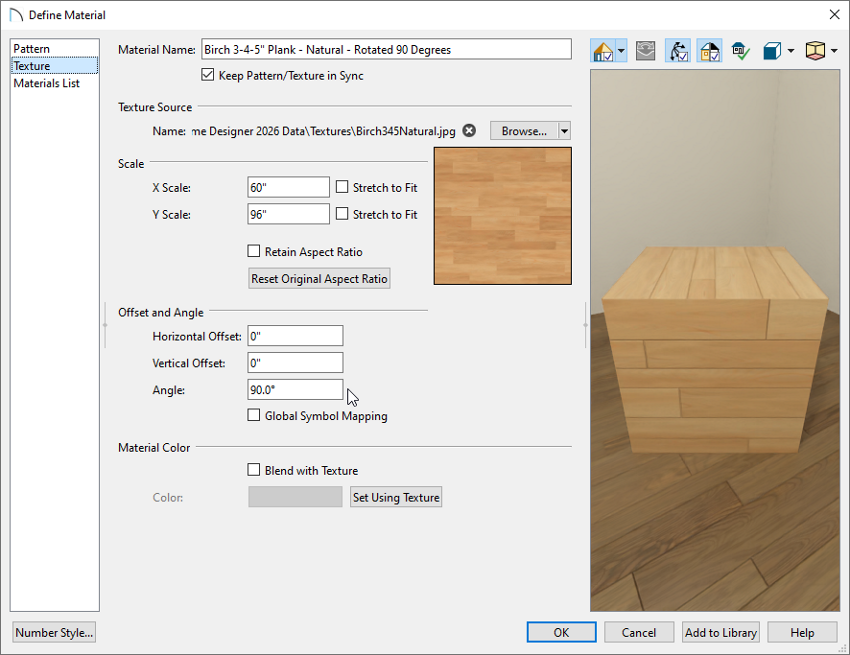
- Change the Material Name of this material so that you know the difference from the original material.
In this example the material is renamed to "Birch 3-4-5" Plank - Natural - Rotated 90 Degrees" to indicate that it is rotated 90 degrees from the original material that it was copied from.
- Ensure that the Keep Pattern/Texture in Sync box is checked, then change the Angle value to your desired number.
In this example, a value of 90 degrees is specified from the default of 0.
- Once all desired changes have been made, click OK.
- Change the Material Name of this material so that you know the difference from the original material.
- The modified material can now be applied to the object or surface of your choice; use the Select Objects
 tool to select the desired object or surface, then click Open Object .
In this example, we have selected a room for modification.
- On the Materials panel of the Specification dialog that opens, select the appropriate component that you want to change, then click the Select Material button to browse for, and select, the customized material located in your User Catalog.
In this example, the Floor Finish component is selected for modification.
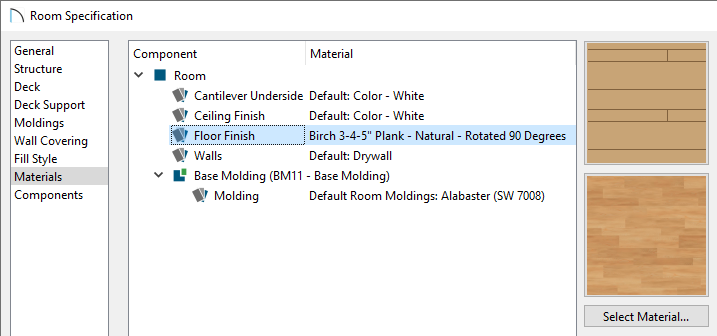
- Click OK on all dialog boxes to confirm the change(s).
Now that you understand the basic process for modifying the orientation of materials, you can take this information and apply it to your own designs including other materials, such as tiles.