Creating a Breakfast Bar
Pro | Architectural | Suite
QUESTION
I want to create an island breakfast bar in my kitchen. How do I do that?
ANSWER
The Cabinet Tools can be used to create a variety of different kitchen island and breakfast bar configurations. In this article, we will walk through creating a basic breakfast bar using cabinets.
The instructions in this article will apply to all versions of the software for modifying cabinets to create a standalone countertop surface.
Home Designer Pro and Home Designer Architectural also have the Custom Countertop  tool, which can be used to quickly create a custom countertop for use as a breakfast bar. This tool allows for more flexibility shaping the countertop.
To create a kitchen island
-
Go to Build> Cabinets> Base Cabinet
 tool and click in a empty area of the plan to place 3 cabinets side by side.
- Place 3 more cabinets directly behind the first three cabinets. If necessary, rotate the cabinets using the Rotation Edit Handle
 , to ensure that all of the cabinets are placed back-to-back.
- Go to 3D> Create Camera View> Full Camera
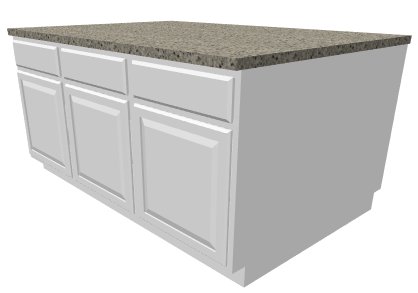
 view to view the current cabinet configuration and rotate it. It should look similar to the image shown below.
For Home Designer Pro, go to 3D> Create Perspective Camera> Full Camera .
.
- Close the 3D view by going File> Close View, and return to the 2D floor plan view.
-
Using the Select Objects
 tool, select the lower left corner cabinet and choose the Open Object
  edit button.
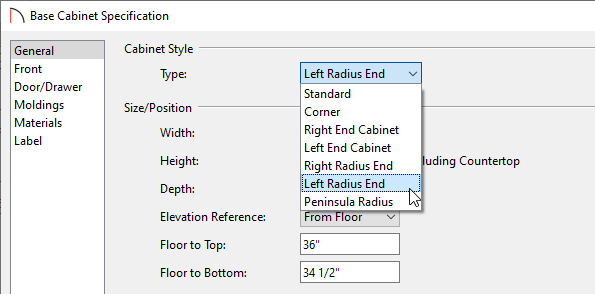
- On the General panel, use the Type drop down menu to set the cabinet as a Left Radius End.
- Click OK to apply this change and close the Base Cabinet Specification dialog.
- Repeat Steps 5 - 7 to change the lower right cabinet into a Right Radius End.
- In plan view, the cabinets should now look like the image below.
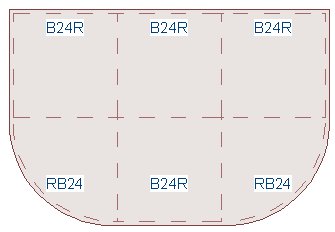
Note: You may have to use Tools> Display Options and set the layers "Cabinets, Labels" and "Cabinets, Module Lines" to Display.
To create a breakfast bar
Now that we have the correct shape for the breakfast bar, we are ready to change the radius end and standard cabinets so that only their countertops are displayed, instead of the cabinet as a whole.
- Using the Select Objects
 Tool Select the Left Radius End cabinet and click Open Object
  to display the Base Cabinet Specification dialog.
- In the General panel, uncheck Toe Kick.
- Change the Height under Size/Position to be only 1 1/2". This is the Counter Thickness listed below.
Note: You may be prompted with a Question dialogue box stating: "This size will change the size of locked face items. Resize anyway?". The Yes option will allow the face items of the cabinet to be resized.
- Change the Floor to Bottom height to be the desired height of the cabinet, subtracting the 1 1/2" for the countertop.
This means the Floor to Bottom will have a value of 34 1/2" to achieve a Floor to Top height of 36".
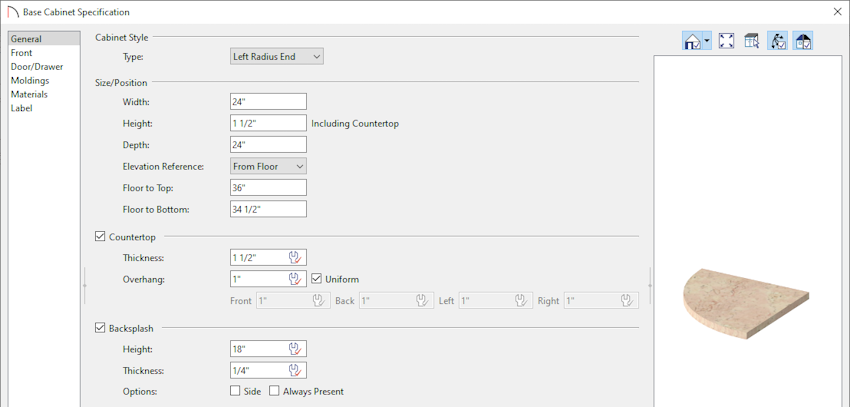
- Click OK to close the Base Cabinet Specification dialog and apply your changes.
Repeat Steps 1 - 4 for the remaining 2 lower cabinets.
- Go to 3D> Create Camera View> Full Camera
 view to see the results.
For Home Designer Pro, go to 3D> Create Perspective Camera> Full Camera .
.
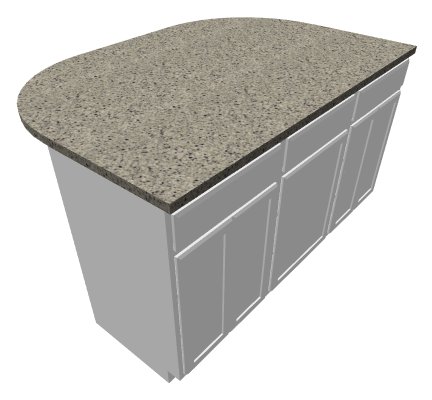
- The cabinet can be customized further through the cabinet's depth, handles and hinges, shelf, door and drawer options in the Base Cabinet Specification dialog. The materials that make up the different components of the cabinet can also be customized within the Base Cabinet Specification dialog, under the Materials panel.
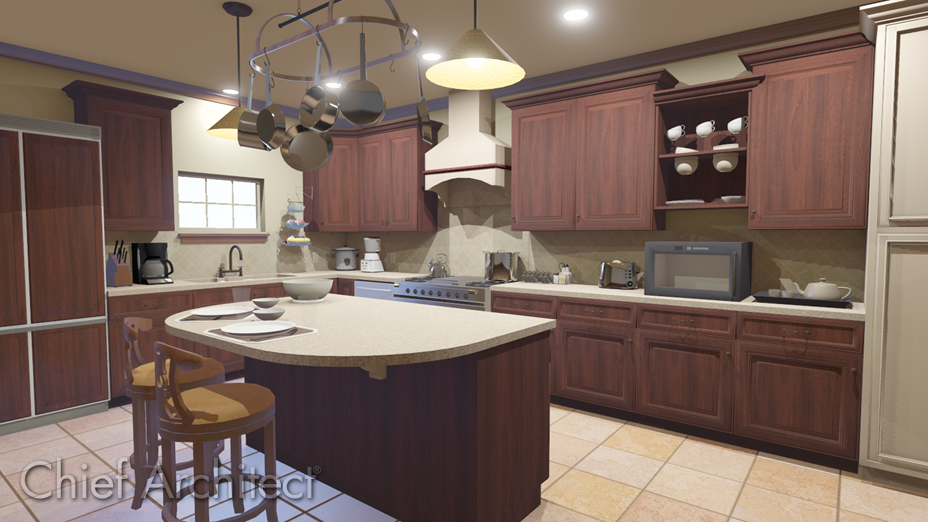
You can also add corbels beneath the countertop from the Millwork section of the Library Browser as in the initial image.