Changing Room Materials
Reference Number:
KB-00305
Last Modified:
August 27, 2021
This article also applies to the following legacy products:
Pro | Architectural | Suite
Pro | Architectural | Suite
QUESTION
I would like to change the floor, ceiling, and wall materials in a specific room. How is this accomplished?

ANSWER
While creating a plan using Home Designer, you may want to change what materials are applied to the floor, ceiling, and walls of a room. This article describes how to change the materials of a room using the Room Specification dialog.
To change the materials in a room
- Using the Select Objects
 tool, click inside of a room to select it, then click on the Open Object
  edit button.
Note: You can also change materials on a per-floor or per-room type basis by navigating to Edit> Default Settings> Floors and Rooms.
- On the Materials panel, select a room component (e.g. Ceiling Finish, Floor Finish, Walls).
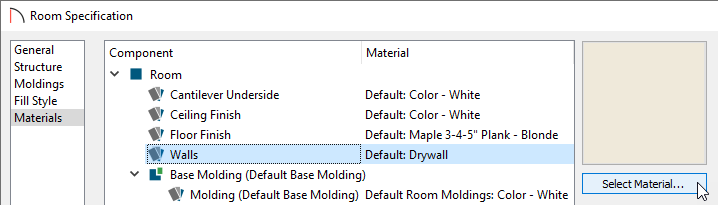
- With the component selected, click the Select Material button.
- In the Select Material dialog that opens, locate and select the desired material, then click OK.
Note: If a plan has been started with a particular template, it may already have some of these objects pre-defined with certain materials. To have complete control over editing these options, start a plan using the Default Style template.
- Repeat steps 2-4 for each additional room component.
- Click OK to close the dialog and confirm the changes. The selected materials will now be visible in camera views going forward.
Related Articles