Creating Stair Winders
Reference Number:
KB-00486
Last Modified:
July 22, 2021
This article also applies to the following legacy products:
Pro | Architectural | Suite
Pro | Architectural | Suite
QUESTION
I have some triangular shaped steps, or winders in my plan. How can I model these?
ANSWER
Winders are steps located where a staircase turns and are narrower on the inside of the turn than they are on the outside. A staircase defined as a winder expands to fill in any gaps between the side of the stairs and nearby walls. Winders can be created a variety of different ways:
- Creating winders automatically for L and U-shaped staircases*
- Creating stair winders manually using landings
-
Adding winders using the Staircase Specification in Home Designer Pro
Creating winders automatically for L and U-shaped staircases*
*Applies to Home Designer 2021 and newer program versions.
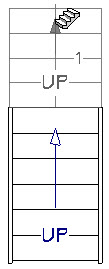
- Select Build> Stairs> L-Shaped Stair
 or Build> Stairs> U-Shaped Stair
  from the menu.
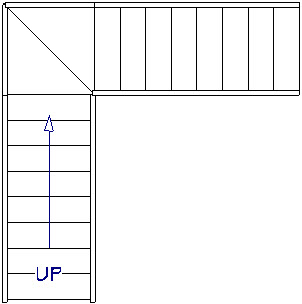
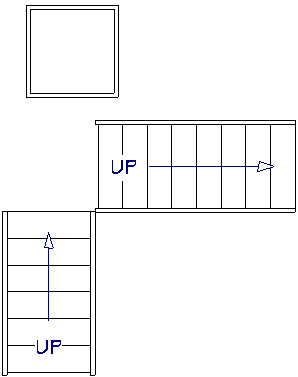
- In the New Shaped Staircase dialog that opens, check Make Winders, then click OK. This will split the landing into 2 winders for an L-shaped staircase and 4 winders for a U-shaped staircase.
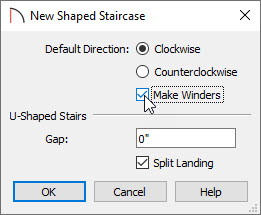
Note: The U-Shaped Stairs section only applies when using the U-Shaped Stair tool. It can be ignored when creating L-shaped stairs.
- Place the stairs wherever you want them and then you'll see your staircase with winders.
Creating stair winders manually using landings
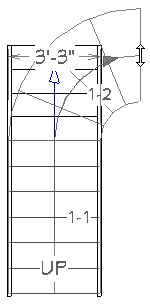
- Select Build> Stairs> Straight Stairs
 , then click and drag to create a section of stairs with the number of treads leading up to the winder section.
- Using the Straight Stair tool, draw another section of stairs from where the top end of the winder would be to finish the staircase.
- Select Build> Stairs> Landing
 tool and click to place a landing on your floor plan.
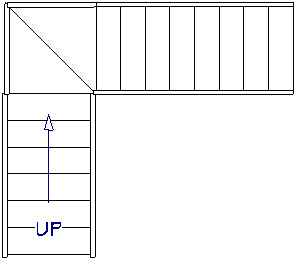
- Select the landing and use the diamond edit handles to reshape it into the shape of the winder step.
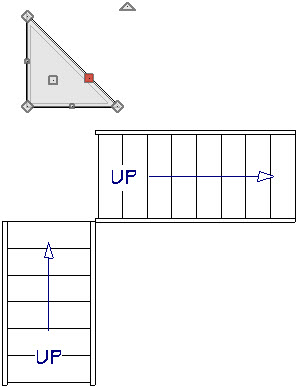
- Using the square edit handle in the middle of the landing, move the landing into position with the stairs. The stairs and landing should automatically connect to one another once they are close enough to each other. Continue creating landings, reshaping them, and moving them into position until all your winders are completed.
Adding winders using the Staircase Specification in Home Designer Pro
- Select Build> Stairs> Straight Stairs
 , then click and drag to create a section of stairs with the number of treads leading up to the winder section.
- Starting at the top of the stairs, create a second stair section, drawing in the same direction as the original. This second section will become the Winders, be sure to draw the appropriate number of treads to fit your specific need.
- Click to select the stairs, then click and drag the move the topmost center edit handle, holding the Alt key on your keyboard or the Option key if you are on a Mac to create a curve in the winder section.
- Using the Straight Stair tool, draw another section of stairs at the top end of the winder to finish the staircase.
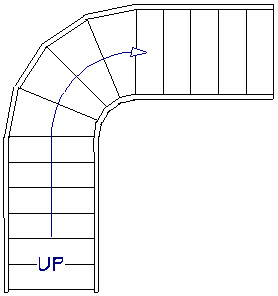
- Move the staircase into the corner you want it placed, and with it selected, click on the Open Object
 edit tool.
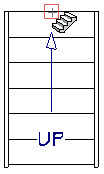
- In the Staircase Specification dialog that displays, check the Winders box.

- Click OK to apply the change, and the winders will now snap into the corner.
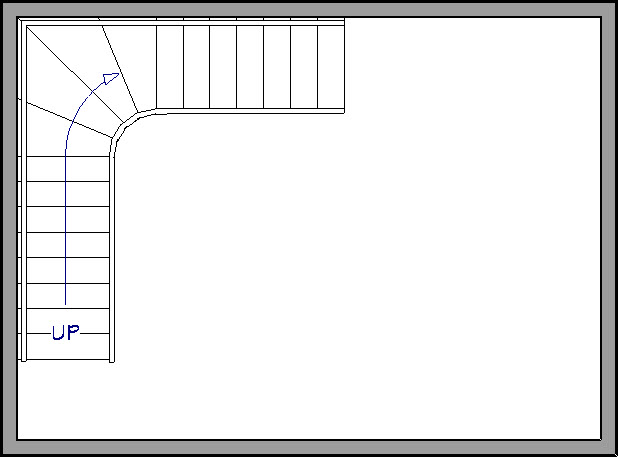
Winders must be in a room with valid room definition. You cannot create winders in an area composed of only 2 corner walls. If this configuration is needed, enclose the area in with Invisible walls so that a room area is defined.
Related Articles