Creating an In-ground Swimming Pool
Pro | Architectural | Suite
QUESTION
I would like to create an in-ground swimming pool in the backyard of my plan. How can I do this?

ANSWER
Using the Terrain Feature tools and furnishings and fixtures from the Library Browser, you can design and accessorize an in-ground swimming pool area.
- Establishing the shape of the swimming pool
- Adding water
- Creating a patio around the pool
-
Creating steps inside the pool
-
Adding furniture and accessories
To establish the shape of the swimming pool
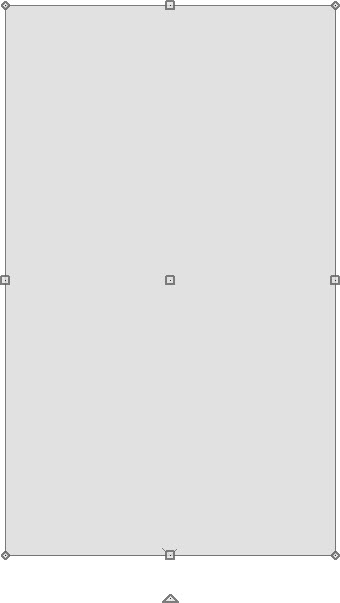
- Select Terrain> Feature> Rectangular Feature
 from the menu, then click and drag a rectangular shape in a flat area within your Terrain Perimeter. This feature will become your swimming pool.

- If this option is not active in your menu, a Terrain Perimeter does not exist in the plan and needs to be created.
- To create a Terrain Perimeter if one is not present, select Terrain> Create Terrain Perimeter
 .
.
Feature regions follow the contours of your terrain. If you place a feature region on a slope, it will follow the slope rather than form a flat area. If your terrain is sloped, use Elevation Lines or a Flat Region to create a level area to place your pool in.
- If this option is not active in your menu, a Terrain Perimeter does not exist in the plan and needs to be created.
- Using the Select Objects
 tool, click on the pool region to select it and use the edit handles that display to resize it, reshape it, and move it into the desired position in your plan.
- Use the Break Line
 tool to place break points and add additional edges to the shape.
- Use the Change Line/Arc
 edit button to change a straight line into an arc.
- Use the Break Line
- When you are satisfied with the shape of the pool region, click the Open Object
 edit button while the pool region is still selected.
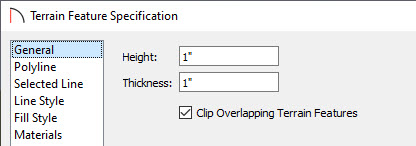
- On the General panel of the Terrain Feature Specification dialog that displays:

- Specify the desired depth of the pool in the Height field using a negative value.
In this example, a value of -48" is used.
- Specify the desired depth of the pool in the Height field using a negative value.
- On the Materials panel, select the Terrain Feature component, click the Select Material button, and browse the Library for a suitable material for the interior of your pool.
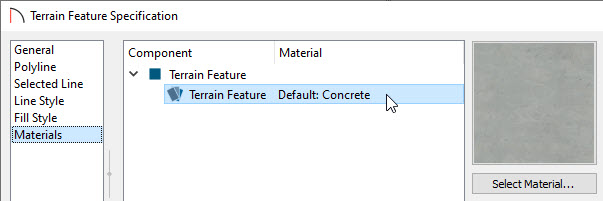
- Click OK to apply the changes and close the dialogs.
To add water
- Select View> Library Browser
 from the menu to open the Library Browser.
- Navigate to Shapes> Boxes> Closed.
- Click once inside the pool region to place a box at that location. After editing, this box will form the surface of the water.
- Navigate to Shapes> Boxes> Closed.
- Using the Select Objects tool, click on the box to select it and use the edit handles to resize and reshape it so that it covers the pool region. It's recommended to extend the edges of the box slightly past the edges of the pool area to prevent a conflict from occurring in camera views.
- With the box still selected, click the Open Object edit button.
- On the General panel of the Geometric Shape Specification dialog that displays:

- Specify a Height that is close to the height of the pool. This will serve as the thickness of the water surface.
In this example, a value of 48" is used.
- Specify the Elevation Reference to be Absolute, then adjust either the Elevation at Top or Elevation at Bottom value.
In this example, an Elevation at Top value is set to -2". This is set to be 2" lower than the pool. This is done intentionally to prevent a conflict from occurring with the terrain feature that is in the same area.
- Specify a Height that is close to the height of the pool. This will serve as the thickness of the water surface.
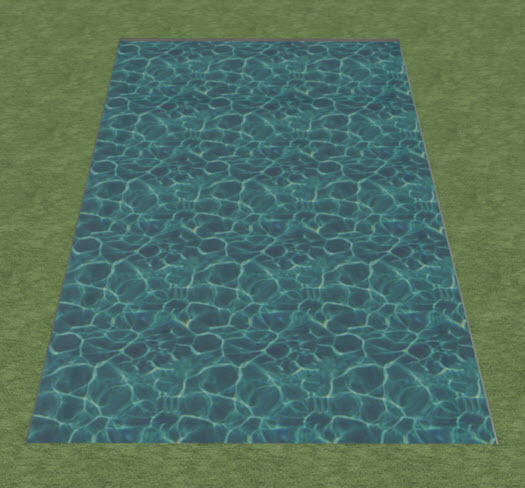
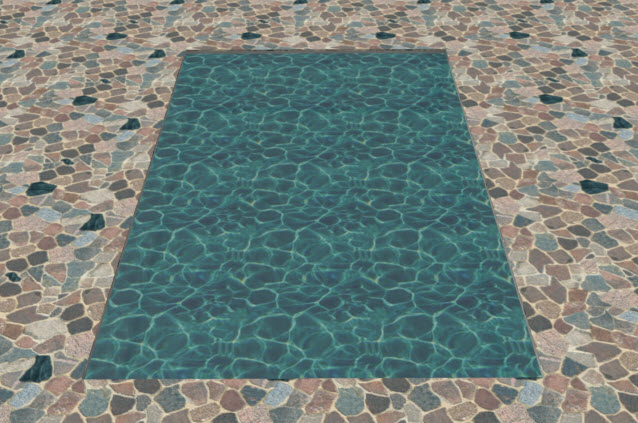
- On the Materials panel, click on Main Color, click the Select Material button, browse to Materials> Landscaping & Roadways> Water within the Library, and select a water material of your choice.

- Click OK to apply the changes and close the dialogs.
- Select 3D> Create Camera View> Perspective Full Overview
 from the menu to see the results so far.
To create a patio around the pool
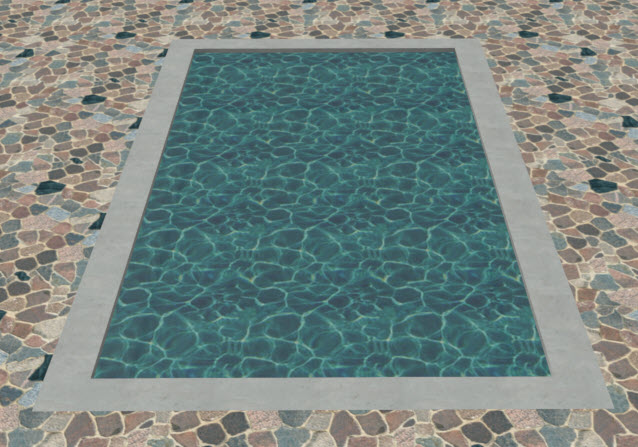
- Select Terrain> Feature> Rectangular Feature from the menu, then click and drag a rectangular shape around the pool region. This feature will serve as the patio area around the pool.
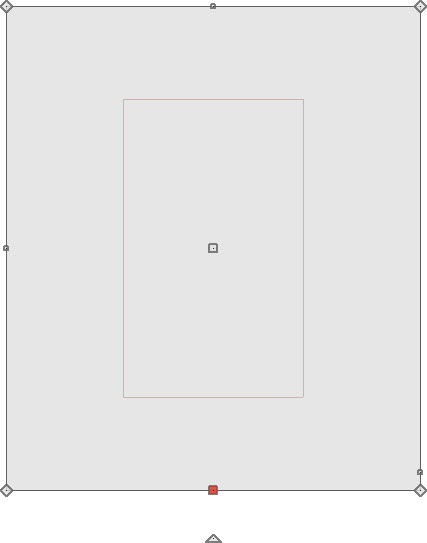
- Using the Select Objects tool, click on the patio region to select it and use the edit handles to reshape the patio to your liking.
- With the patio region still selected, click the Open Object
 edit button.
- On the General panel of the Terrain Feature Specification dialog, check the Clip Overlapping Terrain Features box.
- On the Materials panel, select the Terrain Feature component, click the Select Material button, and browse the Library for an appropriate material for your patio surface.
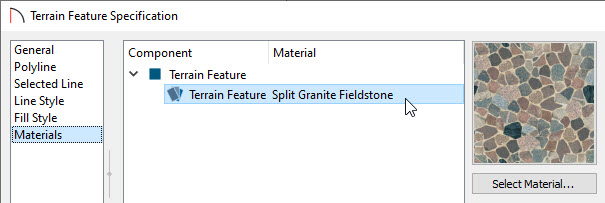
In this example, the Split Granite Fieldstone material is used, which can be accessed from the Buechel Stone Corp. Manufacturer catalog. For more information on accessing additional catalogs, please see the "Downloading Library Catalogs" resource in the Related Articles section.
- Click OK to apply the changes and close the dialogs.
- Select 3D> Create Camera View> Perspective Full Overview from the menu to see the pool in its current state.
You can create more than one Terrain Feature to surround the pool and apply different materials to each one as well.
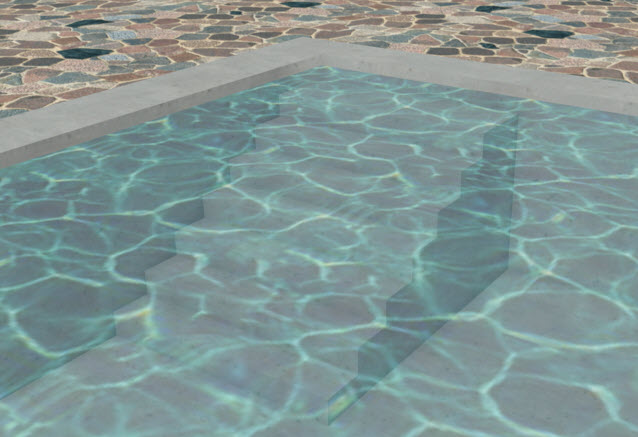
Many pools have a stepped platform for wading into the water.
To add a stepped platform inside the pool
- Select View> Library Browser from the menu to open the Library Browser and browse to Shapes> Boxes.
- Click on the Closed box to select it, then click once in an empty space in your drawing area to place a box at that location. This box will form the bottom step.
- Using the Select Objects tool, click on the box to select it and select the Open Object edit button.
- On the General panel of the Geometric Shape Specification dialog:

- Specify the Height, Width, and Depth of the bottom step, as well as the Elevation.
In this example, the Height is set to 6", the Width is set to 60", and the Depth is set to 80".
- Specify the Elevation Reference and change either the Elevation at Top or Elevation at Bottom value.
In this example, the Elevation Reference has been set to Absolute with a Elevation at Bottom value of -48".
- Specify the Height, Width, and Depth of the bottom step, as well as the Elevation.
- On the Materials panel, click on the Main color component, click the Select Material button, and browse the Library for a suitable material for the step.
- Click OK to apply your changes and close the dialog.
- With the step still selected, use the Move
 edit handle that displays at its center to move the step(s) into position inside the pool.
- Use the Copy/Paste
 edit button to create a copy of the bottom step, and then edit its size and position.
- In this example, each step tread is 10" deep, so the 2nd step has a Depth of 70", the 3rd step 60", and so on.
- Since the Height of each step is 6", the 2nd step will have a Elevation at Bottom value of -42, the 3rd step -36, and so on.
- If you have trouble moving a step into position, hold down the Ctrl/Command key on your keyboard and then move the step. Doing this allows you to move the object through obstructions caused by other objects.
- In this example, each step tread is 10" deep, so the 2nd step has a Depth of 70", the 3rd step 60", and so on.
- Select 3D> Create Camera View> Full Camera
 , then click and drag a camera arrow towards the steps to see the results.
A variety of outdoor accessories are available in the Library Browser.
To add furniture and accessories
A variety of outdoor accessories are available in the Library Browser.
- Select View> Library Browser from the menu to open the Library Browser.
- Browse to Exteriors> Outdoor Living to find patio accessories and furniture.
- Browse to Exteriors> Recreation to find pool accessories like diving boards.
- Browse to Exteriors> Outdoor Living to find patio accessories and furniture.
- Click on an item in the library to select it, then click once to place the selected library object at that location.
- Repeat this process to place any additional items.