Creating a Portico
Reference Number:
KB-00168
Last Modified:
November 26, 2024
This article also applies to the following legacy products:
Pro | Architectural | Suite
Pro | Architectural | Suite
QUESTION
A portico is typically a roofed porch leading to the entrance of a building, or extended as a colonnade, supported by columns. How can I create this in Home Designer?

ANSWER
To create an area covered by a roof where actual walls don't exist, you can use Invisible Walls.
Creating the portico room area
- In the plan you'd like to create the portico in, select Build> Railing and Deck> Straight Railing
 , then click and drag to create the space that will be enclosed by your roof.
- Using the Select Objects
 tool, select each of the railings and click the Open Object
  edit button.
-
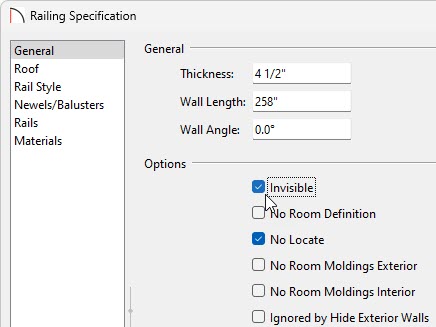
On the General panel of the Railing Specification dialog that displays, check the Invisible box, then click OK.
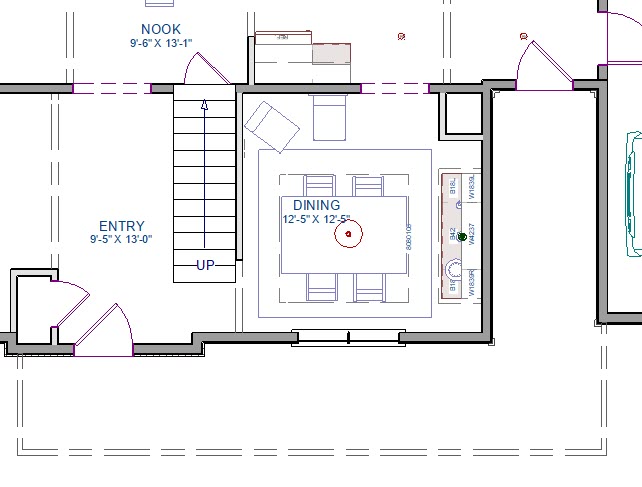
- Notice that the three railings that make up the portico have been set to be invisible and now display as dashed lines as shown in the image below.
- Using the Select Objects tool, select the newly created room, and click on the Open Object edit button.
- In the Room Specification dialog:
- Set your Room Type for the area as a Deck, Porch, or Slab.
- On the Structure panel, set your Floor and Finished Ceiling values, and check Roof Over this Room if it's not already selected.
- Click OK to apply these changes and close the dialog.
- Set your Room Type for the area as a Deck, Porch, or Slab.
Now that we have our basic room defined, we are ready to have the automatic roof generator create a gable over the front door entry area.
Creating a gable over the front door
- Using the Select Objects tool, click on the wall you'd like the have a gable over, then using the Add Break
 edit tool click to place a break on the side of the invisible wall where you want the gable to be.
- Using the Select Objects tool, click on the wall segment, then select the Change to Gable Wall(s)
 edit tool.

- If you do not have Auto Rebuild Roofs enabled, select Build> Roof> Build Roof
 and click OK to rebuild the roof based on these changes.
In Home Designer Pro, check the Build Roof Planes box before clicking OK.
Now that we have our roof set up correctly, we're ready to place columns from the Library Browser.
Placing and positioning columns from the Library Browser
- From the menu, select View> Library Browser
 .
.
- Navigate to Home Designer Core Catalogs> Architectural> Millwork> Columns, and select an appropriate column to place in your design.
For the purposes of our example, we will use the "Doric Faceted Column."
- Once selected, click in your plan to place the column, then create a Camera
 view of the column so that you can resize and position it.
- You can then Copy
 and Paste
  additional columns and position them along your portico area.

Related Articles