Importing, Resizing, and Tracing Over an Image or PDF of a Floor Plan in Home Designer
Pro | Architectural | Suite
QUESTION
What procedure do I use to import an image or PDF of a floor plan into my Home Designer software? Additionally, how can I modify and/or trace over the imported file?
ANSWER
Image and PDF files can be imported into a floor plan view by navigating to File> Import> Import Picture or File> Import> Import PDF. The imported file can then be cropped and/or resized using the object's edit handles, and it can be traced over using the various tools located in your Home Designer software.
To import an image or PDF
- In your desired plan, navigate to File> Import> Import Picture
 or File> Import> Import PDF
  .
.
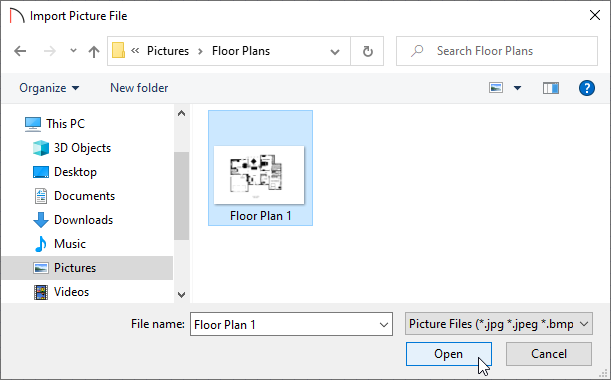
- In the Import Picture File or Import PDF File dialog, browse to the location of the file on your computer, select it, then click Open.
Note: It is recommended to keep this file, as well as any other related files that are imported, in the same folder as your plan file. This is especially important when you use the Backup Entire Plan/Layout tool to create a project backup for transfer to another system. Please see the Related Articles section to learn more about this tool.

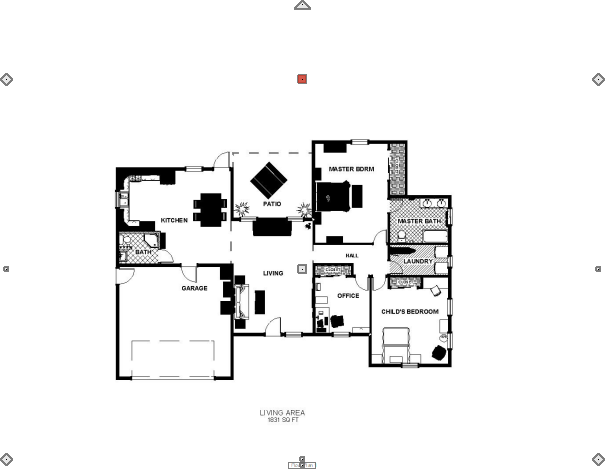
- If you have selected an image to be imported, the image will now appear in the center of your design.
If you have selected a PDF to be imported, an additional dialog will appear asking what pages you would like to import. Choose your desired page settings, then click OK. The page(s) will now appear in the center of your design.
To select and modify an imported image or PDF
- Using the Select Objects
 tool, click on the image/PDF to select it.

- Edit handles will display in the center, at all four corners, and on each side of the file.
- Dragging the corner sizing handles will allow for resizing the file proportionally.
- Dragging the side, bottom, or top handles will allow you to crop the file vertically or horizontally.
- Dragging the center handle will move the file around.
- The triangle edit handle allows the file to be rotated.
In Home Designer Pro, additional sizing controls are available within the PDF Box and Picture File Box Specification dialogs, which can be accessed by double-clicking on an imported file or selecting the Open Object edit tool. For more information on these additional controls, please see the "Tracing Over an Imported File to Create a 3D Floor Plan*" resource in the Related Articles section below.
*Applies to Home Designer Pro
- Edit handles will display in the center, at all four corners, and on each side of the file.
To trace over an imported image or PDF
- First, locate a wall or object on the image or PDF that has been dimensioned.
- If the wall or object on the imported file is dimensioned to a known value, such as 10' (feet) long, select Build> Wall> Straight Exterior Wall
 , or Straight Interior Wall
  , depending on the location of this wall, then draw a new wall that is parallel to the one within the image or PDF.
Make this new wall match the exact known length.
- Next, using the Select Objects
 tool, click on the image or PDF to select it.
- Click and drag the edit handle located on the lower right corner of the image or PDF to resize it while retaining the aspect ratio.
- Continue enlarging the image or PDF until the size of the wall on the file matches the wall you created using the Straight Exterior Wall
 or Straight Interior Wall
  tool.
tool.
- Once the two are the same size, move the new wall you created over the top of the wall.
- Continue to draw new walls over the ones contained in the image or PDF.
- Once you have traced all the walls, you can either select and Delete
 the imported file, move it off to the side of the structure for reference as you continue to customize your design with Doors
  , Windows
  , Cabinets
  ,and other objects, or hide the layer it's on using the Display Options
  .
.
In Home Designer 2024 and newer versions, imported images and PDF's are placed on the "Pictures/PDF Boxes" layer. In Home Designer 2023 and prior versions, these imported files are placed on the "CAD, Default" layer. For more information on turning layers on and off, please see the "Toggling the Display of Objects" resource in the Related Articles section.
By adding fixtures, furniture, and walls over the image or PDF, you can create a duplicate of the original file, and will be able to see your creation in a 3D view.
In this manner, your image/PDF can be used as a guide or template while creating a floor plan, and a drawing scaled at 1:1 can be produced using your Home Designer software.