Creating a Sauna Room
Pro | Architectural | Suite
QUESTION
I would like to model a sauna room in my Home Designer software. How do I do that?

ANSWER
Creating a sauna room in a Home Designer software program is easy by applying the right materials in your room and placing objects from the Library Browser.
First, launch your Home Designer software and choose to open the plan in which you would like to customize your sauna room.
To customize the sauna room
- First, use the Select Objects
 tool to select the sauna room.
- Click on the Open Object
 edit tool to display the Room Specification dialog box.
- Unless you want a molding placed in the sauna room, go to the Moldings panel and uncheck the Use Floor Defaults check box, select the molding you want to delete, then click the Delete button.
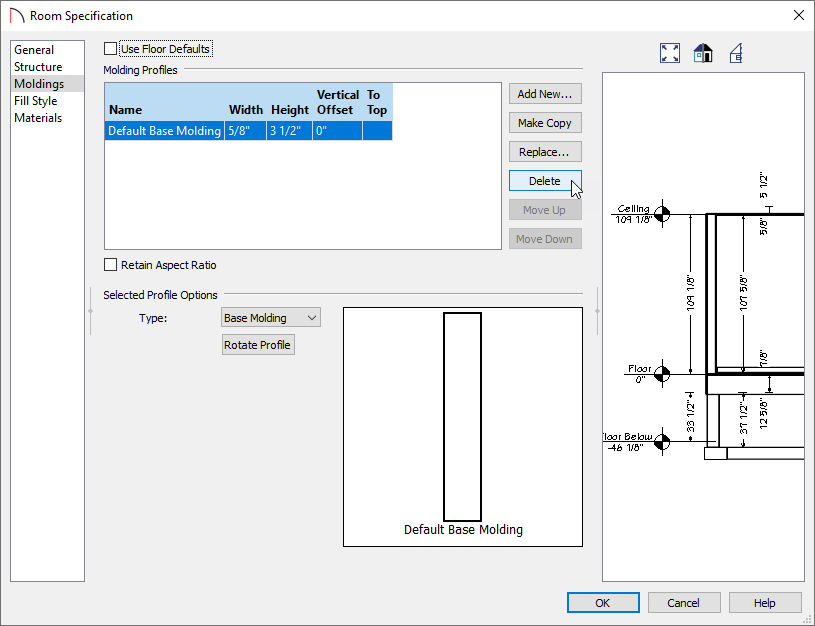
- Select the Materials panel.
- Select the Ceiling Finish component to highlight it, then click on the Select Material button to display the Select Material dialog.
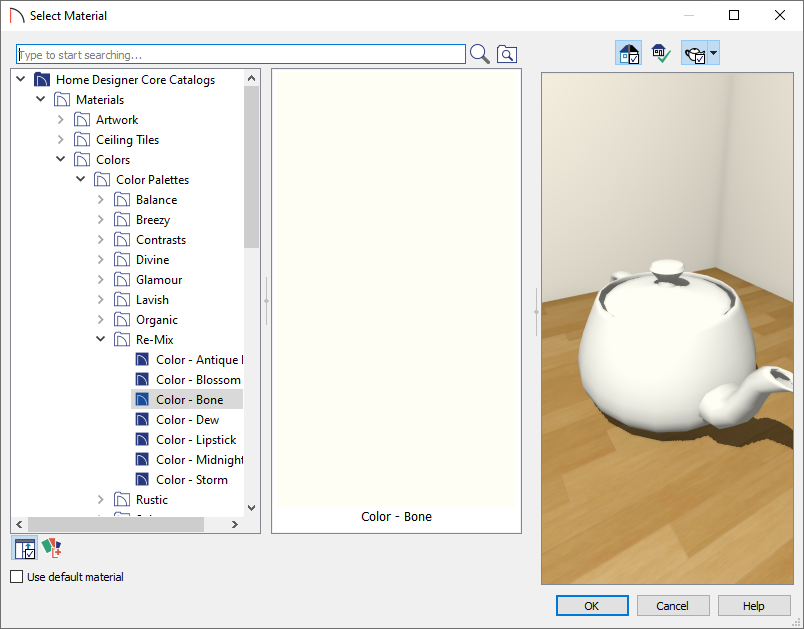
- In the Select Material dialog box, expand the Home Designer Core Catalogs folder, expand the Materials subfolder, then browse to the material that you would like to use for the ceiling in your sauna room.
- Once you have selected the appropriate material, click OK to apply it to the ceiling surface and close the dialog.
- Repeat this process for both the Floor Finish and Walls components.
Is the planking on your walls going the wrong direction? If so, please see the Related Articles section below to learn how to rotate it.
- Once you have finished making changes, click OK to apply them and close the dialog box.
Now that the sauna room has the appropriate materials applied to it, we are ready to begin customizing the sauna room by adding benches for seating.
To add benches
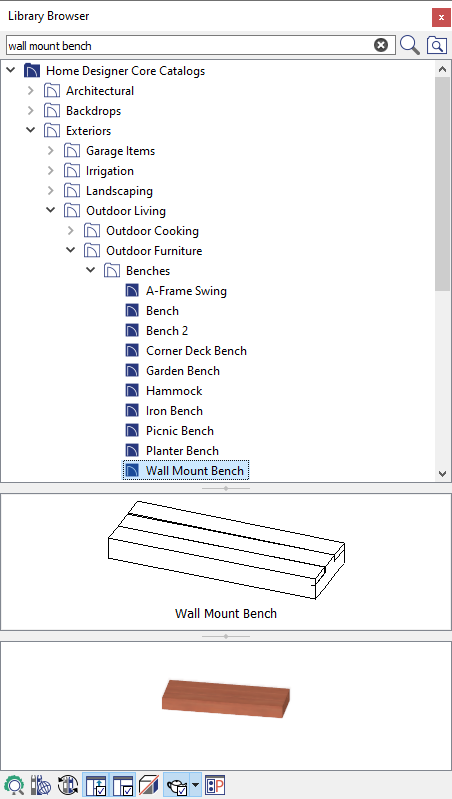
- If the Library Browser is not already open, navigate to View> Library Browser
 .
.
- Search for, or locate, a suitable bench, select it in the Library Browser, then click in your plan to place it.
In this example, we searched for the Wall Mount Bench, which can be located by navigating to Home Designer Core Catalogs> Exteriors> Outdoor Living> Outdoor Furniture> Benches.
- Now that our bench has been placed, there are a number of things that we can do to change the features of this object.
First, we will make the correct number of copies of this bench that we will need in this plan.
To make copies of the bench
- In a floor plan view, use the Select Objects tool to select the bench, then click on the Copy/Paste
 edit tool.
- Since we know that we will need more than a single copy of the bench, we will click on the Sticky Mode
 secondary edit tool to remain in Paste mode and continue pasting copies of the selected bench.
- Once we have placed the copies of our benches, we can Move
 them into place.
In this example, we have three benches against the wall, another row of three directly in front of them, and a final foremost row of three in the room.
In the featured picture at the top of this article, you see the benches at different levels. We do this by changing the heights.
To change the height of the benches
- Select the first bench using the Select Objects tool, then click on the Open Object edit button to display the Furniture Specification dialog box.
- On the General panel, increase the Floor to Bottom Height to your desired value.
In this example, we have set this to 24".
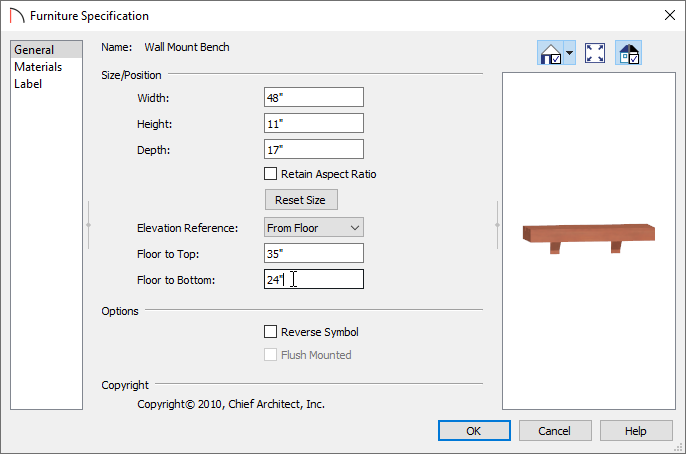
- Once all changes have been made, click OK to close the dialog.
- Repeat this process on the remaining two benches that make up the back row.
Additional details can be added using items out of the Library Browser.
To add additional details
- Fencing panels can be placed to act as barriers in the sauna.
- Additional catalogs can be downloaded from the 3D Library, such as the Home Spa Accessories and Poolside and Sauna bonus catalogs.