Placing an Apron Sink
Reference Number:
KB-00890
Last Modified:
October 31, 2024
This article also applies to the following legacy products:
Pro | Architectural | Suite
Pro | Architectural | Suite
QUESTION
How do I place an apron sink into a cabinet?

ANSWER
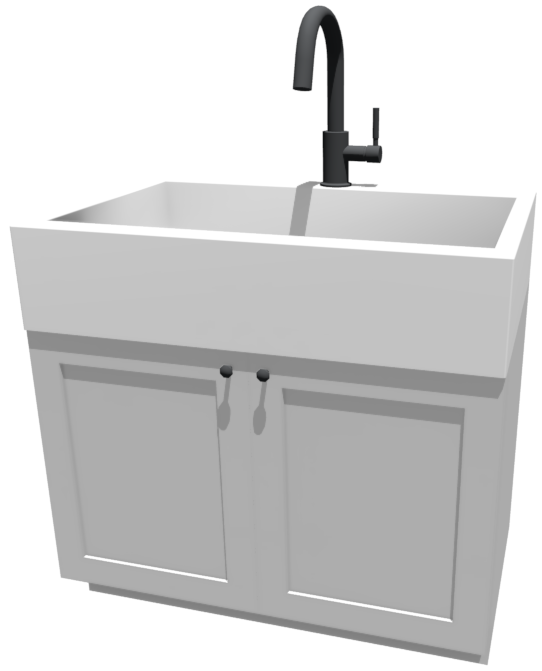
Unlike sinks that just drop into an existing cabinet, an apron sink must be placed separately. An apron sink, which has a finished front surface, can be placed on top of a base cabinet against a wall, or in an island, by following the steps below.
To create a cabinet with an apron sink
- Open the plan you would like to create an apron sink in, select Build> Cabinet> Base Cabinet
 from the menu, and click once in your plan to create a base cabinet.
- Using the Select Objects
 tool, click on the base cabinet to select it, then click the Open Object
  edit button to open the Base Cabinet Specification dialog.
- On the General panel:
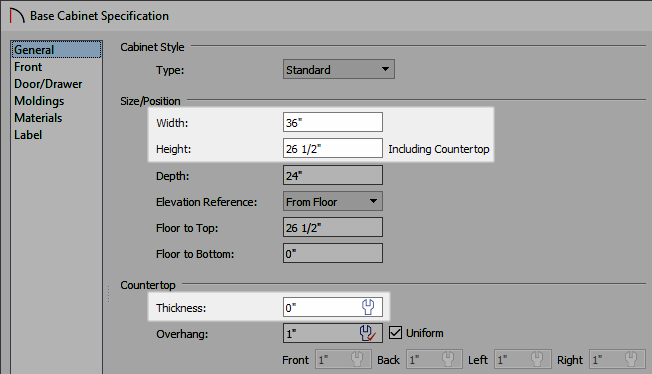
- Set the cabinet's Width so the cabinet is large enough to contain a kitchen sink.
In this example we will use a 36" wide cabinet.
- Decrease the Height of the cabinet so that the sink can be placed on top of this cabinet, while the top of the sink will still line up with the cabinets on either side of it.
In this example, we chose a Height of 26 1/2".
- Change the Countertop Thickness to 0".
- Set the cabinet's Width so the cabinet is large enough to contain a kitchen sink.
- On the Front panel of the Base Cabinet Specification dialog, click on the drawer in the cabinet preview diagram on the right to select it:
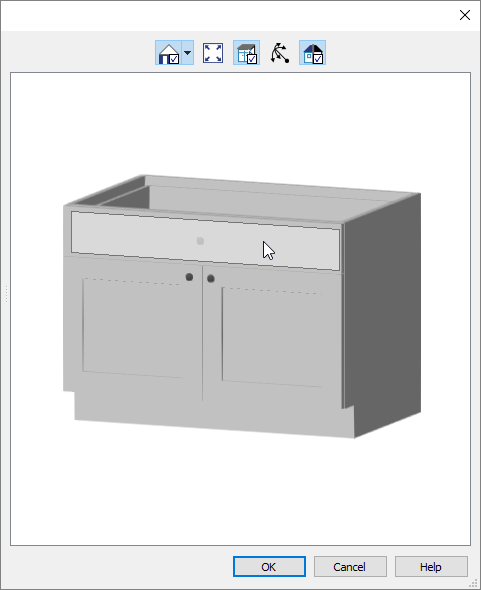
- Click the Delete button within the Base Cabinet Specification dialog to remove it, leaving only the double doors.
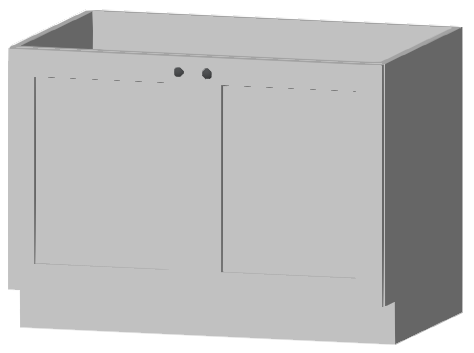
- Click the Delete button within the Base Cabinet Specification dialog to remove it, leaving only the double doors.
- Click OK once you are done editing your cabinet to close out of the dialog.
- Select View> Library Browser
 from the menu to open the library if it's not already open, and browse to Home Designer Core Catalogs> Architectural> Fixtures> Sinks> Kitchen Sinks> Apron Front.
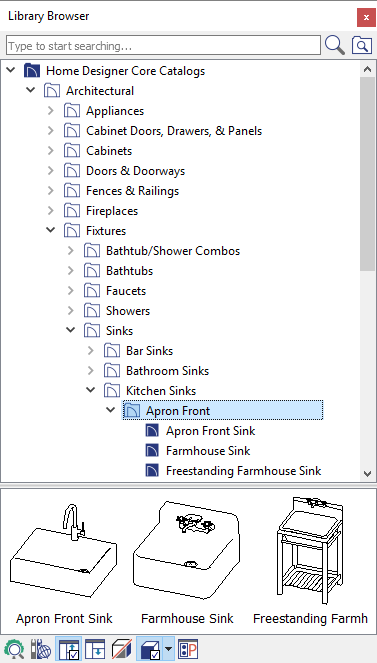
- Select an appropriate apron front sink fixture and click once on the base cabinet to place the sink on top of it.
- If the sink is not placed correctly, use the Select Objects
 tool to select the sink and use the Move
  edit handle to move it into your desired location.
- If you're having trouble selecting the sink, try pressing the Tab key on your keyboard after attempting the selection, as this will cycle between objects that are in the same area.
- If the sink is not placed correctly, use the Select Objects
- Adjust the width and height of the apron front sink to your preference and then take a Camera
 view to see the results.
Related Articles