Creating a Window Well for an Egress in Home Designer
Reference Number:
KB-00862
Last Modified:
November 15, 2024
This article also applies to the following legacy products:
Pro | Architectural | Suite
Pro | Architectural | Suite
QUESTION
I am building a house, or doing a remodel, and need to create a window well for an egress into my design. How can I model this in my Home Designer software?

ANSWER
An egress is easy to create in Home Designer by creating a room defined by foundation walls and creating a hole in the terrain.
Additionally, you can find an assortment of predefined window well and egress symbols in the Exterior Egress Bonus Catalog located in the 3D Library.
Note: It is important to check the code regulations for your particular area on the required specifications for the window and egress opening.
To create a window well for an egress
-
Access your desired plan, then navigate to Build> Floor> Build Foundation
 to generate a foundation under your structure if one is not already created.
For more information on creating different foundation types, please see the Foundations category of the Knowledge Base.
-
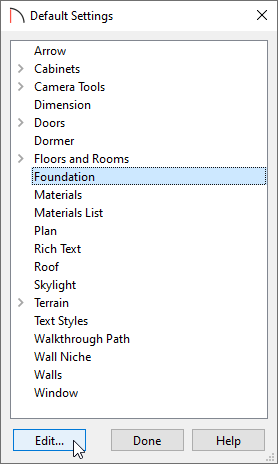
Select Edit> Default Settings
 from the menu, and in the dialog that appears, select the Foundation option, then click Edit.
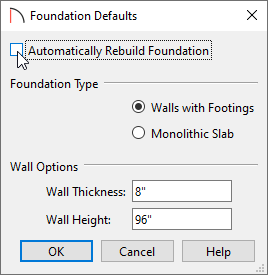
- In the Foundation Defaults dialog that displays, uncheck the Automatically Rebuild Foundation box, click OK, then click Done to close the dialogs.
- In the floor plan, navigate down to Floor 0
 , which is the foundation, or basement level.
- Select Build> Wall> Straight Exterior Wall
 or Straight Foundation Wall*
  and draw a room on the outside of the basement walls. This will represent the window well area.
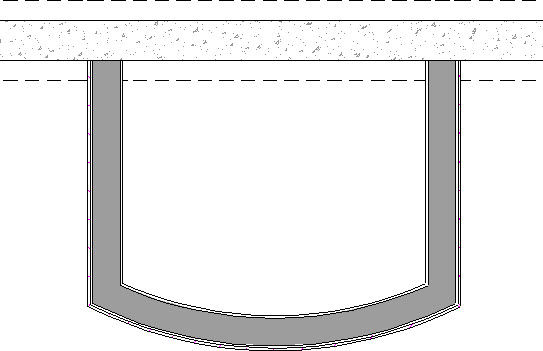
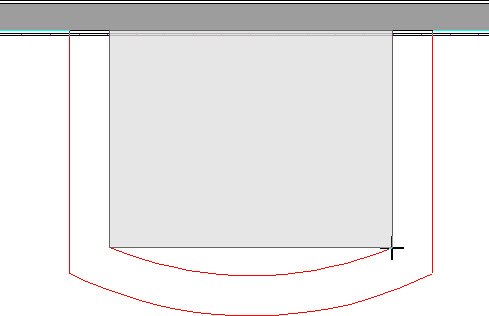
To create the curved wall shown in the image below, select the front wall of the window well and click the Change Line/Arc edit button to convert the front wall to a curved wall.
*Available In Home Designer Architectural and Home Designer Pro Only.
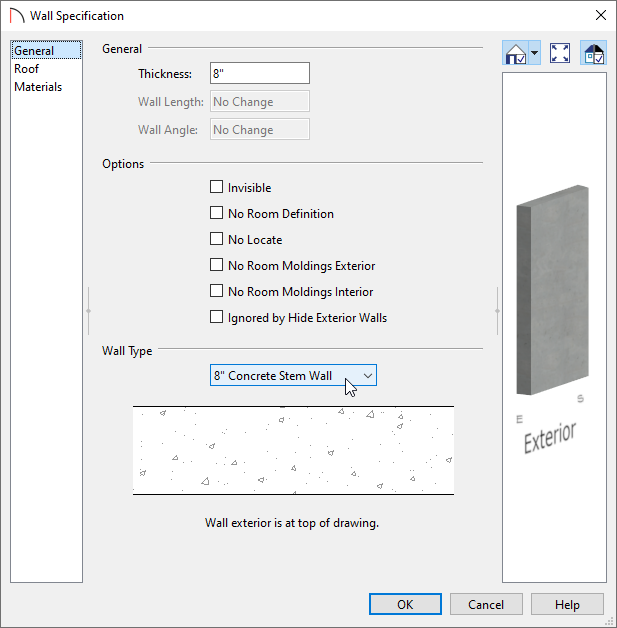
- If exterior walls were created, select all three of them using the Select Objects
 tool, click the Open
  edit button, and in the Wall Specification dialog that displays, set the Wall Type to an appropriate option, then click OK.
- Using the Select Objects tool, select the new room, click the Open Object edit button, and in the Room Specification dialog that displays:
- On the General panel, set the Room Type to Slab, and change the Room Name to the label you would prefer to see.
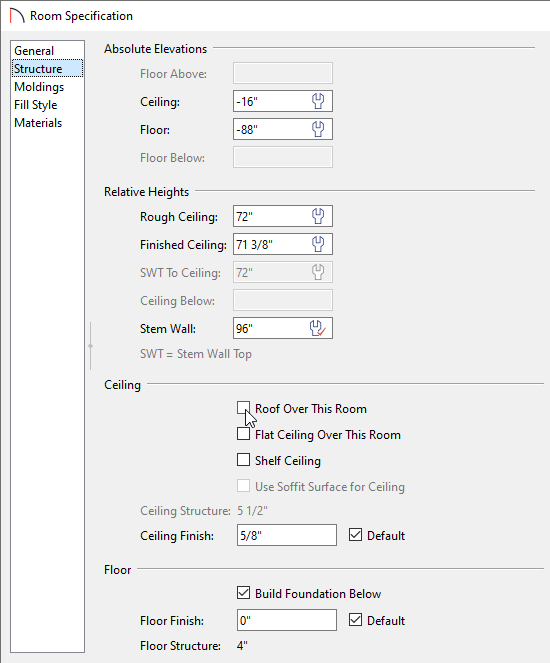
- On the Structure panel, set the Ceiling and Floor height of the window well, and uncheck the Roof Over This Room box.
- Click OK to apply the changes and close the dialog.
- On the General panel, set the Room Type to Slab, and change the Room Name to the label you would prefer to see.
- Back in the floor plan, move up to Floor 1
 and then navigate to Tools> Floor/Reference Display> Reference Display
  . This will allow us to see where the walls are positioned on Floor 0.
- If you do not already have a terrain perimeter, select Terrain> Create Terrain Perimeter
 to create a terrain on Floor 1.
- Select Terrain> Feature> Terrain Hole
 from the menu and draw a hole over the window well as shown below.
If you created a curved front wall, select the front edge of the terrain hole, and click the Change Line/Arc edit button to convert the front edge to be curved to match the window well below.
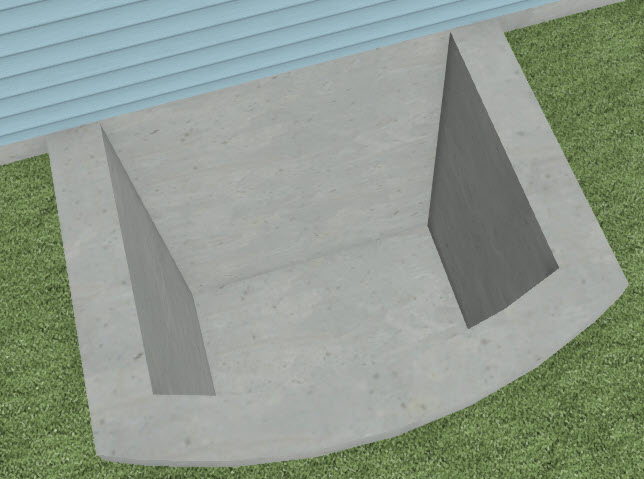
- Create a Camera
 view to see the resulting window well.
Related Articles