Creating a Screen Porch in Home Designer
Pro | Architectural | Suite
QUESTION
I would like to add a screened-in porch to my plan. How can I do this?

ANSWER
Screened panels can be created by applying a mesh material to the glass component in a window and then using copies of this window to form a porch.
To create a screen porch
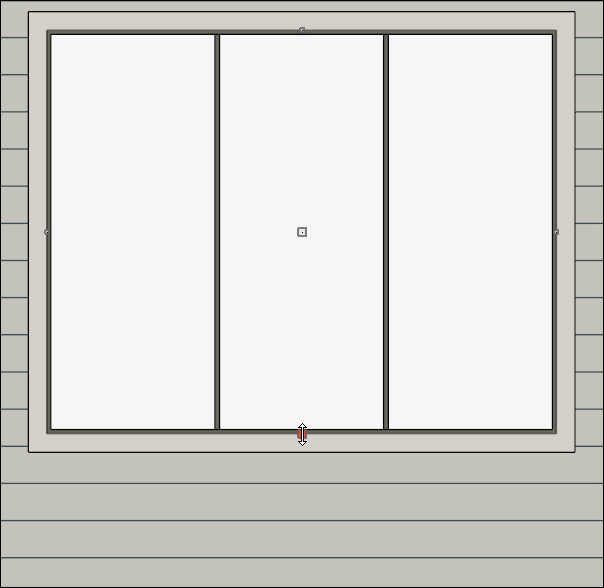
- Select Build> Window> Window
 and place a window into one of the walls of your porch.
- Navigate to 3D> Create Orthographic View> Cross Section/Elevation
 and create a cross section/elevation view of the screen porch wall.
In legacy Home Designer versions, navigate to 3D> Create Camera View> Cross Section/Elevation instead.
- In the newly generated view, select your window and using the edit handles:
- Adjust the top height of the window to match the top of your wall.
- Adjust the bottom height of the window to the height where you want the bottom of your screen to start.
- Adjust the top height of the window to match the top of your wall.
- Using the Select Objects
 tool, select the window and click the Open Object
  edit button.
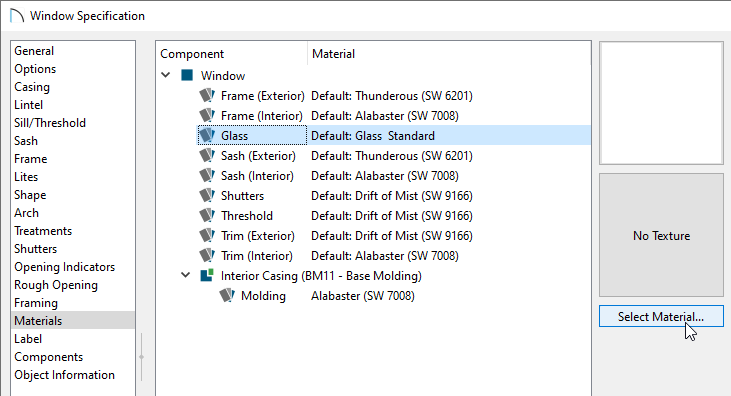
- On the General panel of the Window Specification dialog that opens, change the Window Type to Fixed Glass.
- Access the Casing, Lintel*, Sill/Threshold*, Sash, Frame*, and Lites panels to adjust these various components associated with the window.
*Available in Home Designer Pro and Home Designer 2026 and newer. A limited selection of sill and threshold settings are located on the Casing panel in legacy versions.
- Select the Materials panel, select the Glass component, then click on the Select Material button.
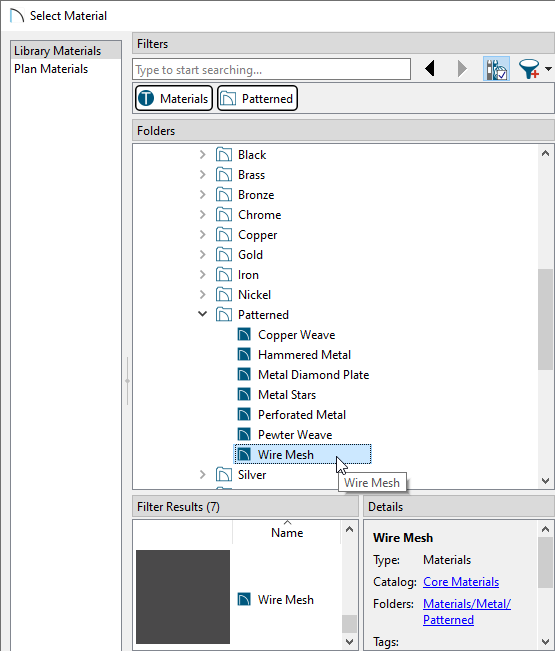
- In the Select Material dialog that opens, navigate to Core Catalogs> Materials> Metal> Patterned> Wire Mesh, select it, then click OK.
In Home Designer 2025 and prior versions, navigate to Home Designer Core Catalogs> Materials> Fabric & Wall Coverings> Sheers & Shades> Screen> Screen instead.
Additional mesh materials, such as Square Mesh, can be located in the Materials Wire and Lattice bonus catalog. For more information on obtaining additional catalogs, please see the Related Articles section below.
- Make any other adjustments to the window, then click OK once more to close the dialog.
You can now create as many copies of this window as needed using the various edit tools.
Additional catalogs can be found in the 3D Library for furnishing your porch room. For more information on obtaining bonus library content ,please see the Related Articles section.