Building a Wine Rack Using a Cabinet
Reference Number:
KB-00434
Last Modified:
January 13, 2022
This article also applies to the following legacy products:
Pro | Architectural | Suite
Pro | Architectural | Suite
QUESTION
How do I create a wine rack inside of a cabinet?

ANSWER
A wine rack is easy to create using a cabinet and the specialty storage objects located in the Core Catalogs section of the library.
In addition to creating a custom wine rack using a cabinet, you can locate additional wine accessories by accessing the Wine Cellar Items Bonus Catalog, the Wine Racks America® Manufacturer Catalog, and the Wineracks.com Manufacturer catalog. For more information on downloading additional library catalogs, please see the Related Articles section below.
To create a wine rack
- Select Build> Cabinet> Base Cabinet
 . then click in your plan to add the cabinet.
- Using the Select Objects
 arrow tool, select the Base Cabinet and click on the Open Object
  edit tool.
- On the General panel of the Cabinet Specification dialog that displays, set the Width, Height, Depth, and Floor to Bottom values to your liking.
- On the Door/Drawer panel:
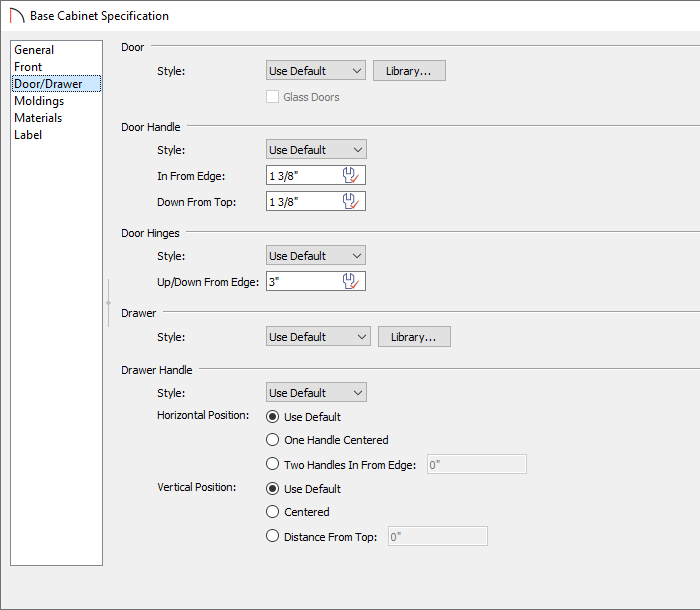
- Click on the Library button next to Door Style and in the Select Library Object dialog expand the list for Cabinet Doors, Drawers, & Panels and navigate to the Specialty Storage folder, where you will be able to choose an object such as a Plate Rack or Wine Rack.
- If your cabinet currently has a handle or knob, use the Door Handle Style drop down menu to change it to None.
- Click on the Library button next to Door Style and in the Select Library Object dialog expand the list for Cabinet Doors, Drawers, & Panels and navigate to the Specialty Storage folder, where you will be able to choose an object such as a Plate Rack or Wine Rack.
- Select the Front panel:
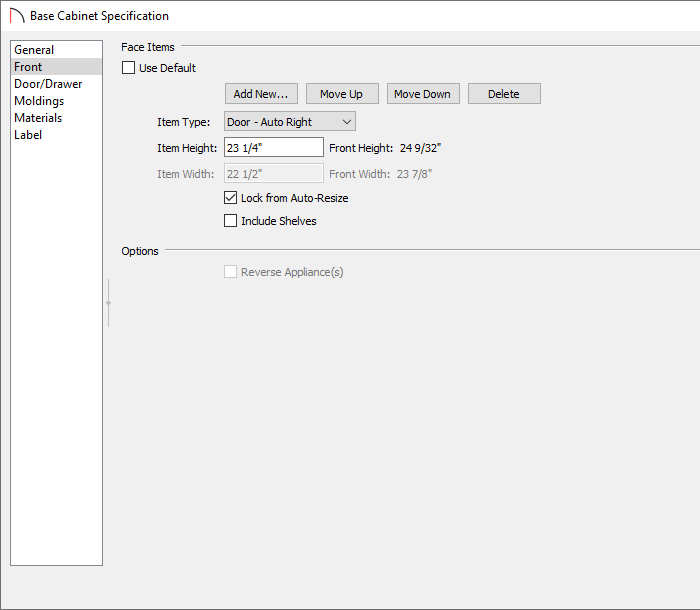
- Click on the door area in the preview panel to modify it.
- If you would like to lock the size of the wine rack face item, select the wine rack door face item using the preview panel, then check the Lock from Auto-Resize box.
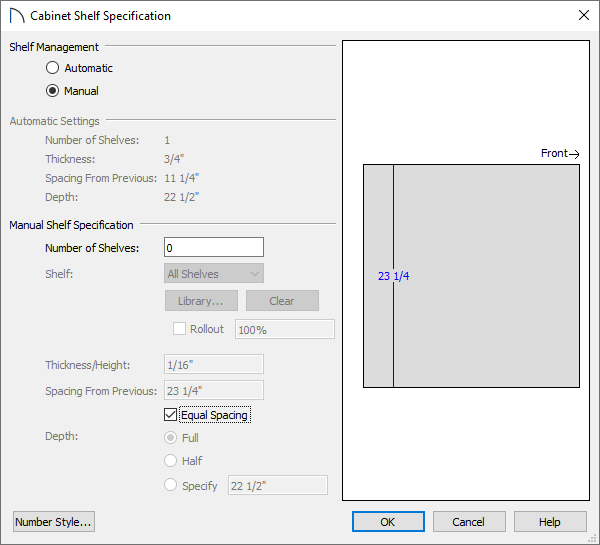
- To remove the shelves in Home Designer Suite and Architectural, deselect Include Shelves.
- In Home Designer Pro, click on the Specify button next to the Shelves section to open the Cabinet Shelf Specification dialog. Select the Manual radio button at the top, then specify the value next to Number of Shelves to be 0.
- Once all desired changes have been made, click OK.
- Click on the door area in the preview panel to modify it.
- Take a Camera
 view to see the results.
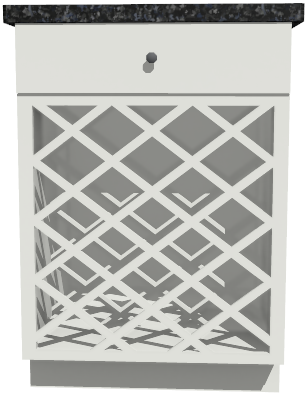
- Bottles from the Wine Cellar Items Bonus Catalog can now be inserted into the wine rack cabinet, along with any additional wine accessories that you may want to place in your plan.
Related Articles