Adjusting Roofs Over Alcoves
Reference Number:
KB-00425
Last Modified:
June 30, 2022
This article also applies to the following legacy products:
Pro | Architectural | Suite
Pro | Architectural | Suite
QUESTION
I have an alcove in my plan, and I want the roof to extend across it as if there was a wall there. How can I make the roof extend over this area?
ANSWER
Alcove allowances can be set in the Build Roof dialog.
To adjust how a roof builds over an alcove
- Launch Home Designer and select File> New Plan
 to create a new plan.
- Select Build> Wall> Straight Exterior Wall
 , then click and drag out a basic structure with one or more alcoves, as shown in the image below.
In this example, two alcoves are drawn - one that is 36" (3)' wide and one that is 35" (2' 11") wide.

- Navigate to Build> Roof> Build Roof
 .
.
- On the Roof panel of the Build Roof dialog, note the Minimum Alcove Size, then click OK and build the roof.
In Home Designer Pro, make sure that either the Build Roof Planes or Auto Rebuild Roofs box is checked before clicking OK.
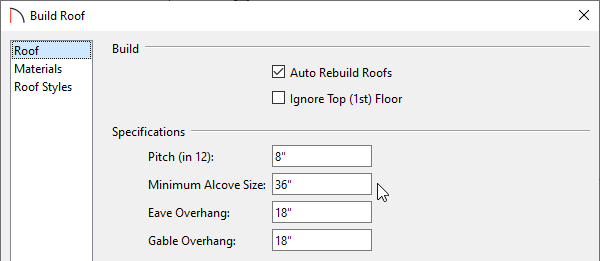
Any alcove less than the specified value is treated as though the exterior wall continues straight across. Alcoves that measure wider than this value are not roofed over; they cause a change in roof planes.
Here is an example showing this difference. If the Minimum Alcove Size is 36", a 36" wide alcove requires a change in the roof line. Each wall of the alcove has an eave. On the right, the alcove is less than the 36" minimum value, so the roof passes right over it.

Related Articles