Creating a DWG or DXF File
Reference Number:
KB-00111
Last Modified:
July 14, 2021
This article also applies to the following legacy products:
Pro | Architectural | Suite
Pro | Architectural | Suite
QUESTION
How do I convert my plan to a file format that an AutoCAD user can open?
ANSWER
Line-based 2D files can be exported from by navigating to File> Export and choosing the Export Current View or Export All Floors option.
You can specify the version of AutoCAD to export to, however, compatibility with other software may vary.
To create a DWG or DXF File
- First, launch Home Designer and Open
 the .plan file that you want to export.
- Navigate to File> Export
 from the menu, then select either Export Current View (DWG, DXF)
  or Export All Floors (DWG, DXF)
  .
.
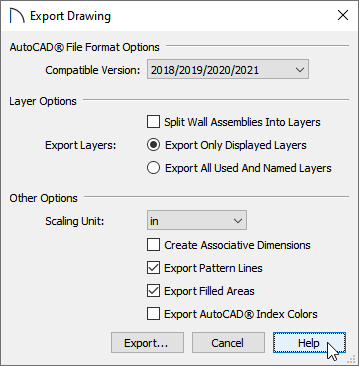
- In the Export Drawing dialog that displays, choose a compatible AutoCAD version, then select Export.
Note: If you will be sending this file to someone using an older version of AutoCAD, find out which version they have and select it from the drop-down menu here before exporting.

In Home Designer Pro, a few additional options are available. You can learn more about each of these options by clicking the Help button at the bottom of the dialog.
- In the Save Drawing File dialog that appears next, navigate to the location on your computer where you would like to save your file. In the File name field, or the Save As field if you are on a Mac, enter a name for the file. Choose to save the file as a .dwg or .dxf using the Save as type drop-down.
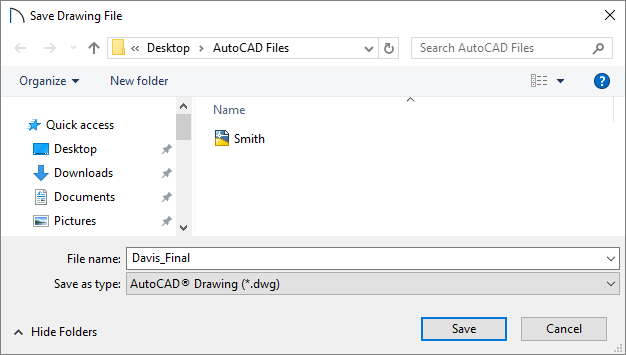
- Click the Save button to close the dialog and the file will be saved on your computer under the name and location that you have chosen.
Related Articles