Specifying Different Roof Overhangs on Different Walls
Pro | Architectural | Suite
QUESTION
How can I make a roof that has different overhangs on different sides?

ANSWER
Roofs that are automatically generated can have a Overhang set for the entire house, however, utilizing wall settings you can also change the over hang on a by wall basis.
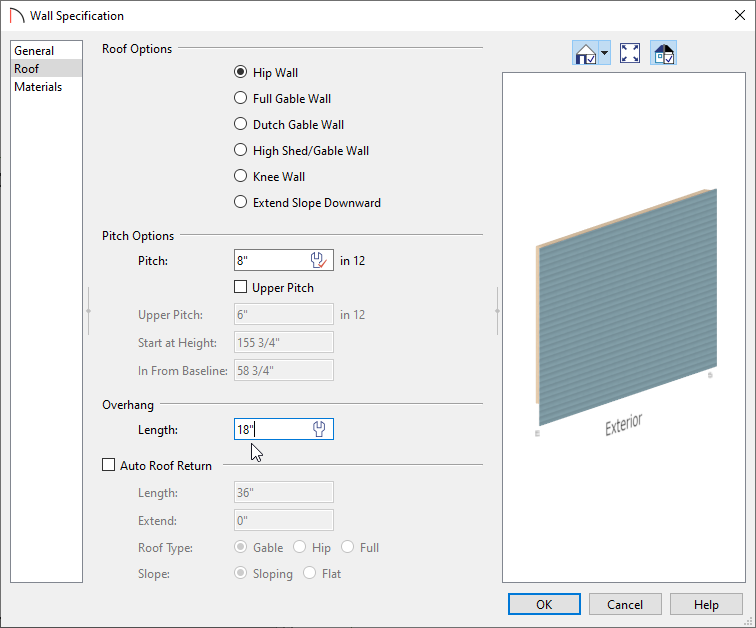
To specify different overhangs for different walls in the Wall Specification dialog
- Use the Select Objects
 tool to select the wall that supports the overhang you would like to change.
- Click on the Open Object
 edit tool.
- On the Roof panel of the Wall Specification dialog, specify the desired Overhang Length, then click OK.
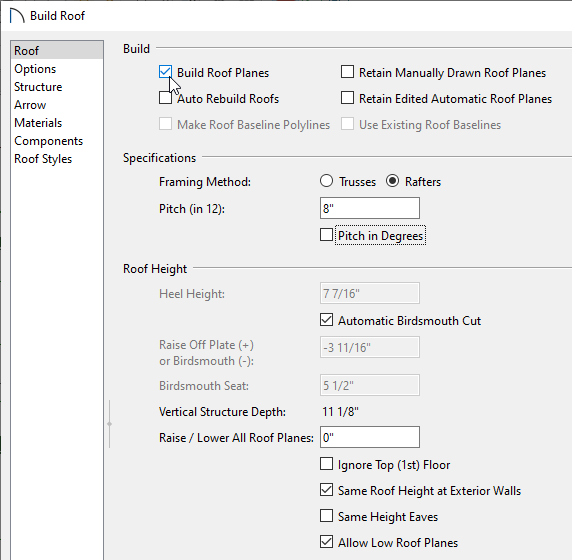
- If Auto Rebuild Roofs is turned on, you will see the change right away. If Auto Rebuild Roofs is turned off, the roof will need to be rebuilt to see the change.
To rebuild the roof using Home Designer Suite and Home Designer Architectural, navigate to Build> Roof> Build Roof to open the Build Roof dialog, then click OK.
To rebuild the roof using Home Designer Pro, navigate to Build> Roof> Build Roof to open the Build Roof dialog, check the Build Roof Planes box, then click OK.
The roof rebuilding methods mentioned above allow you to build the roof based on the current state of the plan a single time. Any subsequent changes require you to repeat the process each time you want to rebuild the roof.
The Auto Rebuild Roofs setting is a persistent setting that, when enabled, rebuilds the roof anytime a change that affects the generation of roofs is made, such as changes to exterior walls or ceiling heights.