Changing the Floor Materials in One Area of a Larger Room
Reference Number:
KB-00030
Last Modified:
December 12, 2025
This article also applies to the following legacy products:
Pro
Pro
QUESTION
I would like to change the flooring material for a large room so that it uses both carpet and tile. How can I accomplish this task?

ANSWER
In reality, rooms are not always divided by a physical wall. The separation of two rooms may be marked by a change in the flooring (wood to tile, for example), or by a change in the interior wall covering.
In Home Designer 2026 and Home Designer Professional, a room divider can be used to define rooms without creating a physical wall.
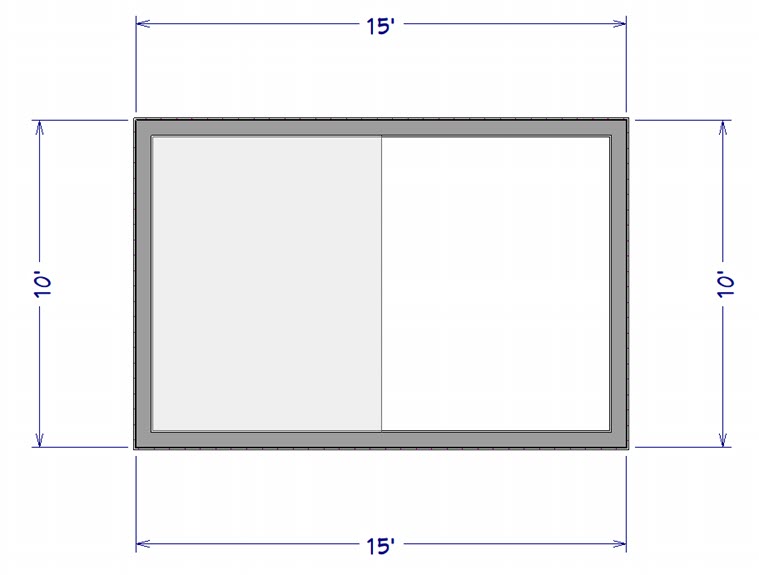
To create a room divider
- First, launch Home Designer and access the plan in which you want to separate out a larger room to adjust its flooring materials.
- Select Build> Wall> Room Divider
 and draw a room divider line where you want to have the flooring material change.

- Once the room has been divided, use the Select Objects
 tool to select one side, then click the Open Object
  edit button.
- Go to the Materials panel of the Room Specification dialog, select the Floor Finish component, then click on the Select Material button.
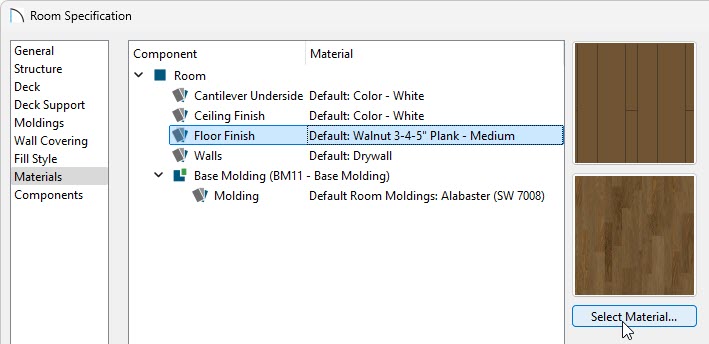
- In the Select Material dialog, choose your desired floor material, then click OK.
- Click OK to apply the change, then select 3D> Create Perspective View> Doll House View
 to see the results.
In the image below, we have rotated the camera to look down on the structure to be able to easily see both flooring materials.

Related Articles