Creating an Etched Glass Cabinet Door
The information in this article appliesto:

QUESTION
I would like to know how to create cabinets with etched glass or frosted doors using Home Designer. How is this accomplished?

ANSWER
While etched glass doors are not available by default in the Library Browser in Home Designer, you can easily import, or modify, existing materials to create an etched glass effect.
To add etched glass style door
- Select Build> Cabinet> Base Cabinet
 .
.
Although we are using a base cabinet for the purposes of this example, a Wall Cabinet or Full Height Cabinet
  could be used as well.
- Once the base cabinet is placed, use the Select Objects
 tool to select it, then click on the Open Object
  edit tool to display the Base Cabinet Specification dialog.
Note: The appearance of the Cabinet Specification dialog and the options within it will vary depending on the version of Home Designer that you are using.
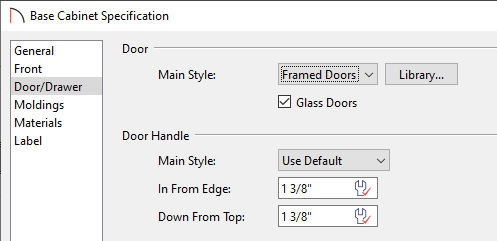
- Select the Door/Drawer panel, then in Main Style, select Framed Doors in the drop-down box. Glass Doors will also have to be checked.
- Make any other necessary modifications to the cabinet, such as its size, the hardware that is applied to it, or its materials, then click OK more to exit out of the dialog.
To create the etched glass material
- Select View> Library Browser
 to display the Library Browser window if it's not already open.
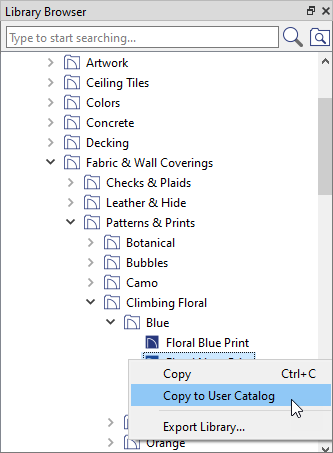
- Browse to a material that you would like to copy and modify to create your etched glass material, right-click on it, then select Copy to User Catalog.
For the purposes of this example, browse to Materials> Fabric & Wall Coverings> Patterns & Prints> Climbing Floral> Blue> Floral Navy Print.
You could also import an image from an outside source, such as a picture that you have taken, or from a picture that you located online.
For instructions on how to add your own materials to Home Designer, please see the Related Articles section below.
- Now that you have a copy of the material in your User Catalog, right-click on it and select Open Object .
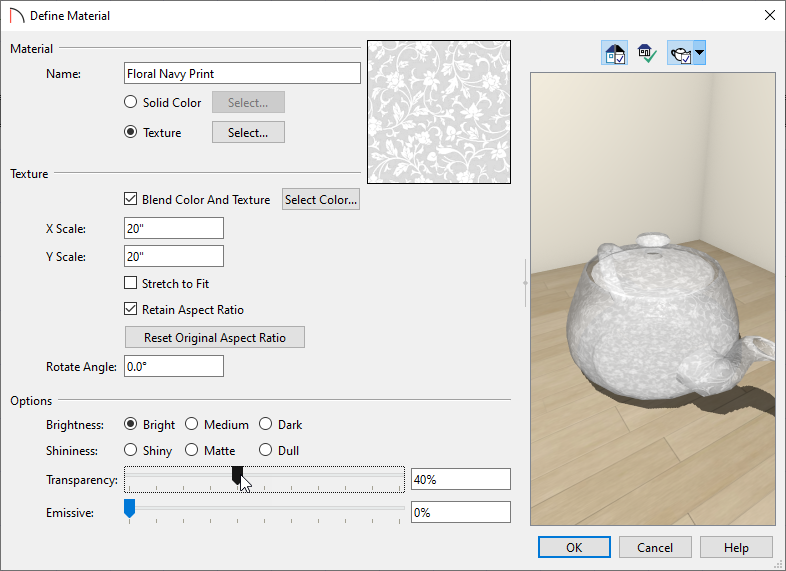
- In the Define Material dialog that displays:
- Rename the material to Etched Glass - White Floral
- Check the Blend Color And Texture checkbox.
In Home Designer Architectural and Pro, access the Texture panel and check the Blend with Texture box instead.
- Click on the Select Color button to display the Color Chooser dialog, select an off white color, then click OK.
In Home Designer Architectural and Pro, click the Color box located on the Texture panel to choose a different color.
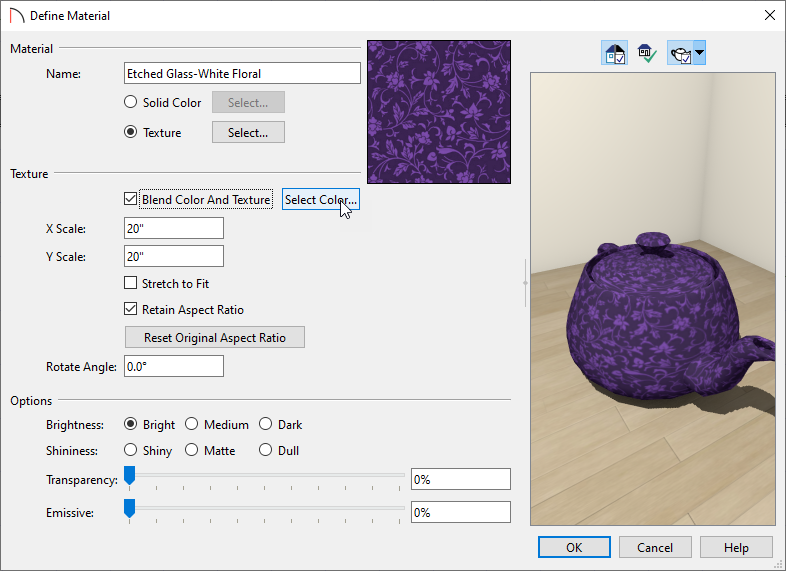
- Adjust the material's Transparency using the slider or input field.
In Home Designer Architectural and Pro, this setting is located on the Properties panel.
In this example a value of 40% is used.
- Click OK when you have completely making changes to apply them, and the material in your User Catalog will take on the characteristics that you have adjusted.
- Rename the material to Etched Glass - White Floral
Now that we have both our cabinet and etched glass material ready, we can apply the material to our base cabinet's glass doors. We can do this either in a 3D camera view by using the Material Painter  in Component
  mode, or by applying the material in the Base Cabinet Specification dialog.
For the purposes of this example, we will walk you through adjusting the material in the Base Cabinet Specification dialog.
To change the cabinet's glass material using the dialog
- Use the Select Objects tool to select the Base Cabinet, and click on the Open Object edit tool to again display the Base Cabinet Specification dialog.
- Select the Materials panel, select the Cabinet Door's Glass option to highlight it, and click on the Select Material button to display the Select Library Object dialog.
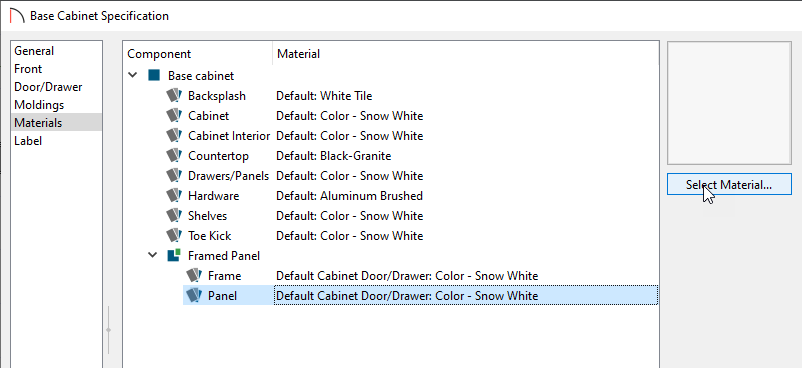
- Browse to your User Catalog and select the Etched Glass - White Floral material to highlight it, and click OK to close the dialog and apply the glass to the Base Cabinet.
- Click OK once again to apply the change in the dialog.
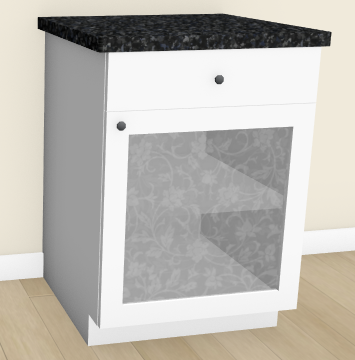
- Take a Camera
 view to see your results.