Creating a Sunken Living Room
The information in this article applies to:

QUESTION
I would like to create a sunken living room or a multi-level interior area with steps down to a conversation pit or other area of the house in my Home Designer software program. How can I create this?

ANSWER
Creating a structure that has many different small floor height variances between rooms is easy do by simply adjusting the floor heights in each room accordingly. Begin by launching your Home Designer software program and Open the plan in which you would like to create your sunken living room.
Before beginning your plan, make sure that you have set your Default values including Ceiling Height, and have already created the correct number of stories that will be in your plan.

For the purposes of our example, we have a single story structure with the Kitchen being at the highest level, then the Dining area, and finally the Living Room at the lowest level.
To define your rooms
- First, you must have an area entirely enclosed by walls and/or railings to form a room.
If an actual wall or railing does not exist in the plan that you are modeling, place a Room Divider wall (formerly known as an Invisible Wall) to enclose a room for the purposes of designating this area's height separate from the other areas in the plan.
- Once you have your room completely enclosed, use the Select Objects
 tool to select the room, and click on the Open Object
  edit tool to display the Room Specification dialog.
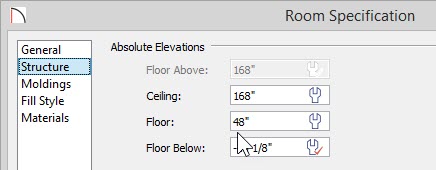
- On the Structure panel, change the Floor value to the appropriate height for your design.

In our example, we set a value of 48" for the Kitchen.
The Ceiling height can be changed room by room as well. If we wanted to maintain the default of 97 1/8" distance from the floor to the ceiling, we would add this value to the 48" we changed the floor height to, for a total value of 145 1/8".
In our example, a cathedral ceiling was used which meant that this value did not need to be changed, so we simply unchecked the Ceiling Over This Room option.
- Once you have finished making changes to the Floor and Ceiling values, click OK to apply them and close the dialog.
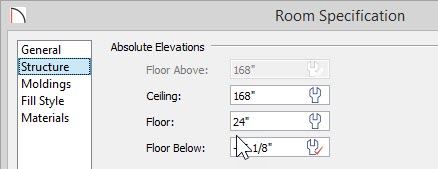
- Follow this same procedure for the Dining room.

Our Dining room floor height was set at a value of 24".
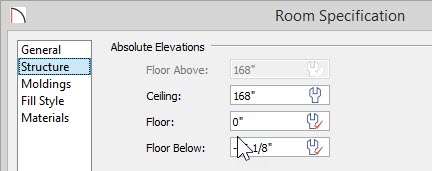
- Finally, the floor height of the Living Room was left at its default value of 0".

- To quickly place stairs between these different levels, select Build> Stairs> Straight Stairs
 and click to automatically place stairs that will connect two levels.
- Make any other desired changes to your design, and finally, take a Full Camera
 view to see the results.
