Modifying Fencing
Reference Number:
KB-01204
Last Modified:
September 29, 2023
This article also applies to the following legacy products:
Pro | Architectural | Suite
Pro | Architectural | Suite
QUESTION
How can I adjust my fencing so that it is no longer the default fence style?

ANSWER
Modifying fencing is easy to accomplish is Home Designer by adjusting the properties located in the Fencing Specification dialog.
To create and modify fencing
- In floor plan view, select Build> Fencing> Straight Fencing
 , then click and drag to create a segment of fence.
- Using the Select Objects
 tool, select your newly placed fence, then click the Open Object
  edit tool.
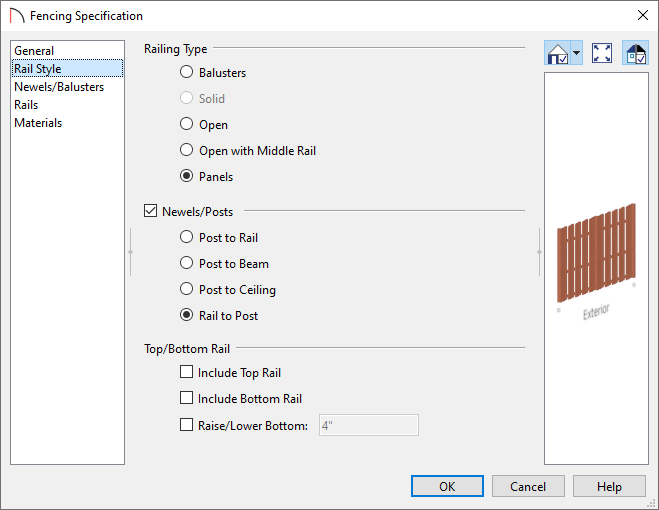
- On the Rail Style panel of the Fencing Specification dialog that opens, ensure that the Railing Type is set to Panels, specify whether you would like Newels/Posts to be present, and specify your desired properties for the Top/Bottom Rail.
- On the Newels/Balusters panel:
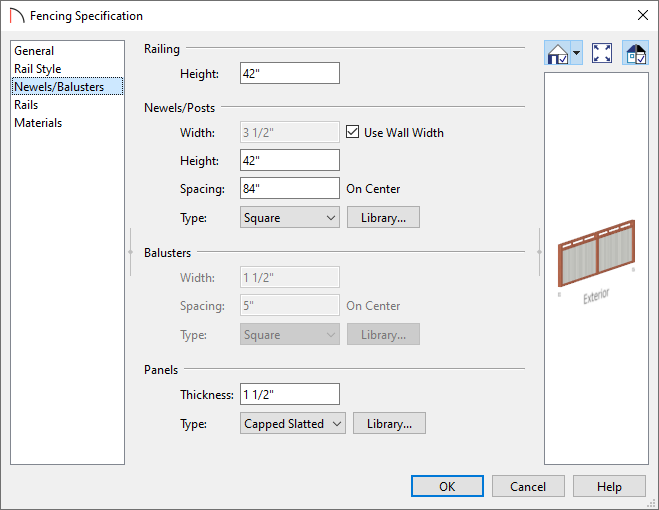
- Specify the Height for the Railing and the Newels/Posts.
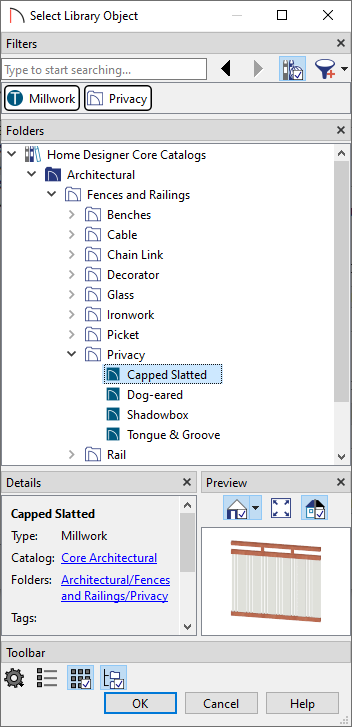
- In the Panels section, click on the Library button, and in the Select Library Object dialog that displays, browse for an appropriate fencing style, select it, then click OK to return to the Specification dialog.
In this example, the Capped Slatted fence style is selected and used.
- Adjust any other properties on this panel, if desired.
- Specify the Height for the Railing and the Newels/Posts.
- On the Materials panel, make your desired material changes to each component that is part of the fence.
- Make any other desired changes, then click OK.
- If you would like to place a gate in your fence, access the Library Browser
 , then navigate to Home Designer Core Catalogs> Architectural> Fences and Railings> Gates.
Additional gate and fence panel options are available in the Exterior Fence Panels and Block Walls Bonus Catalog. Please see the "Download Library Catalogs" resource in the Related Articles section to learn more about obtaining additional catalogs.
- Select an appropriate gate from the selection and click along the fence where you would like the gate to be. Gates are classified as doors, so once placed, you can Open them to specification to make further changes.
In this example, the Beaded Gate option located within the Exterior Fence Panels and Block Walls Bonus Catalog is used.
Related Articles