Creating a Backsplash
Pro | Architectural | Suite
QUESTION
I would like to create a backsplash behind my base cabinets. How can I create this in Home Designer?

ANSWER
A backsplash can be easily created by adjusting the Backsplash settings in the Cabinet Specification, Defaults dialog, or you can use the dedicated Custom Backsplash tool.
To create a backsplash using base cabinets
- Using the Select Objects
 tool, select the cabinets you'd like to add a backsplash to, then click the Open Object
  edit tool.
You may want to make the following adjustments in your Base Cabinet Defaults so that the backsplash settings apply to all base cabinets that are created going forward.
- In the Base Cabinet Specification or the Base Cabinet Defaults dialog that displays:
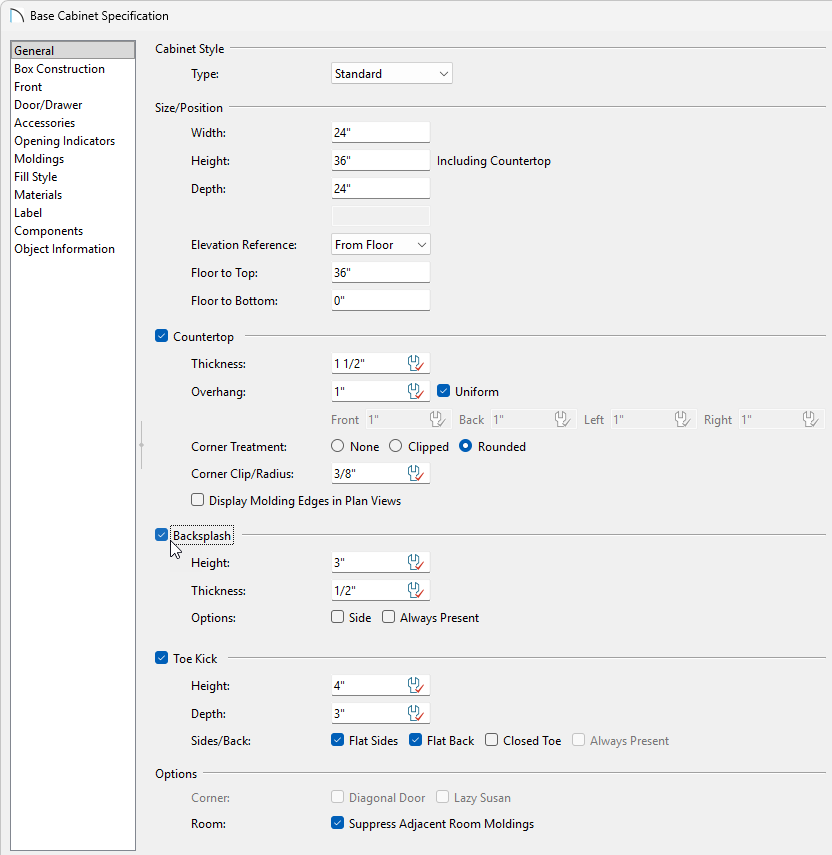
- On the General panel, check the Backsplash box, then set the Height and Thickness to your desired values.
Note: Check the "Side" box to add the backsplash to the side of the cabinet if it is against a wall or a taller cabinet.
Check the "Always Present" box to display the backsplash at all times. If unchecked, a backsplash is present only when the cabinet is against a wall.
- On the Materials panel, select the Backsplash component and change its material to your liking.
- On the General panel, check the Backsplash box, then set the Height and Thickness to your desired values.
- Once you have completed making changes in this dialog, click OK, and if necessary, click Done.
To create a custom backsplash*
*Does not apply to legacy Home Designer Suite.
-
Select Edit> Default Settings
 from the menu.
-
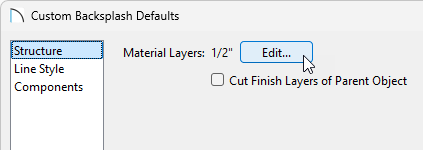
In the Default Settings dialog, expand the Cabinets category, select the Custom Backsplash option, then click Edit.
-
On the Structure panel of the Custom Backsplash Defaults that displays, select the Edit button beside Material Layers to adjust the Material and the Thickness of the backsplash to your liking.
-
Click OK and Done to close the dialogs once your desired changes have been made.
-
Next, select 3D> Create Orthographic View> Cross Section/Elevation
 or Wall Elevation
  , then click and drag a camera view towards the desired wall(s) you want to create a backsplash on.
In Home Designer Architectural, navigate to 3D> Create Camera View> Cross Section/Elevation or Wall Elevation instead.
- With the view open, navigate to Build> Cabinet> Custom Backsplash
 from the menu, then click and drag in your desired location to create the backsplash on the wall.

- Using the Select Objects tool, click on the backsplash to select it, and use the edit handles to reshape and resize the backsplash to suit your needs.

Note: You can use the Add Break edit tool when the backsplash is selected to place break points along a desired edge. This will provide greater flexibility for adjusting the shape of the backsplash.