Applying Moldings to Cabinets
Pro | Architectural | Suite
QUESTION
I would like to apply moldings to some of my cabinets. How can I do that?

ANSWER
In this article, we will walk you through applying moldings to one of the wall cabinets in your plan.
If you want to apply moldings to all of the wall cabinets placed in your plan moving forward, make the following changes in your Wall Cabinet Defaults.
To add the first molding to your wall cabinet
- First, launch your Home Designer software program and Open
 the plan in which you would like to add a molding to the cabinet.
- Next, using the Select Objects
 tool, select the cabinet that you would like to apply the molding to, and click on the Open Object
  edit tool.
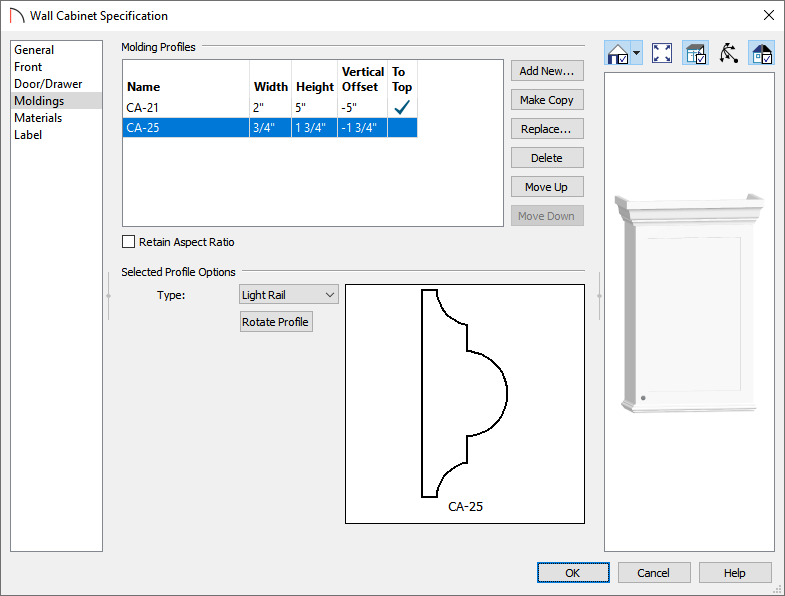
- Select the Moldings panel within the Wall Cabinet Specification dialog that displays, and click on the Add New button.
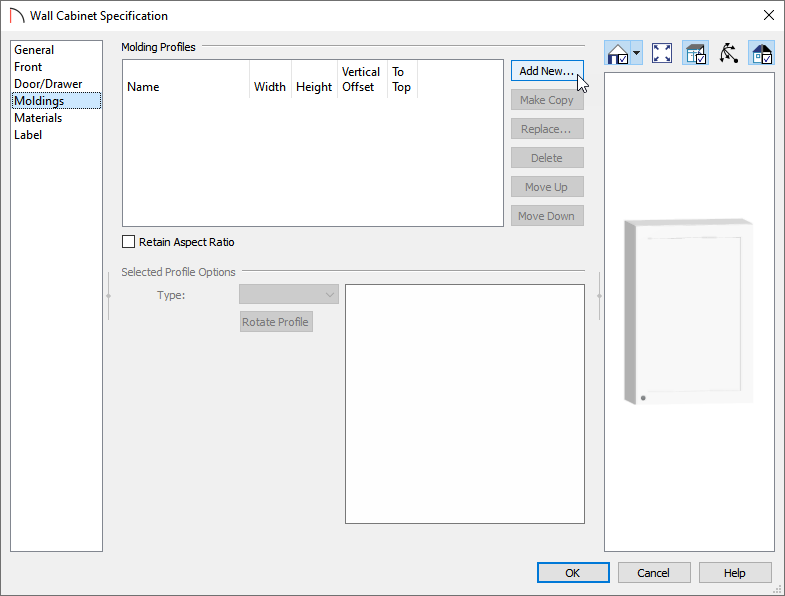
If there is a molding profile already specified, you can replace it with a molding profile if your choice by clicking the Replace button instead.
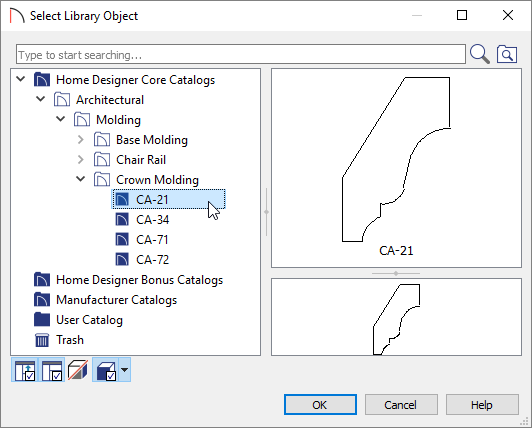
- In the Select Library Object dialog, browse to Home Designer Core Catalogs> Architectural> Molding, choose a molding profile that fits your needs, then click OK to apply this change.
In this example, the CA-21 Molding Profile is used.
- Now we can see that the molding has been added to the wall cabinet. Multiple moldings for each type of cabinet can be specified if you desire.
If we later decided to remove this molding, we would select the molding and click on the Delete button here, or if we simply wanted to change the profile used, we would click on the Replace button and choose a different molding.
- Staying within the Wall Cabinet Specification dialog, specify the molding profile properties to your liking by clicking in each field.
Starting in Home Designer 2022, you can rotate the molding profile until it faces the direction you want.
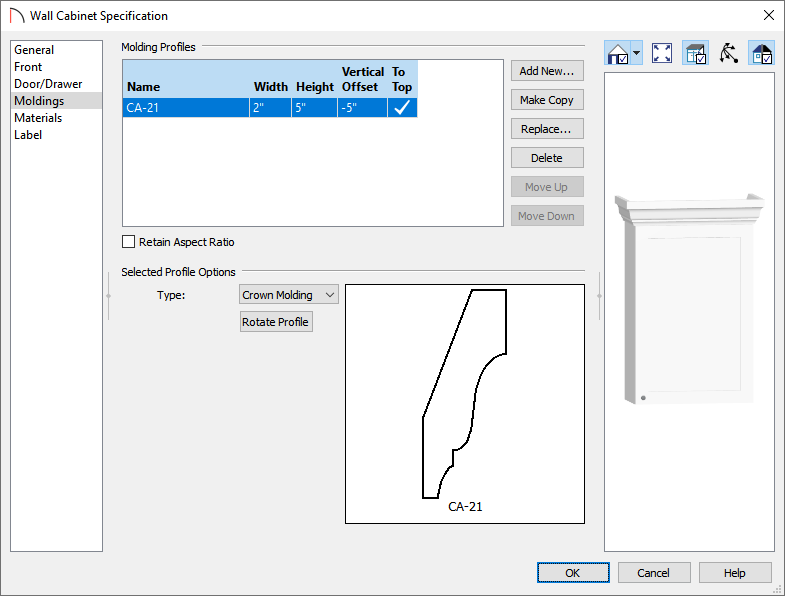
- Set the Width of the molding.
In this example, 2" is used.
- Increase the Height of the molding to change its vertical dimension.
In this example, 5" is used.
- Specify an Offset if you desire.
In this example, we will leave a check in the To Top column and change the Vertical Offset value to -5".
The Vertical Offset value defines the distance the molding is offset from the top, or bottom of the cabinet. Where it is measured from depends on if the To Top column is checked or unchecked. You can enter either position or negative values into this field.
- Set the Width of the molding.
- Take a Camera
 view to see the results.
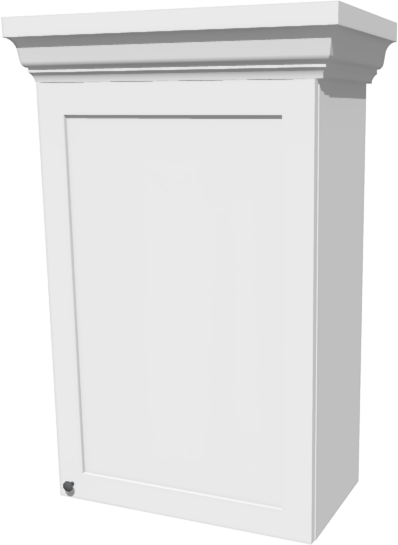
We can also add a molding to the bottom of our cabinet, to serve as a light rail.
To add a second molding to the cabinet
- Open the Wall Cabinet Specification dialog, select the Moldings panel, and click on the Add New button once again to display the Select Library Object dialog.
- Again, navigate to an appropriate molding, select it, and click OK so that you see it displayed in the dialog.
In this example, the CA-25 Molding Profile is used.
- As a light rail, we will want to remove the checkmark from the To Top column for this molding. We will also set the Vertical Offset to -1 3/4" which is the height that is specified for the light rail.
Starting in Home Designer 2022, you can rotate the molding profile until it faces the direction you want.
- When all desired changes have been made, click the OK button to apply the changes.
- Finally, take a Camera view to see the results.
