Restoring a Missing Living Area Label in Home Designer
Reference Number:
KB-00390
Last Modified:
June 24, 2024
This article also applies to the following legacy products:
Pro | Architectural | Suite
Pro | Architectural | Suite
QUESTION
The Living Area label is no longer appearing on my plan. What can I do to make the Living Area reappear?
ANSWER
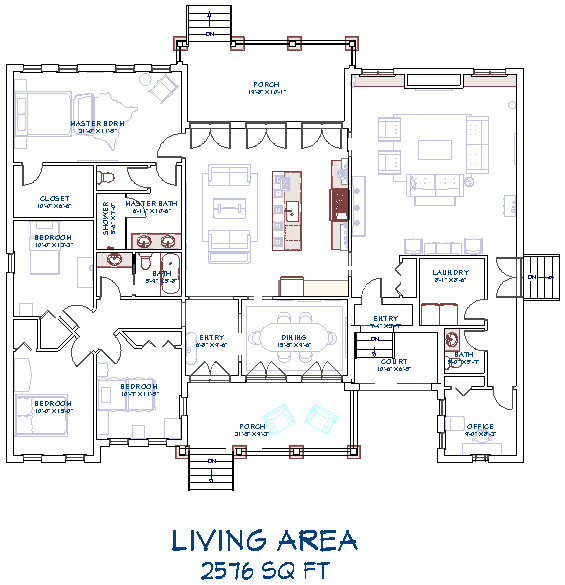
The Living Area label displays the area of the floor platform for living areas in a plan. It is found near the bottom center of the plan as soon as a room area is defined by walls and/or railings.
To restore the Living Area label
- Select Edit> Default Settings
 from the menu.
- In the Default Settings dialog, select Plan from the list, then click Edit.
- In the General Plan Defaults dialog that displays, place a check in the box beside Show Living Area Label.
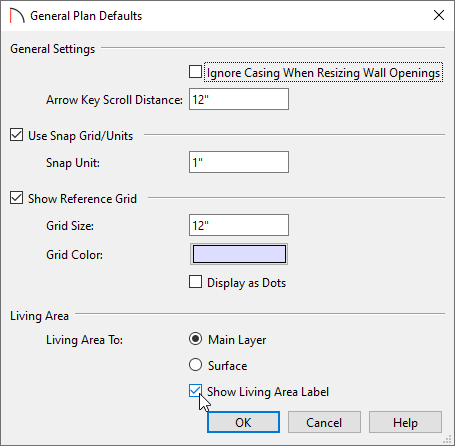
- Click the OK and Done to confirm the changes and close the dialogs.
If the Living Area label still does not display after enabling the setting above, please try the following:
-
Open
 one of your rooms up to specification and verify that either the Include in Total Living Area Calculation option or Use Default (Included) option is selected on the General panel. If all rooms on a floor level are set to be excluded in the total living area calculation, the Living Area label will not display.
-
Select Tools> Checks> Plan Check
 from the menu. In the Plan Check dialog, click the Done button. When the dialog closes, check to see if the Living Area label displays.
-
Next, ensure that the "Room Labels" layer is displayed in the Layer Display Options
 dialog. This is the default layer for the Living Area label. If you're using Home Designer Pro, you will also want to make sure that the Text Style assigned to this layer has a Character Height value large enough to be visible in the floor plan.
-
If the Living Area label still doesn't appear and you're using Home Designer Pro, click on an exterior wall within a floor plan view, and use one of the resize edit handles at either end of the wall to detach it from one of the other exterior walls that it's connected to. By opening the enclosed room area, the living area calculation will be forced to update. Navigate to Build> Floor> Rebuild Walls/Floors/Ceilings
 . Reconnect the walls to restore the enclosed room area, then navigate to Build> Floor> Rebuild Walls/Floors/Ceilings once again.
If you continue to have trouble with populating the Living Area label, please provide a copy of the .plan file to our Technical Support department using the Technical Support Center.
Related Articles