Changing a Walls Fill Color to Black
Pro | Architectural | Suite
QUESTION
How can I make my walls appear solid black?

ANSWER
You can make your walls appear solid black by either applying Wall Hatching or editing your Wall Type.
To create solid black wall hatching
- Select Build> Wall> Wall Hatching
 , and click on a wall that you want to change to be solid black.
Note: You may be prompted with a question that advises that the "Walls, Hatching" layer is not displayed, and asks if you want to turn it on. If so, choose Yes.
- Once the hatching has been applied to the wall, click on it with the Wall Hatching tool still active, so that it selects.
You can verify that the wall hatching is selected, and not the wall, by looking at the bottom left corner of the Status Bar which shows you the name of the object you have selected.
- Click on the Open Object
 edit button to display the Wall Hatch Specification dialog.
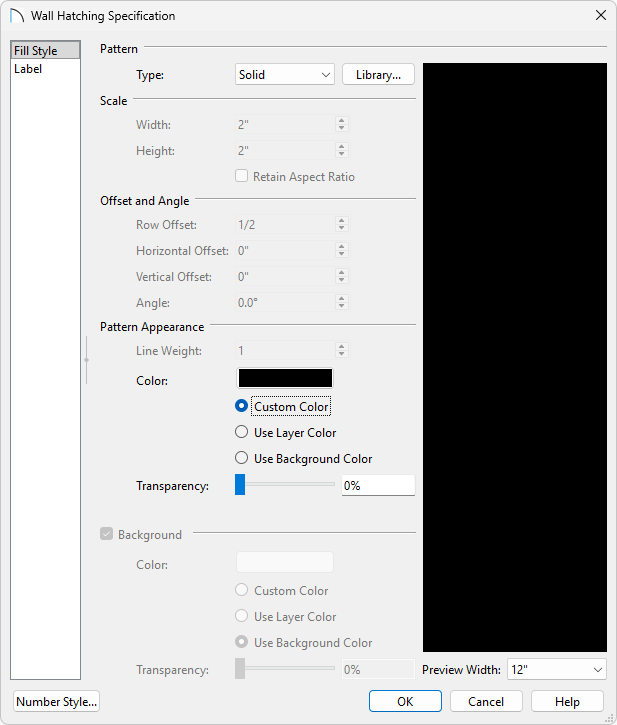
- Change the Fill Pattern to Solid.
- Set the Pattern Color to Black.
- Click OK.
- Change the Fill Pattern to Solid.
- Wall hatching can then be copied/pasted to other walls using the Copy/Paste
 edit tool.
To modify the wall hatching defaults*
*Not available in legacy Home Designer Suite and Architectural.
- Select Edit> Default Settings
 , click on the arrow next to Walls, highlight the Wall Hatching option, then click the Edit button.
- In the Wall Hatching Defaults dialog, on the Fill Style panel, make the following changes:
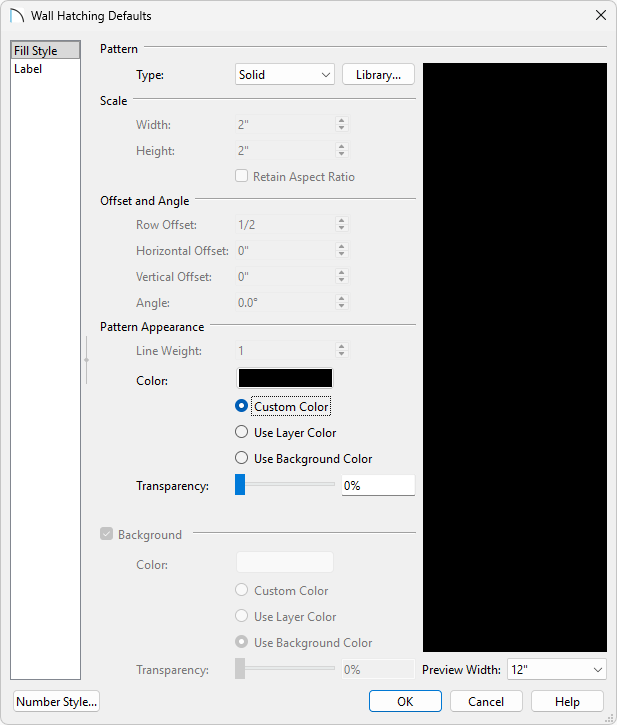
- Change the pattern Type to Solid.
-
- Set the pattern Color to Black.
-
- Click OK and Done to confirm the changes and close the dialogs.
- Navigate to Build> Wall> Wall Hatching and click on a wall that you want to change to be solid black.
Note: You may be prompted with a question that advises that the "Walls, Hatching" layer is not displayed, and asks if you want to turn it on. If so, choose Yes.
Alternatively you can define your Wall Type and set the fill to solid black, and then set them as your default so you always draw with a solid black wall type for your interior and exterior walls.
To modify the Fill Style for Wall Types*
*Not available in legacy Home Designer Suite.
- Select Edit> Default Settings , click on the arrow next to Walls, highlight the desired wall tool, then click the Edit button.
In legacy Home Designer Architectural, select the Exterior/Interior Wall option, then click the Edit button.
- In the Wall Defaults dialog that displays, navigate to the Wall Types panel on the left, then select the Define button.
In legacy Home Designer Architectural select Define for either the Exterior Wall or Interior Wall.
- In the Wall Type Definitions dialog that appears:
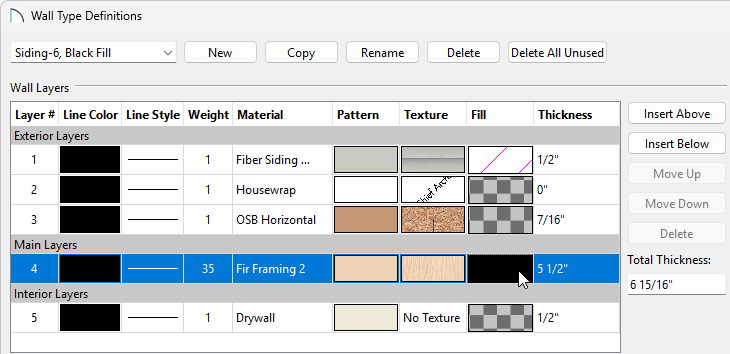
- Click on the Copy button to make of copy of the existing wall type.
In this example, a copy of the Siding-6 wall type was copied.
- Rename the wall appropriately.
In this example, the copied wall type was renamed to Siding-6, Black Fill
- In the list of wall layers, click on the Fill column box for one of the wall layers to open the Layer Fill Style dialog box.
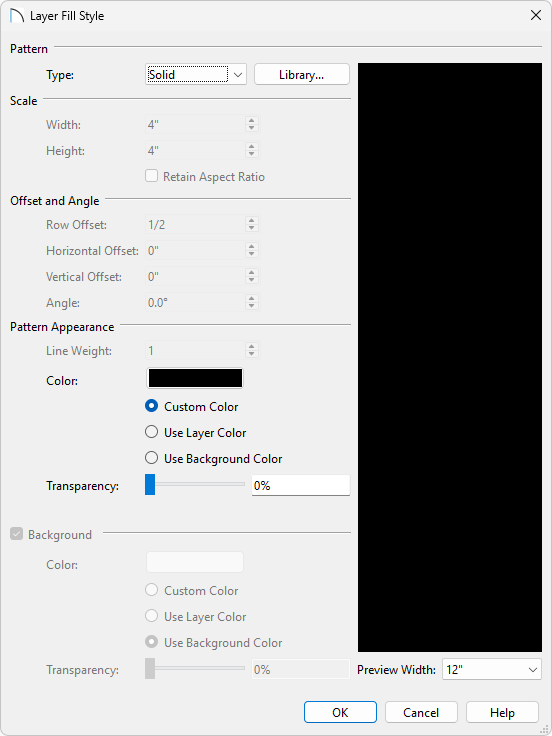
- Set the pattern Type to Solid and set the pattern Color to Black.
- Click OK.
- Set the pattern Type to Solid and set the pattern Color to Black.
- Repeat this process for each wall layer listed.
It is important to keep all of these wall layers present for the wall type, as opposed to creating a single layer wall type with a black fill, for the purposes of applying materials, generating framing, and creating a Materials List.
- Once you have finished making these changes, click OK.
- Click on the Copy button to make of copy of the existing wall type.
- Repeat this process for any additional wall types that you would like to have a black fill.
- Now, when you draw walls, they will be completely black in the floor plan view.
If you have already created a plan with the default colored wall, you can follow the same basic instructions discussed above. Once you have copied the walls and set them up appropriately, you can open the Wall Specification dialog and use the Wall Type drop-down menu to change the walls from Siding-6 or Interior-4 to the appropriate modified Black Fill wall type.
- In Home Designer Architectural, this drop-down menu is located on the General panel.
- In Home Designer 2026 and newer, as well as in Home Designer Pro, this drop-down menu is on the Wall Types panel.