Compare Products

  • Suite

    Home Designer Suite

    $129

  • Architectural

    Home Designer Architectural

    $249

  • Professional

    Home Designer Professional

    $595

Summary

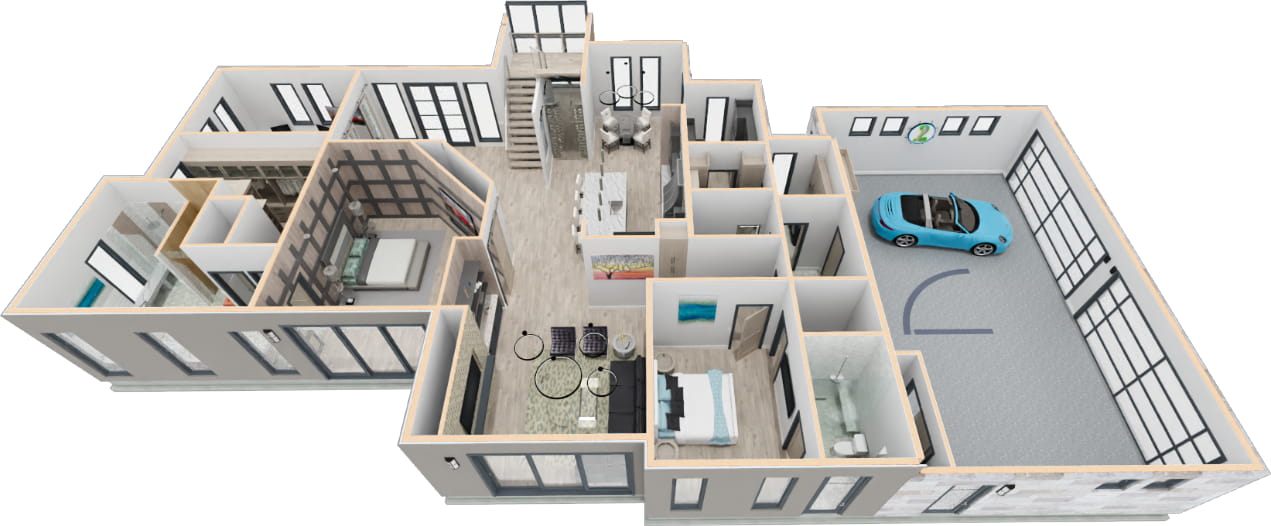
2D and 3D Design
  • Yes
  • Yes
  • Yes
Automated Building Tools: Roofs, Stairs, Floors, Foundations, Framing and Cost Estimating
  • Yes
  • Yes
  • Yes
Smart Cabinet Tools
  • Yes
  • Yes
  • Yes
Landscaping, Terrain, and Decking Tools
  • Yes
  • Yes
  • Yes
CAD Tools
  • Yes
  • Yes
  • Yes
3D Viewer - Export Models to Mobile Devices
  • Yes
  • Yes
  • Yes
Free Technical Support provided by staff at Chief Architect Headquarters
  • Yes
  • Yes
  • Yes
80+ Training Videos, 500+ How-To Articles
  • Yes
  • Yes
  • Yes
Create Custom Wall Types
  • --
  • Yes
  • Yes
Custom Backsplash and Countertops
  • --
  • Yes
  • Yes
Add Dimensions to Elevation Views
  • --
  • Yes
  • Yes
Advanced Deck Tools: Curved Decks, Roofs and Ceilings, Deck Planking Controls
  • --
  • Yes
  • Yes
Rendering Technique for Physically Based, Watercolor, Technical Illustration, and Vector Views
  • --
  • Yes
  • Yes
Import / Export DXF and DWG File Formats
  • Export Only
  • Yes
  • Yes
Printable Construction Document Layout Sheets
  • --
  • --
  • Yes
Manual Roof, Ceiling, and Framing Tools
  • --
  • --
  • Yes
Advanced Cabinet Tools
  • --
  • --
  • Yes
Fully Editable Dimensions
  • --
  • --
  • Yes
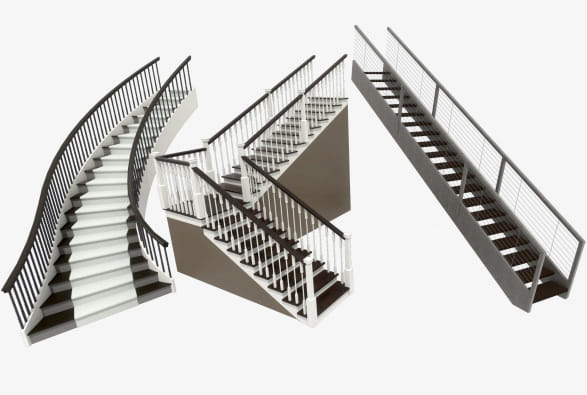
Advanced Stair Tools
  • --
  • --
  • Yes
Master List Material Pricing Management
  • --
  • --
  • Yes
North Pointer for Sun Angles
  • --
  • --
  • Yes

Design Tools

2D and 3D Design. Objects you place in 2D plan view are automatically created in 3D, real-time. Generate 3D views and select, modify, move, and delete objects directly in the view.
  • Yes
  • Yes
  • Yes
Display Coordinate Axes. Show the XYZ axes indicator and the project origin location in 2D and 3D views. Use toolbar toggles to display the Axis style and Origin Indicator.
  • Yes
  • Yes
  • Yes
Space Planning Assistant. Layout out room boxes in a bubble diagram to quickly create a floor plan. Convert diagram into walls, windows, and doors to finalized and furnish the design. Use the polyline-based Room Boxes of the Space Planner tools to customize room shapes and junctions. Controls for snapping and room overlap help make spatial design easier.
  • Yes
  • Yes
  • Yes
Plan Check™ reviews your design against basic building principles.
  • Yes
  • Yes
  • Yes
Import PDF Files. Retain print resolution and quality when printing final documents by using embedded PDF files.
  • Yes
  • Yes
  • Yes
Backup Entire Plan. Export a bundle of all the files referenced in your plan, good for archival purposes and for sharing with other users who do not have your custom materials and images.
  • Yes
  • Yes
  • Yes
Reference Display Tool. Turn on a Reference of adjacent floors to aid in designing multi-tiered decks or room layout between floors.
  • Yes
  • Yes
  • Yes
Customize Room Names. Customize the available rooms list to suit your most common needs and regional naming conventions.
  • Yes
  • Yes
  • Yes
Multiple-Select Editing. For example, select all your cabinets and change them all with one command.
  • Yes
  • Yes
  • Yes
Predictive Edit Feedback. While editing items in your view, get more visual feedback on the edit before it is applied. Understand what changes will happen before completing an edit to efficiently progress through your designs.
  • Yes
  • Yes
  • Yes
Reflect About Angle Centers. The Reflect About tool will locate the corners of walls, CAD, and other objects so you can easily select Angle Centers.
  • Yes
  • Yes
  • Yes
Undo History. Turn on the Action History window to interact with the list of commands and actions that have occurred. Perform multiple undos/redos at once by navigating the Action History list.
  • Yes
  • Yes
  • Yes
Object Painter™ / Eyedropper. Use eyedropper functionality to match properties from one object and apply them to another object. Use Scoping controls to apply changes to groups of objects at once by component, object, room, floor, and plan.
  • Yes
  • Yes
  • Yes
Automatic GFCI Outlets in Kitchens. Use the Auto Place Outlet tool to add GFCI outlets to your kitchen rooms.
  • Yes
  • Yes
  • Yes
Electrical Connections for Fixtures. Create electrical designs where Electrical Connections map fixtures and other non-electrical objects.
  • Yes
  • Yes
  • Yes
Architectural Blocks. Multi-Select and group items together to create architectural blocks, like kitchen islands, that can be moved as one, stored in the library, and unblocked for editing.
  • --
  • Yes
  • Yes
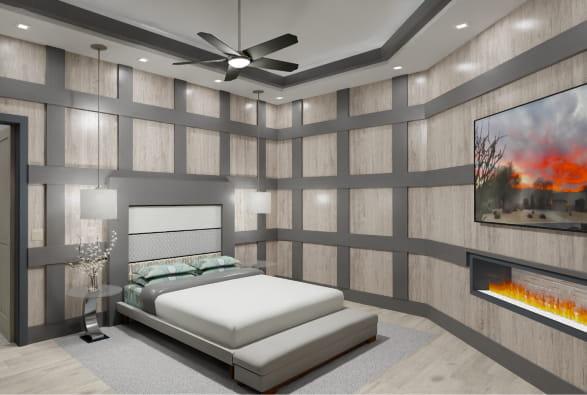
Wall Coverings. Apply coverings in the wall specification dialog to create an accent area that uses a different material. Create wallpaper boarders or wainscotting on a wall or in a room.
  • --
  • Yes
  • Yes
Rotate and Reverse Plan. Quickly change the orientation of your design for alternate versions or to better fit the lot.
  • Excludes Rotate
  • Excludes Rotate
  • Yes
Multiple Plan Views. Open multiple tabbed windows of the same plan view, show different floors separately or adjust displayed layers in different tabs.
  • --
  • --
  • Yes
Transform/Replicate at Angles. Use controls like “Relative Angle To Itself” and “Absolute Angle” to copy, edit, and move objects accurately.
  • --
  • --
  • Yes
Concentric Resize Edit Tool. Choose the Concentric Resize tool from an object’s Edit Toolbar to make concentric jump modifications to the item.
  • --
  • --
  • Yes
Draw Order Controls. Use the Draw Order Edit Tools to fully control the display of items in plan view in relation to each other. Move object forward and backward in a group, or move to different drawing groups altogether.
  • --
  • --
  • Yes
Convert Polyline Tool. Create 3D objects (countertops, slabs, terrain features, and more) from CAD objects.
  • --
  • --
  • Yes
Electrical Connection Defaults. Set up default behaviors for electrical connections, like arc curvature.
  • --
  • --
  • Yes
Custom Watermarks. Create watermarks and display them on your work. Control location, size, angle, transparency, and include images in your watermark design.
  • --
  • --
  • Yes
Printable Layout Sheets. Create blueprint layouts with 3D, CAD, Cross Section / Elevation, and Plan Views. Define any scale for the drawing.
  • --
  • --
  • Yes
Multi-Page Layouts. Use up to 5 pages on a Layout page for your projects.
  • --
  • --
  • Yes
Delete Objects for Layouts. Use the delete objects tool to clear unnecessary elements like CAD, Images, Text, and Layout Boxes from your layout documents. These controls make it easier to transition between projects when copying layout files and in developing templates.
  • --
  • --
  • Yes
Labeled Callouts. Use callouts to reference between details, plans, and cross sections in a blueprint layout. See callout previews in specification dialog.
  • --
  • --
  • Yes
Store Callouts and Markers in Library.
  • --
  • --
  • Yes

3D Tools

3D Viewer Export. Save designs to the Cloud and share them for using on mobile devices and websites using the Chief Architect 3D Viewer App.
  • Yes
  • Yes
  • Yes
Export 360° Spherical Views. Rendered cameras can be shared and embedded in websites for interactive navigation. Export these Render Views and store them to the Chief Architect Cloud to share and embed in websites.
  • Yes
  • Yes
  • Yes
Virtual Reality. Leverage HTC VIVE™ and Oculus Rift Virtual Reality Headsets to view your Chief Architect Designs. In addition to experiencing the 360d area of a scene, teleport from point to point in a model to experience multiple virtual spaces. Choose to view your models in VR from a First-Person orientation or from an Overhead view; interact with each view type to experience the details of your design.
  • Yes
  • Yes
  • Yes
3D Navigation. Easily navigate 3D views in an intuitive way. Use the 3D Focus on Object tool and select an object to make it the camera's target, or select an object then use the Focus on Selected edit tool to make the selected object the target; use [ALT + Middle Mouse] button controls to enter Orbit mode; system returns to previous edit state when buttons are released.
  • Yes
  • Yes
  • Yes
Auto-Hide Exterior Walls While Navigating. Set navigation camera views to automatically hide the backs of walls that prevent seeing into a small room. Use the Hide Camera-Facing Exterior walls tools to easily navigate small rooms.
  • Yes
  • Yes
  • Yes
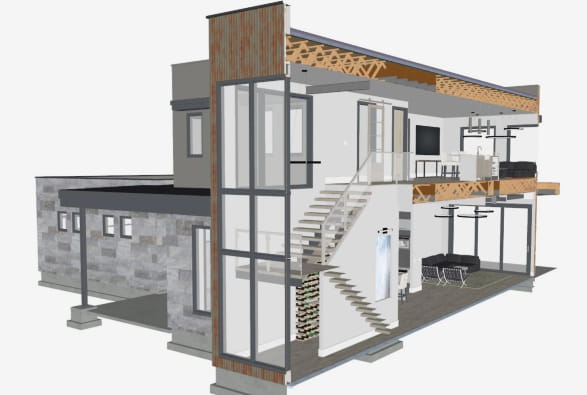
Cross Section Slider with Multiple Cutting Planes. Choose up to six cutting planes in the Cross-Section Slider view and adjust the cutting distance for each plane to create unique and detailed views.
  • Yes
  • Yes
  • Yes
3D Overview Floor Levels. Show multiple floors when creating 3D dollhouse views.
  • Yes
  • Yes
  • Yes
3D Mouse Support. Use a 3Dconnexion Mouse as your input device to efficiently navigate camera views.
  • Yes
  • Yes
  • Yes
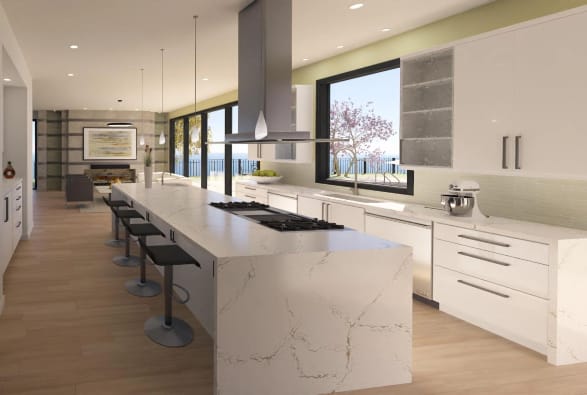
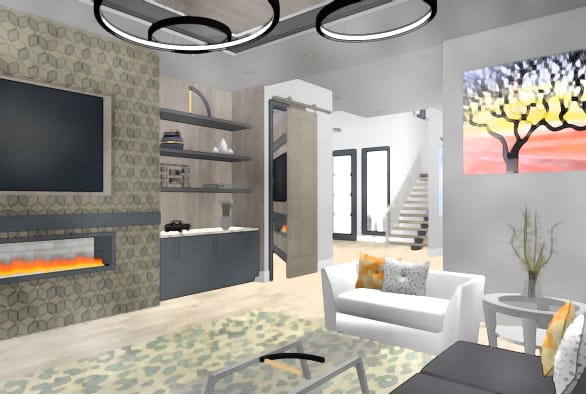
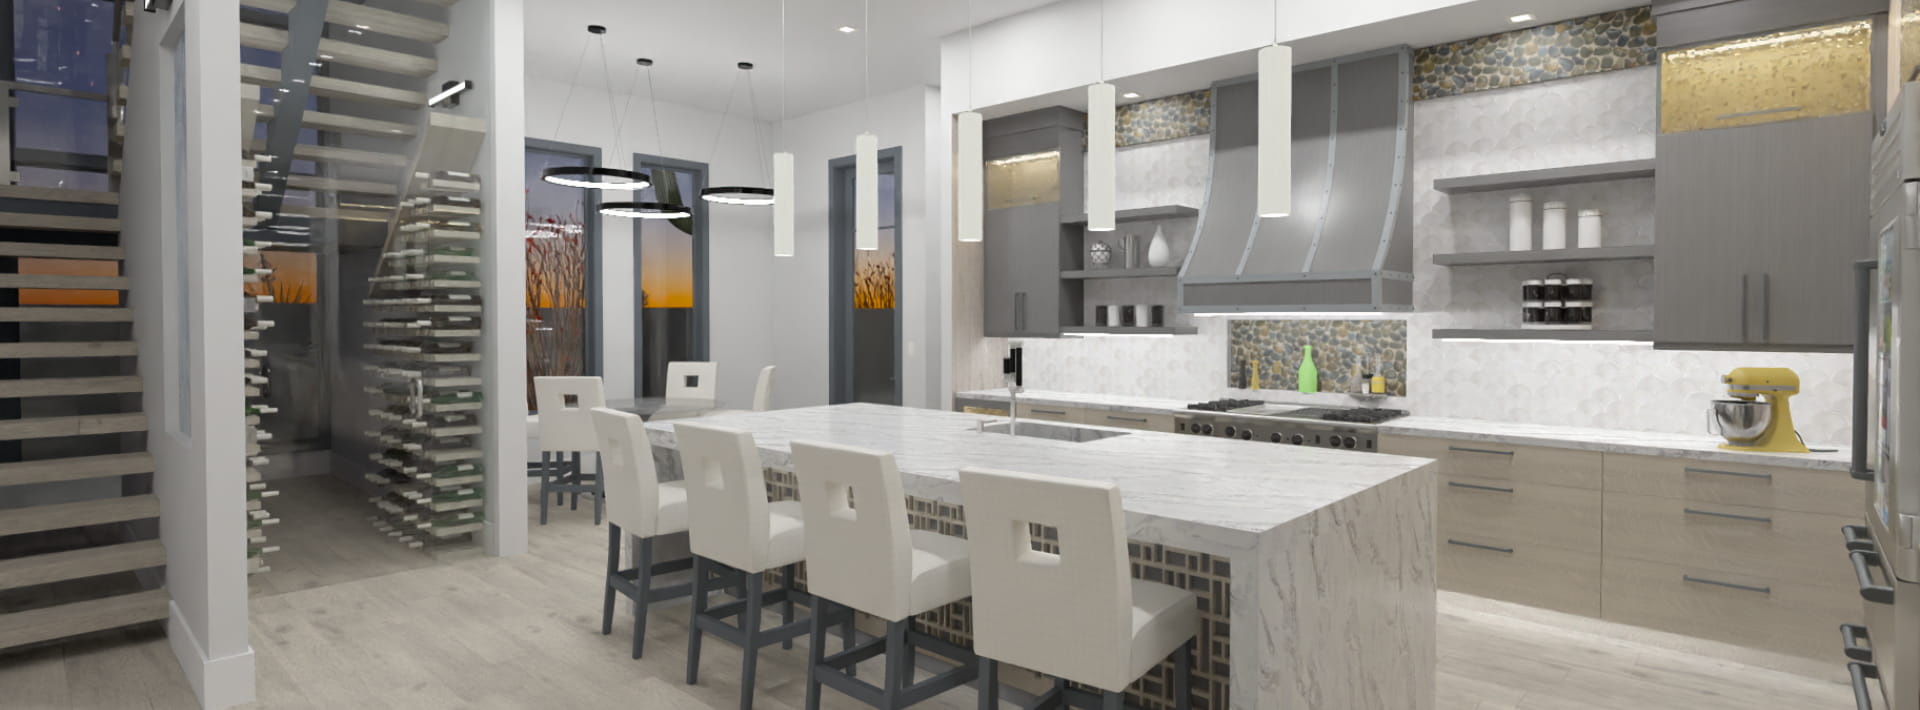
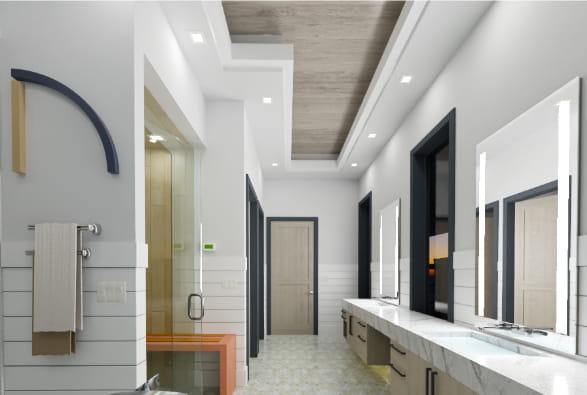
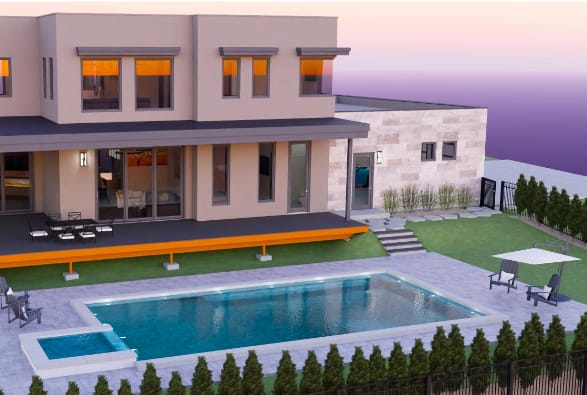
Rendering Controls. Set up camera angles and locations to create realistic 3D renderings with shadows, reflections, lighting, and material effects in interior and exterior scenes. Navigate scenes in real-time.
  • Yes
  • Yes
  • Yes
Material Eye-Dropper and Color Chooser™. Quick "click-and-drop" application of materials and colors.
  • Yes
  • Yes
  • Yes
Blend Color Tool. Change the Color of any material while retaining its texture, similar to applying stain to wood.
  • Yes
  • Yes
  • Yes
Adjust Material Scoping. When editing a material in a 3D view using the Adjust Materials tool, choose the scope of impact to adjust the material throughout your project, or create a copy on-the-fly for a subset of objects using the material. After editing a material’s properties, quickly save the change with the Add to Library tool.
  • Yes
  • Yes
  • Yes
Export image files of your designs to share. (.JPG, .PNG, .BMP). Set Pixel Resolution and Image Output measurements when exporting images.
  • Yes
  • Yes
  • Yes
Saved Cameras. Save, edit, and re-open 3D and Render Views to quickly see your favorite camera images. Duplicate perspective and overview cameras in the same plan, or between existing plans, to easily replicate angle, direction, and other camera attributes.
  • Yes
  • Yes
  • Yes
Reset Saved Camera. In a modified 3D view, use the reset camera options for ‘Position’ or ‘All’ settings to update the view to its previously saved state.
  • Yes
  • Yes
  • Yes
Create accurate day or night-time views of your lighting plan.
  • Yes
  • Yes
  • Yes
Sky Model. Control settings for the sun, moon, horizon and their impact on a scene’s lighting from within the camera’s specification dialog.
  • Yes
  • Yes
  • Yes
Record Walkthrough Videos Along a Specified Path. Add key frames at any point on the spline to control view direction and speed; walk up or down stairs and to span walkthrough between floors.
  • Yes
  • Yes
  • Yes
Walkthrough Editing. Use key frame editing controls to quickly adjust and modify individual keyframes directly from the preview dialog and the edit toolbar. Join multiple walkthrough segments as one path and retain the keyframe details from the original pieces. Use the Complete Break tool to break an existing walkthrough into individual parts or use existing, longer walkthroughs to record sub-sections as smaller animations without generating a new path.
  • Yes
  • Yes
  • Yes
Walkthrough Preview Panel. While laying out your walkthrough path, see your changes and editing live before spending time recording the sequence.
  • Yes
  • Yes
  • Yes
360 Exterior Walkthrough. Create an automatic walkthrough path that orbits the exterior of your design.
  • Yes
  • Yes
  • Yes
Artificial Terrain. Use the Extend Terrain to Horizon feature in the Camera Specification dialog to display the ground in 3D beyond the boundaries of the plan view’s terrain perimeter.
  • Yes
  • Yes
  • Yes
Procedural Grass Areas. Use Grass Region tools to create areas that simulate 3D grass; specify the length, density, color, and other parameters to achieve more natural-looking grass in your scenes.
  • Yes
  • Yes
  • Yes
Focal Blur. Turn ON Depth of Field in perspective views; set focal points using the camera tools and set the intensity of the blur with F-Stop settings.
  • Yes
  • Yes
  • Yes
Depth Cueing. Assign a ‘foggy’ or shaded effect to areas that are a specified distance from the camera to differentiate the foreground from the background of a scene. Define gradient values to control the intensity range of Depth Cueing.
  • Yes
  • Yes
  • Yes
Custom Lighting. Define shadows, intensity, and more. Locate lights by label name or room location with the Adjust Lighting Dialog.
  • --
  • Yes
  • Yes
Rendering Technique Tools. Create artistic views of your designs like Watercolor, Technical Illustration, and Vector Views.
  • --
  • Yes
  • Yes
Physically Based Rendering. Improve the quality of your scenes where lighting, shadows, metal, and surface reflections are concerned with the Physically Based Rendering Technique (also known as PBR).
  • --
  • Yes
  • Yes
Pattern Scaling. Set X and Y sizing values for custom patterns so they scale uniformly or stretch.
  • --
  • Yes
  • Yes
Edit Parametric Patterns. Modify the sizing and offset for the Herringbone and Grid pattern types to accurately match your final installation pattern.
  • --
  • Yes
  • Yes
Multiple Camera Defaults. Specify default values for each camera type; control, layer assignment, active Rendering Technique, and more.
  • --
  • --
  • Yes
Cross Section Slider for Any Camera View. Use the Cross Section Slider in orthographic and vector views, along with other rendering techniques and view types.
  • --
  • --
  • Yes
Full control of render settings allows you to customize your realistic rendering for speed or visual quality.
  • --
  • --
  • Yes
Export Images with Transparent Background. Export .PNG and .TIF images that treat the backdrop as transparent, making it easy to overlay the graphics on other artwork without the need for additional photo manipulation.
  • --
  • --
  • Yes
Leverage the North Pointer for Sun Angles. Create Sun Angles with accurate longitude, latitude, date, and time; use North Pointer as bearing for sun angle. Easily identify Sun Angles to be used for saved cameras or to be adjusted by their date and time naming.
  • --
  • --
  • Yes
Spherical Backdrop Controls. Control offsets, orientation, and Eye Level for spherical backdrops.
  • --
  • --
  • Yes
Opaque Glass in Camera Views. Set glass to appear as solid fill (non-transparent) in camera views. Choose to show glass as opaque or transparent by default per Render Technique, or adjust individual views.
  • --
  • --
  • Yes
Group Select and Edit Cameras. Select multiple cameras at one time and edit their properties, like height off floor or the Rendering Technique used.
  • --
  • --
  • Yes
Export .DAE 3D files. Includes texture mapping that can be leveraged with external rendering software.
  • --
  • Yes
  • Yes
STL Import and Export. Use the .STL format to use with 3D Printers.
  • --
  • Yes
  • Yes

Cost Estimating / Materials List

Project Cost Estimation. Automatically generate a materials list for budgeting and planning a project.
  • Yes
  • Yes
  • Yes
Specify when a room is calculated in the Living Area. For example, specify the garage or attic to be included or excluded in the living area calculation.
  • Yes
  • Yes
  • Yes
Deck and Framing Cut & Buy Lists. A Structural Lumber Table can be used to calculate lumber materials for a Cut & Buy List. This calculation is in addition to square feet and lineal feet calculations and can be especially helpful for your framing and decking board calculations.
  • Yes
  • Yes
  • Yes
Export Materials Lists to spreadsheet programs including Microsoft® Excel.
  • Text File Only
  • Text File Only
  • Yes
Find in Plan from the Materials List. Select items from the materials list and choose to Show in Plan to identify and locate them in your design.
  • Yes
  • Yes
  • Yes
Control Materials List Formatting. Use defaults to control fonts and table styles for Materials Lists and Reports.
  • Limited
  • Limited
  • Yes
Save snapshot Materials Lists for different stages of the project. Allows you to evaluate different ideas, compare cost differences, and plan stages of construction.
  • --
  • --
  • Yes
Add detail to each individual component in the materials list for a comprehensive cost estimate breakdown. For example, assign components to your cabinets, such as doors, pulls, and hinges and assign costs for each item. Access these attributes from the Components panel of its specification dialog.
  • --
  • --
  • Yes
Master List allows you to store and manage commonly-used material prices.
  • --
  • --
  • Yes

Dimensioning

Manual and Automatic dimensioning. Includes One-Click™ Automatic dimensions.
  • Yes
  • Yes
  • Yes
Auto Refresh Exterior Dimensions. Keep Auto Exterior Dimensions up-to-date as you move walls and openings in your design.
  • Yes
  • Yes
  • Yes
Temporary Dynamic Wall Dimension. Display temporary dimensions as walls are drawn.
  • Yes
  • Yes
  • Yes
Adjust Position using Dimensions. Use dimensions to quickly position objects with precision. Use simple arithmetic formulas while editing dimensions to easily move objects in a design.
  • Yes
  • Yes
  • Yes
Default Dimension Format & Arrows. Control the unit formatting, arrows for the default dimensions. Quickly change the look of the dimensions in your design through a single dialog.
  • Yes
  • Yes
  • Yes
Dimension Unit Display Threshold. Set a threshold where dimensions display in inches when the value is less than the specified amount; for example, show dimension as 18” instead of 1’ 6”.
  • Yes
  • Yes
  • Yes
Delete Dimension Tool. Quickly delete all dimensions in an active view with this dimension toolbar button.
  • Yes
  • Yes
  • Yes
Advanced Dimensioning Tools. Includes angular, point-to-point, and interior dimensions.
  • Interior Dimensions
  • Interior Dimensions
  • Yes
Fully Editable Dimensions. Define where dimensions locate walls, windows, doors, and other objects, when generating dimensions automatically or manually.
  • --
  • --
  • Yes
Locate Defaults per Dimension Tool. For each dimension tool, set up location snapping; for example, set the Center Line dimension tool to pick up only walls and fixture centers for kitchen and bath dimension defaults or only pier and post centers for deck or framing defaults.
  • --
  • --
  • Yes
Angled Dimensions. Set up behaviors for Angled Dimensions within Dimension Default.
  • --
  • --
  • Yes
Dimension to Foundation Wall Steps. Snap dimensions to elevation height transitions on stepped foundation walls in plan and elevation views.
  • --
  • --
  • Yes
Dimension Framing in Elevation Views. Display and dimension to framing members in Elevation and Cross Section views.
  • --
  • --
  • Yes

CAD / Elevations

Create Elevation, Wall Elevation, and Cross Section Views for the interior and exterior of your design.
  • No Cross Section
  • Yes
  • Yes
Clip Cross-Section Views. Turn on clipping for sides and back-clipping to limit your view to relevant details for precise plan editing.
  • --
  • --
  • Yes
Convert Wall Elevations to Section Views. Regardless of the camera tool used to create a Section View, Elevation, or Wall Elevation, it can be edited to behave as the other view types. Expand Wall Elevations to included parts of the scenes beyond a room (like vaulted ceilings or multi-room suites), or crop larger Sections to show smaller spaces.
  • --
  • --
  • Yes
Show Vaulted Ceilings in Wall Elevation Views. Wall Elevations for rooms with vaulted and sloped ceilings include the full wall height; the elevation can be set to crop at the top of the wall plate using the “Ignore Walls Above” setting.
  • --
  • --
  • Yes
Center CAD in Elevation Views. Use the Center Objects tool in Elevation Views to control the location of CAD objects.
  • --
  • Yes
  • Yes
Import / Export files in DXF and DWG file formats.
  • Export Only
  • Yes
  • Yes
Layers can be used to separate key building components such as electrical or framing. Display or hide features of your design, set colors, lock layers, and use reference layers for precise editing.
  • Limited
  • Limited
  • Yes
Text Tools and Customization. Add custom text as notes and modify text in plan with attributes and treatments like font, bold, underline, caps, size, and color. Embed hyperlinks in text objects; open the URL path using CTRL + click.
  • Yes
  • Yes
  • Yes
Text Style Tools. Create Text Styles and assign them per layer, per default, or per object to control the appearance of labels, dimensions and other text in your design.
  • Limited
  • Limited
  • Yes
Find and Replace Text in Plan. Quickly search for and replace words or strings of text used in your project for entire plan, or for just the currently selected text.
  • Yes
  • Yes
  • Yes
Replace Fonts. Use the Replace Fonts tool to substitute font types throughout your plan.
  • Yes
  • Yes
  • Yes
Standard CAD tools to detail your designs.
  • Yes
  • Yes
  • Yes
Advanced CAD tools to detail cross-section views with insulation, cross-boxes, blocking box, and more.
  • --
  • --
  • Yes
Polyline Editing. Select any polyline and choose Close Polyline to automatically connect the start and end points. Editing of filleted polylines retains fillet radius.
  • --
  • --
  • Yes
Advanced CAD editing tools such as replicate, line weights, point-to-point move, custom patterns, and stretch CAD.
  • --
  • --
  • Yes
Box and Bumpout Extension Snaps. Snap to projected 90° intersections.
  • Not Visual
  • Not Visual
  • Yes
Visual CAD Snaps™ feature with setup dialog and snap options to control.
  • --
  • --
  • Yes
Automatic Roof Labels. Display labels for roofs, skylights and holes. Label includes pitch direction arrow and the roof angle in pitch or degrees. Modify the arrow style and text style of the roof labels.
  • --
  • Yes
  • Yes
Specify labels for Light Source or “added light” objects. Uniquely name light sources in your scenes for easy recognition.
  • --
  • --
  • Yes

Windows / Doors / Cabinets

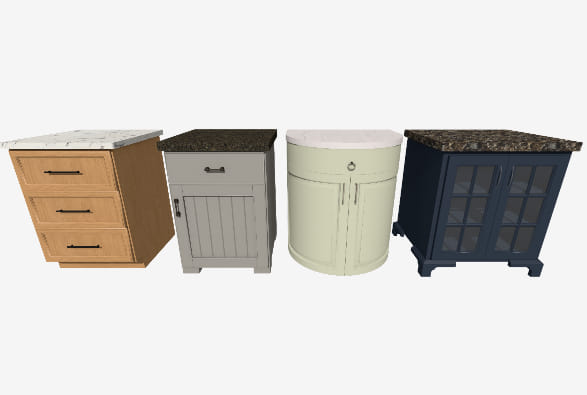
Cabinet Tools. Place base, wall and full height cabinets, partitions and shelves, and soffits and edit them to suit your design. Use placment feedback to create a corner cabinet or shelf.
  • Yes
  • Yes
  • Yes
Advanced Cabinets. Attach moldings and hardware, angled front cabinets, and more.
  • Moldings Only
  • Yes
  • Yes
Dynamic Cabinet Face Defaults. Configure the default cabinet front to automatically update cabinets in the design that are set as “Use Default".
  • Yes
  • Yes
  • Yes
Cabinet Door Size. Discover the overall size of cabinet doors and drawers while selected in the cabinet specification dialog.
  • Yes
  • Yes
  • Yes
Clipped Cabinet Overhang. Automatically clip cabinet counter overhang when it butts against appliances and partitions.
  • Yes
  • Yes
  • Yes
Design and edit Custom Countertop shapes and styles.
  • --
  • Yes
  • Yes
Custom Backsplash Tool. Click to generate a Custom Backsplash that automatically fits around cabinets, openings, and appliances.
  • --
  • Yes
  • Yes
Waterfall Counters. Automatically specify the edge of a custom counter as “Waterfall” to create a solid section from the counter’s top to the floor.
  • --
  • Yes
  • Yes
Cabinet Hardware per Drawer. Control the hardware attached to any door or drawer on a single cabinet separately.
  • --
  • --
  • Yes
Frameless Cabinet Settings. Change the cabinet style in one click with the Frameless and Full Overlay options for cabinets.
  • --
  • --
  • Yes
Place Multiple Appliances in a Cabinet. Add an oven and a warming drawer to the same cabinet; adjust or replace the appliance type by editing it in the Cabinet Specification dialog.
  • --
  • --
  • Yes
Insert Items inside Cabinets. Attach custom shelves, storage, and hardware items into cabinet boxes and specify their behavior per face item.
  • --
  • --
  • Yes
Multiple Door and Drawer Styles per Cabinet. Assign different door or drawer styles to a single cabinet; wall cabinets with glass doors on top; drawer bases with slab and panel drawers.
  • --
  • --
  • Yes
Evenly Space Doors and Drawers on Cabinet Fronts. Use the Equalize Layout button on Horizontal and Vertical Layouts to space their components equally.
  • --
  • --
  • Yes
Multiple Faced Cabinets. Use the Split Items button to add horizontal and vertical layout of doors and drawers on any cabinet. Create Entertainment Centers and Vanity cabinets with doors on one side and drawers on the other.
  • --
  • --
  • Yes
Rounded Countertop Corners for Automatic Countertops.
  • --
  • --
  • Yes
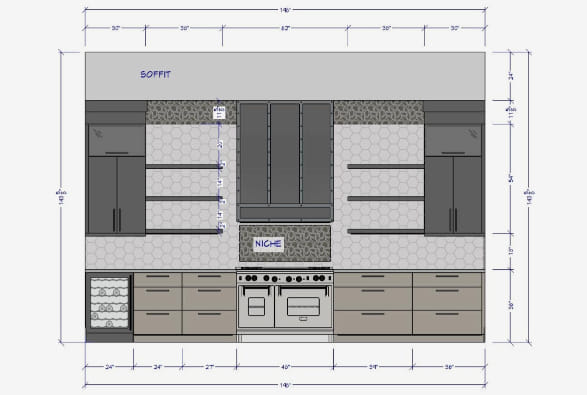
Dimension to Cabinet Toe Kicks, Moldings, Backsplashes and Countertops. Set up locate configuration for dimensions; use the automatic dimension tools in elevation views to automatically include these dimensions.
  • --
  • --
  • Yes
Control Partition Toe Kick. Choose to include or exclude a toe kick on cabinet partitions.
  • --
  • --
  • Yes
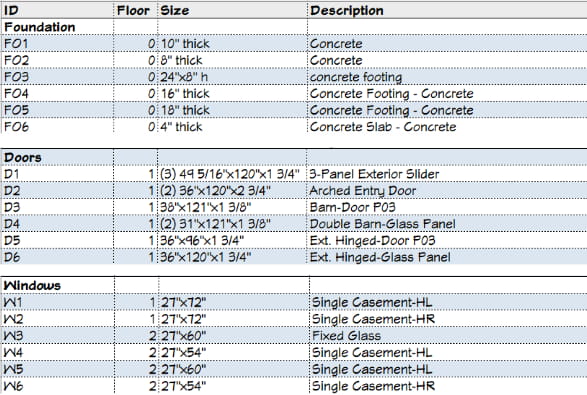
Door Defaults by Door Type. Set unique door defaults for different types of doors: hinged, pocket, bifold, sliding, barn, fixed, shower, and garage.
  • Yes
  • Yes
  • Yes
3D Door Display Options. Edit tools “Show Door Open in 3D” and “Show Door Closed in 3D” make it fast and easy to control the state of doors in 3D views.
  • Yes
  • Yes
  • Yes
Door Panel Offset. Use offset values to control the door panel location relative to walls. Set sliding doors to be offset from the door surface, or set the inset amount of the panel in the door frame.
  • Yes
  • Yes
  • Yes
Specify Door Thickness. Assign thickness to parametric and library doors, cabinet doors, drawers, and panels.
  • --
  • --
  • Yes
Sill and Threshold Control for Openings. Use checkboxes for Sill and Thresholds for explicit control of doors, windows, and openings.
  • --
  • --
  • Yes
Atrium Door Options. Create Center Swing Double Doors, also known as atrium patio doors.
  • --
  • --
  • Yes
Customize Door Glass. Independently set the top, bottom, left, and right frame size for panel and glass panel doors. Create garage and entry doors with asymmetric windows. Choose to set all garage door panels to use glass.
  • --
  • --
  • Yes
Door and Window Frame Toggle. Choose to include or exclude frame for openings with "Has Frame" controller.
  • Yes
  • Yes
  • Yes
Control Trim for Interior Doors and Windows. Separately specify the materials and trim assigned to each side of an opening.
  • Yes
  • Yes
  • Yes
Parametric Window Tools. Create Double-Hung, Fixed, Casement, Hopper, and other windows styles and change a window's style on the fly using parametric tools.
  • Yes
  • Yes
  • Yes
Bay, Box, Bow Window Tools. Click and drop bay, box, and bow windows in a wall. Resize and customize the unit as a whole.
  • Yes
  • Yes
  • Yes
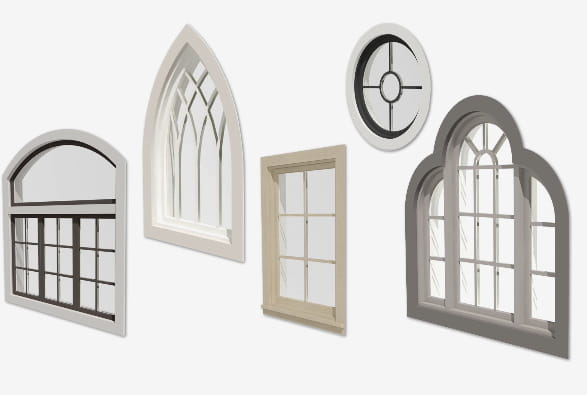
Arched Top Windows & Doors. Specify Round Top, Gothic Arch, or Broken Arch shapes to windows and doors. Adjust the amount of curvature.
  • Yes
  • Yes
  • Yes
Angled Top Window Controls. Adjust the angle of window tops. Apply changes to the left, right, or center of the window.
  • Yes
  • Yes
  • Yes
Corner Windows. Bump windows together at wall corners and choose to include or remove the corner post at the sash joint to create a glass corner.
  • Excludes Glass Corner
  • Excludes Glass Corner
  • Yes
Window Treatments & Interior Shutters. Adjust curtains by the height off floor and height above casing. Specify shutters on the interior of a window. Blinds fit inside casing when attached to windows.
  • --
  • Yes
  • Yes
Opening Indicators. Display opening indicators for hinged and sliding windows and doors in camera views. Set up default behaviors to configure the indicators to your drawing standards.
  • --
  • --
  • Yes
Lintel and Sill Control. Separately display Lintels or Sills for windows.
  • --
  • --
  • Yes
Automatic Frame Depth. Set window frame depth to automatically fit into wall.
  • --
  • --
  • Yes
Comments and Notes per Object. Use the Object Information panel to easily add and manipulate Code, Comment, Description, and Manufacturer fields through items' specification dialog.
  • --
  • --
  • Yes

Libraries / Catalogs

Included Library Items for customizing and creating designs. Fixtures, furniture, accessories, and materials to create your scenes. Add more variety by downloading Bonus and Branded catalogs from Chief Architect's 3D Library.
  • 6,500+
  • 8,800+
  • 8,800+
Brand Specific Library Items. Downloadable catalogs can be added to your library browser to expand the selection of Brand Name objects for enhancing your designs and scenes. New catalogs offered regularly.
  • 45,000+
  • 46,000+
  • 46,000+
Bonus Catalog Add-Ons. Generic furniture, materials, fixtures, hardware, and accessories, some free and others for purchase, can be downloaded and added to your library browser for more design choices. New catalogs made available monthly.
  • Yes
  • Yes
  • Yes
Catalog Migration. Core, Bonus, Manufacturer and User Catalogs from previous installs automatically migrate and update to the latest version at install time. Use the catalog migration dialog to specify which catalogs to bring forward.
  • Yes
  • Yes
  • Yes
Library Browser. Use various filter tools based on User-Defined Tags, Object Properties and Types, and Favorites to find and manage objects in the Library Browser. View and browse through filtered results; discover details about individual objects. Customize your experience with personalized Tags and Saved Filters. Use the Back button to view previous results.
  • Yes
  • Yes
  • Yes
Library Search Bar and Context Menus. Quickly search for Library items by keyword, object type, or style. Choose to search for items in entire catalog or in specific folders only. Customize search attributes for User Catalog content. Refined Search in Library Browser. Use terms “AND”, “OR”, and “NOT”, and create search groups using parentheses ‘()’ in library searches to refine results.
  • Yes
  • Yes
  • Yes
Search Online for Available Catalogs. Use the search tools inside Chief Architect’s Library Browser to discover and download content from the 3D Library.
  • Yes
  • Yes
  • Yes
Update Catalogs on Demand. Reference a catalog’s library browser icon to determine if an update is available. Use the context menu to update selected catalogs or use the Update Library Catalogs command to update all at once.
  • Yes
  • Yes
  • Yes
Ability to Export Custom Libraries. Share your libraries with other Home Designer Users.
  • Yes
  • Yes
  • Yes
Find in Library. Determine whether or not a selected object exists in the library browser using an edit tool, or through the Replace from Library dialog.
  • Yes
  • Yes
  • Yes
Library Painter Scoping. Apply library items to parametric objects using scoping. For example, replace cabinet hardware on a single drawer, on an entire cabinet, for all cabinets in a room, on a floor level, or in the whole plan.
  • Yes
  • Yes
  • Yes
Replace Freestanding Symbols via Painting. Use Library Painter and Scoping Controls to replace symbol objects in your designs. Choose a new barstool from the library, and click on an existing barstool in your design to replace it and items like it.
  • Yes
  • Yes
  • Yes
Custom Materials and Images. Save custom image billboards and paintable materials in the User Library to include and reuse in your projects.
  • Yes
  • Yes
  • Yes
Import 3D Library objects in .3DS, .OBJ, .SKP, & .DAE formats.
  • Yes
  • Yes
  • Yes
Edit Parametric Items in Library Browser. Once saved into the Library, open and edit the properties of Cabinets, Windows, Doors, and other parametric items.
  • Yes
  • Yes
  • Yes
Store and Edit Text in Library Browser. Add individual, unblocked pieces of text to the Library Browser for easy preservation and reuse in future projects.
  • Yes
  • Yes
  • Yes
Patterns and Fill Styles Library. Access your favorite patterns from the Library Browser. Easily apply fills and patterns to objects and materials from their specification dialogs and through the Fill Style Painter tool.
  • --
  • Yes
  • Yes
Library Browser filtered views. Choose to show or hide entire library catalogs in the Library Browser tree.
  • --
  • --
  • Yes

Stairs / Ramps / Railings

Stairs and Ramps. Draw stairs or ramps in designs and modify length, treads, and style of stairs. See stair preview in dialog to preview your modifications.
  • Yes
  • Yes
  • Yes
One-Click™ Stairs & Ramps. Auto place stairs from platform to platform. Place full length stairs with a single click. Stairs and Ramps automatically connect to the terrain when drawn from the ground to the structure.
  • Yes
  • Yes
  • Yes
Ramp Tool. Default Ramp is ADA compliant. Specify length and slope rise and run for non-traditional ramps such as skateboard ramps.
  • Yes
  • Yes
  • Yes
Refined Stair Controls. Use the Break Line edit tool and Disconnect Selected Section tool to edit and add break points to an existing stair. Use the key to select, disconnect, edit, or move an individual stair section or landing; the default move handle allows the entire group to be moved together.
  • Yes
  • Yes
  • Yes
Customize Stair Components. Control the number, placement, size, and materials of the stringers under a stair. Control the thickness and material of the wall trim along a stair. Specify materials for stair risers and stringers separately.
  • Yes
  • Yes
  • Yes
Auto L-Shaped and U-Shaped Stairs. Use the L and U stair tools to automatically drop stairs with landings into plans; stairs will orient and snap to adjacent walls. Split landings into multiple segments using dialog box controls for U-shape and L-shape stairs.
  • Yes
  • Yes
  • Yes
Wrap Around Stairs. Join stairs on outside or inside corners.
  • Yes
  • Yes
  • Yes
Stair Railings. Railings specified for stairs can be customized with different rail styles (balusters, open, middle rail, panels)and multiple rails.
  • Yes
  • Yes
  • Yes
Railing Tools. Assign symbol Railing Balusters, Newels, and Panels. Specify railings, balusters, and newels from the Library Browser for railing walls. Control Railing beam and top and bottom rail configurations.
  • Yes
  • Yes
  • Yes
Landing Tool. Create Custom Landings to auto-connect Stair sections or Ramp sections together. Choose auto adjust features for the height and thickness based on stair or ramp connection. Turn railings on or off per Landing edge.
  • Excludes Editing and Auto Adjust
  • Excludes Editing and Auto Adjust
  • Yes
Advanced stair tools allow control of shape, starter treads, flaring, tread width, and more. Full control over curved staircases.
  • --
  • Limited
  • Yes
Pony Walls and Railings Follow Stairs. Create Fully Housed Stairs using a pony wall with a railing on top and set to follow the slope of the stairs.
  • --
  • --
  • Yes
Offset Railings. Control post, newel, and railing locations; extend posts and and balusters below floor platform.
  • --
  • --
  • Yes
Define Stair Starting Elevation. Specify whether stairs and ramps are located at the sub-floor or the finished floor elevation.
  • --
  • --
  • Yes

Building Tools

Automatic building tools for roof generation, stairs, dimensioning, foundations, framing and electrical.
  • Yes
  • Yes
  • Yes
Building tools to customize floors and ceilings. Control over ceiling height and vault. Use an edit tool to quickly change a room’s ceiling type from flat to vaulted.
  • Yes
  • Yes
  • Yes
Design Multiple-Story Buildings. Create structures with up to 5 floor levels in addition to an attic and basement foundation.
  • 3 Levels
  • Yes
  • Yes
Omit Foundation per Room. Choose to build or exclude a foundation in the Room Specification dialog; useful for spaces like patios.
  • Yes
  • Yes
  • Yes
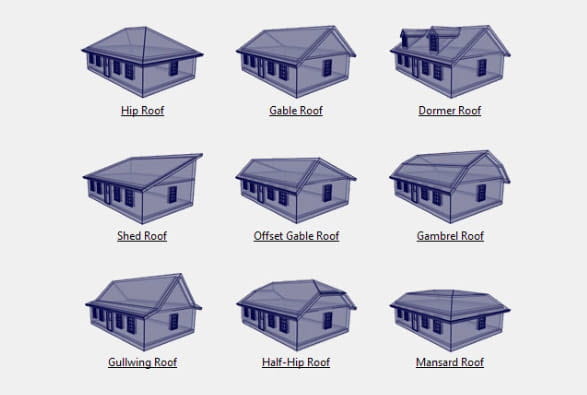
Automatic Roofs. Gable, hip, shed, gambrel, Dutch gable, roof returns and more. Access roof defaults for each project.
  • Yes
  • Yes
  • Yes
Gable & Hip Roof Toggle tool. Toggle the roof between these two styles using the Gable / Hip tool in 3D and 2D.
  • Yes
  • Yes
  • Yes
One-Click Auto Dormer™. Build dormer on roof automatically while cutting a hole for the ceiling.
  • Yes
  • Yes
  • Yes
Skylight Shape. Edit skylight shape using the skylight detail view tool.
  • --
  • --
  • Yes
Manual Roof Tools. Create and edit any custom roof planes. Start with an automatic roof and then add custom details, or create the entire roof manually. Control framing and pivot point for individual roof planes.
  • --
  • --
  • Yes
Automatic Structural Dormers. Build dormers automatically with walls that reach the floor.
  • --
  • --
  • Yes
Unblock and manually edit Automatic Dormers.
  • --
  • --
  • Yes
Flush End Boxed Eaves. Auto-generate boxed roof soffits that are flush at gable walls and control their materials.
  • --
  • --
  • Yes
Ceiling Plane Tool. Create custom ceilings of any slope and shape; vaulted, cathedral, and more.
  • --
  • --
  • Yes
Convert Planes to Polylines. Edit Roof and Ceiling Planes using the Convert to Plain Polyline tool to easily create a CAD line that is duplicate to the plane’s shape.
  • --
  • --
  • Yes
Glass Wall Tool. Use the glass wall tool to quickly draw a new glass wall via the wall parent toolbar.
  • Yes
  • Yes
  • Yes
Custom Wall Types. Create, copy, edit, and delete wall types with layers to match your projects.
  • --
  • Yes
  • Yes
Multiple Framing Layers in Wall. Create wall types with multiple framing layers and automatically generate framing for both layers; ideal for furred basement walls.
  • --
  • Yes
  • Yes
Wall Hatching. Set up attributes for the Wall Hatching tool in your template plan so that it defaults to look the way you’d like it to for every project. Copy and Paste wall hatching throughout your design to easily indicate wall areas of note.
  • --
  • --
  • Yes
Glass Ponywall Tool. Wall tool to quickly draw a glass wall over a solid wall, perfect for showers.
  • --
  • Yes
  • Yes
Create pony walls and edit wall shape in cross section view. Add beadboard to a kitchen, add stone to the outside of your design, or create a stepped foundation for a hillside lot.
  • --
  • Limited
  • Yes
Pony Wall Height Controls. Adjust the height of individual Pony Walls by typing the lower wall’s height into the dialog.
  • --
  • Yes
  • Yes
Railing Over Solid Wall. Generate Pony Walls with a railing as the upper wall type.
  • --
  • --
  • Yes
Wall Defaults. Default controls for interior and exterior walls.
  • --
  • --
  • Yes
Wall Labels. Specify wall labels to identify individual walls.
  • --
  • --
  • Yes
Molding Specification. Easily manage moldings attached to an object through the moldings panel and see a preview moldings assigned to rooms.
  • Yes
  • Yes
  • Yes
Auto Place and Delete Corner Boards and Quoins. Automatically add or remove trim details to wall corners.
  • --
  • Yes
  • Yes
Monolithic Slab technology. Designing slab foundations is fast, easy, and accurate.
  • Yes
  • Yes
  • Yes
Advanced Foundation Controls. Specify foundation types by room, foundations with slab at top of Stem Wall, garage slabs with monolithic foundations, foundation piers as round or square, and other foundation customizations.
  • --
  • --
  • Yes
Slab Volume listed in the slab specification dialog for easy reference.
  • --
  • --
  • Yes
Horizontal Wall Framing. Use the automatic framing tools along with wall definitions to create wall types suited for some Pole Buildings and Timber Framing scenarios. Set up girt spacing within the wall’s properties, including distance from the ground.
  • --
  • Yes
  • Yes
Customize construction methods for walls, floors, ceilings, and foundations. Specify wall layers, floor structure, platform height, mudsills, framing methods, and more.
  • --
  • --
  • Yes
Balloon Framing. Set automatic framing tools to generate true balloon framing and offer flexible settings for specifying where to include or exclude this framing technique.
  • --
  • --
  • Yes
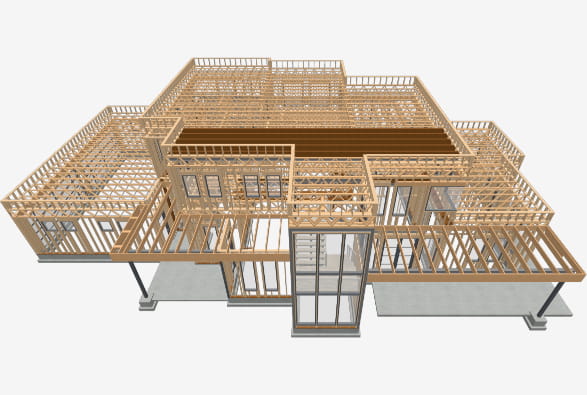
Manual framing tools for fully editable framing, including joists, rafters, trusses, beams, posts, and more. Create any framing system for your design.
  • --
  • --
  • Yes
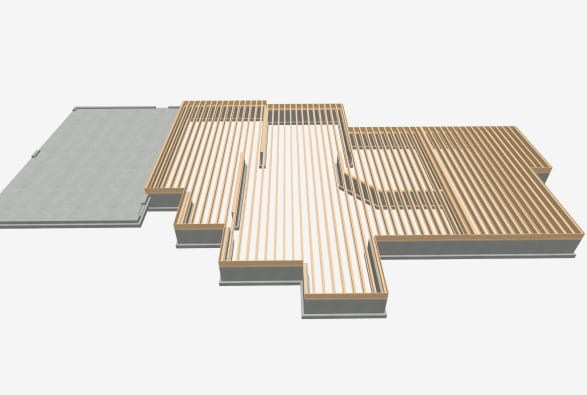
Build All Framing Tool. Choose to “Build All Framing” in your project, generating Roof, Wall, Platform, and Deck framing in a single click.
  • --
  • --
  • Yes
Build Framing Panel. Choose to generate all or a subset of automatic framing from the Build Framing Panel.
  • --
  • --
  • Yes
Automatically Build Trusses. Set up your defaults and use parametric features to automatically add floor and roof trusses to your design when you build framing. Specify whether an end truss will be generated over a wall in the Wall’s Structure Specification. Choose to set up your template to use Energy Heel Trusses by default.
  • --
  • --
  • Yes
Flat Header. Specify rotated header framing members so the flat side is parallel with the ceiling, useful for non-loadbearing walls.
  • --
  • --
  • Yes
Wall Plates per Wall Type. Designate the number of top and bottom wall plates within the Wall Type specification dialog.
  • --
  • --
  • Yes
Cut Lengths for Wall Plates. Specify maximum plate lengths for wall tops and bottoms. Automatic framing will optimize them to stagger the joints and bear over studs as necessary.
  • --
  • --
  • Yes
Multiple King Studs per Opening. Specify the number of kings studs generated for openings in the framing defaults.
  • --
  • --
  • Yes
Rough Opening Panel in Dialogs. Access controls unique to rough openings for doors, windows, and wall niches in the object specification dialog.
  • --
  • --
  • Yes
Framing Reference Markers. Create framing reference markers for each level of your design to control where framing originates; choose which types of framing members reference the marker (floor, ceiling, wall). Use Stud Rollout controls to manage the framing start point for walls.
  • --
  • --
  • Yes
Framing Member Role. Use the Role option in the Framing Specification dialog to control how individual framing objects are represented.
  • --
  • --
  • Yes
Wall Corner and Intersection Framing. Specify Standard, Reduced Stud (two-stud Advanced Framing Technique), or Laddered options for building wall framing at corners and intersections.
  • --
  • --
  • Yes
Multiple Framing Types. Choose from a wide selection of framing types when designing your structure; from lumber, to steel, to engineered materials like LVL, PSL, and VSL. Framing labels reflect the type of material specified.
  • --
  • --
  • Yes
Post & Beam Framing Tools. Specify Round or Square posts. Set the Default Material for Posts in the framing defaults.
  • --
  • --
  • Yes

Landscaping / Decking / Terrain

Landscaping Plants.
  • 3,600+
  • 3,600+
  • 3,600+
Plant Encyclopedia & Plant Chooser™. Looks for special characteristics specific to available plants in the catalog, including common name, zone, water and light needs, and 2D or 3D available objects. Leverage Plant Hardiness Zone Maps to choose plants for your region.
  • Yes
  • Yes
  • Yes
Pre-Arranged Garden Beds.
  • Yes
  • Yes
  • Yes
Distribute Objects in Garden Beds. Auto-populate your garden beds automatically. Set up default behaviors and display options.
  • Yes
  • Yes
  • Yes
Plant Schedules. Generate a list of all the plants used in your design; use different schedule callout shapes as reference labels to plants in designs. Manage multiple schedules of the same type and independently control their display of labels. Schedules update when items in the plan are added to or removed from the schedule display.
  • --
  • Yes
  • Yes
Grow Plants Slider Tool - 0 - 20 years.
  • --
  • Yes
  • Yes
Railing Tools. Custom Railing Panels, Control of Height & Railing Styles, great for custom decks.
  • Yes
  • Yes
  • Yes
Polygon Deck tool creates deck shapes automatically.
  • Yes
  • Yes
  • Yes
Auto Re-Build Deck Framing. Deck Framing updates as the deck design changes.
  • Yes
  • Yes
  • Yes
Deck Designer™ Tool. Design Straight and Curved Decks. Define roof and ceiling attributes for a covered deck. Control the orientation and size of deck planking, gap, width, overhang, direction, border planks.
  • --
  • Yes
  • Yes
Deck Beam Controls. Define spacing, offsets, and generation of automatically generated deck beams through the Deck Specification and Framing dialogs. Choose whether beams are placed under or in line with joists.
  • --
  • --
  • Yes
Deck Plank Blocking. Automatic framing includes blocking under border planks.
  • --
  • --
  • Yes
Treated Deck Framing. Specify Deck Framing Members as “treated” to reflect the lumber type in your materials list.
  • --
  • --
  • Yes
Deck Support Controls. Specify size and type of deck posts and height, width, shape of deck footings for individual deck rooms or as project defaults. Set defaults for deck posts and beams.
  • --
  • --
  • Yes
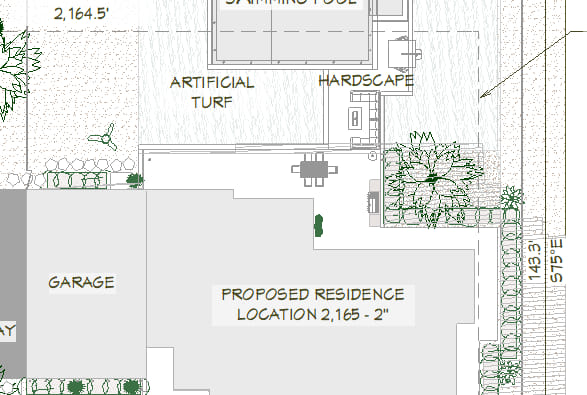
Landscaping Terrain Tools. Define custom Terrain, including sloped lots and input elevation points. Shape the terrain with Hill and Valley tools. Cut holes in terrain for pools, window wells and other customizations.
  • Yes
  • Yes
  • Yes
Import GPS Assistant. Quickly model your terrain with GPS data.
  • Yes
  • Yes
  • Yes
Primary and Secondary Terrain contour labels. Control the highlight for negative value contour labels.
  • Primary Only
  • Primary Only
  • Yes
Straight and Curved Terrain Walls, Curbs, and Retaining Walls. Straight and Curved Roads, Sidewalks, Driveway and Parking Lot Tools.
  • Yes
  • Yes
  • Yes
Calculate Materials for Roads. Include the volume of Roads, Driveways, Sidewalks, and Terrain Walls and Curbs in materials lists.
  • Yes
  • Yes
  • Yes
Stepping Stone Tools. Click and drop stepping stone shapes onto terrain to quickly create paths and hardscaping interest.
  • Yes
  • Yes
  • Yes
Water Feature Tools. Create various shaped ponds, streams, creeks, and water features, or design a lake front home.
  • Yes
  • Yes
  • Yes
Define Terrain Elevation Splines, Elevation Regions, and Terrain Breaks.
  • Elevation Regions
  • Elevation Regions
  • Yes
Display angles as Azimuth Bearings.
  • --
  • --
  • Yes
Convert Polyline to Terrain Curb/Wall. Use an edit tool to convert CAD to Terrain Curbs or Terrain Walls.
  • --
  • --
  • Yes
Copy Sun Angles. Create duplicate sun angles, then move and adjust the copies to represent different seasons and times for sun studies and lighting effects.
  • --
  • --
  • Yes

General / Support

Mac and PC compatible. Home Designer can be installed and run natively either on Mac or Windows operating systems with a single license.
  • Yes
  • Yes
  • Yes
Native ARM Support for Mac M1 Processors. See up to 20% performance improvement with ARM processors.
  • Yes
  • Yes
  • Yes
Support for Multiple Monitors. Tabbed view windows can be torn or undocked from the main user interface and moved between monitors independently.
  • Yes
  • Yes
  • Yes
Touch Screen Optimization. Smooth and accurate touch controls for pinch zoom, pan, rotate and other controls for Windows computers (not supported by Mac OS).
  • Yes
  • Yes
  • Yes
Unicode Special Character Support. User accounts and files using accented Western letters can be leveraged for most interactions in the software.
  • Yes
  • Yes
  • Yes
Migration Tools. Easily bring forward settings from previous versions.
  • Yes
  • Yes
  • Yes
Auto-Save Untitled Projects. Projects that have not been named or manually saved for the first time are archived through the Auto-Save rules set up in user Preferences.
  • Yes
  • Yes
  • Yes
Manage Archive Preferences. Define the frequency that files are archived
  • +
  • +
  • Yes
Thumbnail Preferences. Control thumbnail associated with plan files
  • +
  • +
  • Yes
Print to any Paper Size. Set up your prints and PDF to work with your favorite paper size.
  • Yes
  • Yes
  • Yes
Save Prints in PDF Format. Save to a PDF file for outsourcing a print job.
  • Yes
  • Yes
  • Yes
Loan/Mortgage Calculator.
  • Yes
  • Yes
  • Yes
Custom Stylized Themes. Set up Chief’s User Interface with color and style themes of your choosing. Set preferences for the look of dialogs, menus, buttons and other interface elements; import, export, and share saved themes.
  • --
  • --
  • Yes
Fully editable working environment including customizable toolbars.
  • --
  • Customizable Toolbars
  • Yes
Compatible with Chief Architect® (Version X1-X15). Edit plans created using Chief Architect.
  • Basic Editing, Change Materials & Colors, Move Furniture
  • Basic Editing, Change Materials & Colors, Move Furniture
  • Yes
Dynamically-Updating Help. The Help viewer automatically updates to show the Help topic for the highlighted object, tool, or dialog. Dynamic help updates can be toggled on or off.
  • Yes
  • Yes
  • Yes
Online Training Tutorials with "How-To" videos.
  • 80+ videos
  • 100+ videos
  • 120+ videos
Searchable Knowledge Base Articles. Detailed, illustrated, instructional articles will guide you step-by-step through specific tasks; search on a subject or task to find help on that topic.
  • Yes
  • Yes
  • Yes
Free Online and Live Technical Support. Contact Support Technicians at Chief Architect Headquarters.
  • Yes
  • Yes
  • Yes
Rental Option. Pay for monthly access to software for $59/month with terms to own the license after 12 consecutive months.
  • --
  • --
  • Yes