Creating a Built-in Barbecue
Reference Number:
KB-02693
Last Modified:
July 21, 2021
This article also applies to the following legacy products:
Pro | Architectural | Suite
Pro | Architectural | Suite
QUESTION
How can I create a built-in barbecue in Home Designer?

ANSWER
Use a variety of cabinets and built-in appliances from the library to create a built-in barbecue using Home Designer.
To set plan defaults
- Start by creating a New Plan
 .
.
- Select Edit> Default Settings
 from the menu.
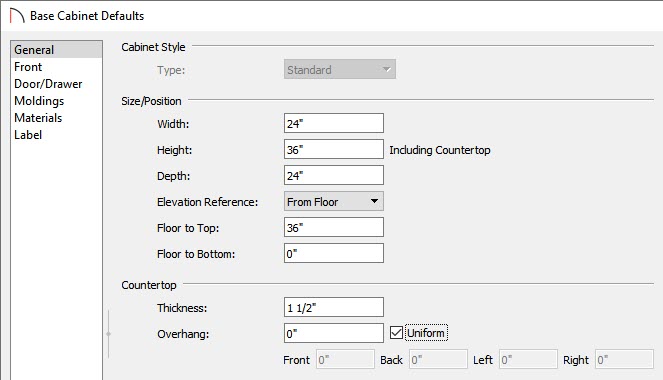
- Navigate to Cabinets> Base Cabinet, then click the Edit button.
- On the General panel of the Base Cabinet Defaults dialog, set the Overhang to 0".
- On the Materials panel, select the Cabinet component, then click on the Select Material button to browse for a new material. In this example, Stacked Stone is used.
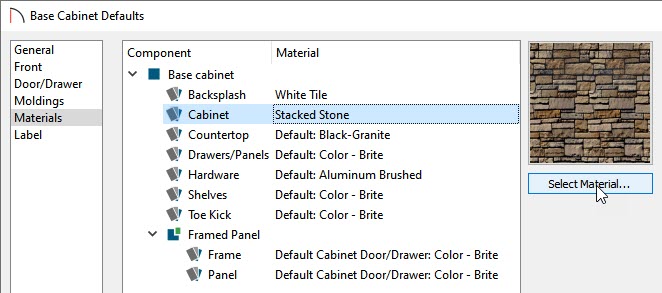
- Remaining on the Materials panel, select the Countertop component, then click on the Select Material button to browse for a new material. In this example, we used Buff-Stone.
- Once the defaults have been set, click OK, then click Done.
To place the cabinets for the barbecue
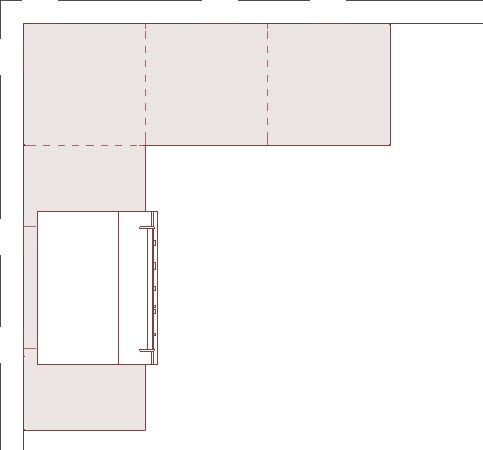
- Next, select Build> Cabinet> Base Cabinet
 and click in the plan to place base cabinets.
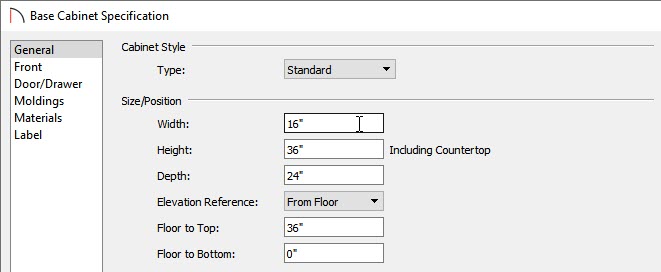
- Some cabinets may be different widths than others. To change the width, select the cabinet using the Select Objects
 tool, click on the Open Object
  edit button, and on the General panel of the Cabinet Specification dialog that displays, increase the Width.
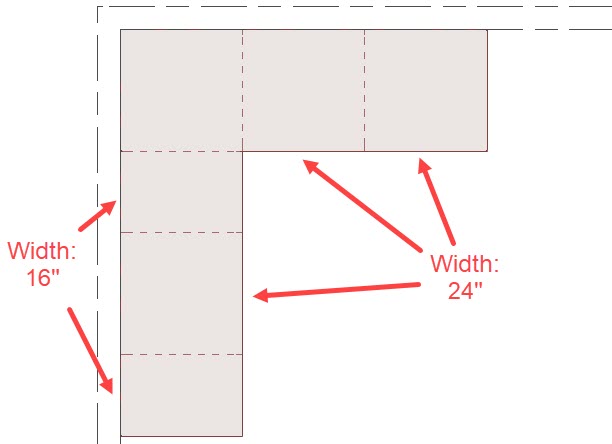
- Here is how we defined the cabinets in this example.
To modify the cabinets
- Select one of the cabinets and click on Open Object edit button.
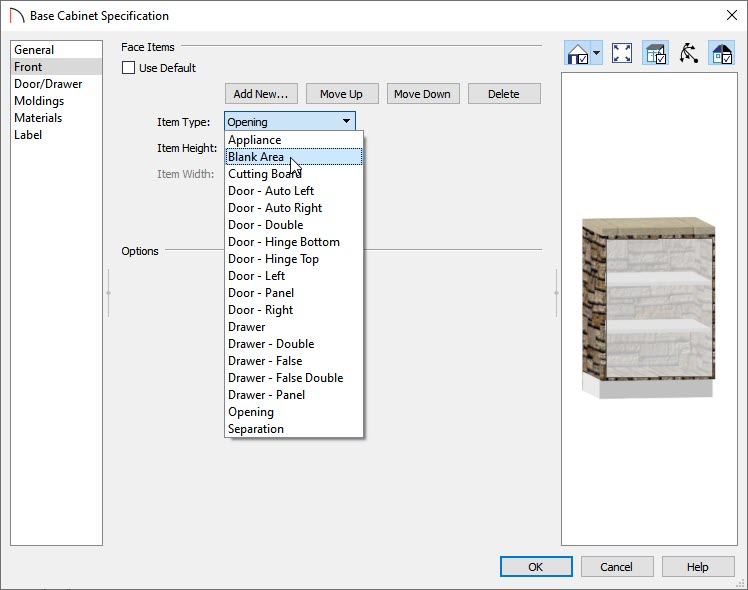
- On the Front panel of the Base Cabinet Specification dialog that displays, click on the drawer in the cabinet preview on the right.

- Click the Delete button to remove the drawer.
- Repeat the process for the door on the cabinet
- Once the door and drawer have been removed from the cabinet, click on the open area and change the Item Type from Opening to Blank Area.
- Click the Delete button to remove the drawer.
To place the barbecue
- Select View> Library Browser
 , then find the barbecue grill in the library by doing a search for BBQ.
In this example the BBQ (built-in, gas) was used.
- Once you have found the barbecue, select it and then click on the cabinet to place it in the plan .
- You're now ready to continue customizing your barbecue area using additional cabinetry and items from the Library Browser.
Related Articles