Adding a Pond and Stream to Your Terrain
Pro | Architectural | Suite
QUESTION
I would like to design a stream and pond in my plan. How can I do this?

ANSWER
Creating a ponds and stream is easy to accomplish in Home Designer using the options under the Terrain menu.
To create a pond
- If you do not already have a Terrain Perimeter in your plan, select Terrain> Create Terrain Perimeter
 .
.
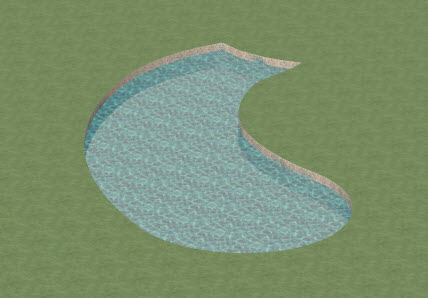
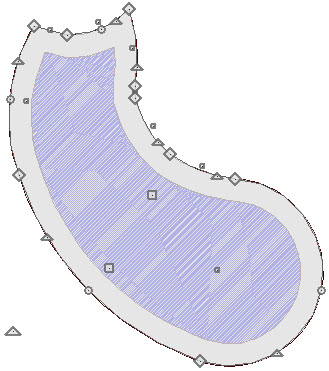
- Next, select Terrain> Water Feature> Kidney Shaped Pond
 , then click and drag to create a basic kidney shaped pond within your Terrain Perimeter.
Don't worry about the exact shape and size, as once your pond is created in your plan, you will be modify it using the Edit tools and handles.
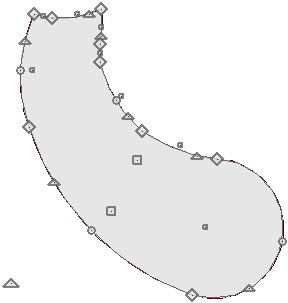
- Now that you have created your pond, use the Select Objects
 tool to select it, then click on the Add Break
  edit button, and click on an edge of the pond to place an additional break.
- Place additional breaks and use the edit handle to reshape the pond as desired.
Once your pond is the approximate desired shape, continue on to the next section of this tutorial. Keep in mind that you can always reshape the pond later if needed.
Now that the basic shape of the pond is created it can be modified.
To modify the pond
- With the pond still selected, click on the Open Object
 edit tool to display the Terrain Feature Specification dialog.
- In the Terrain Feature specification dialog
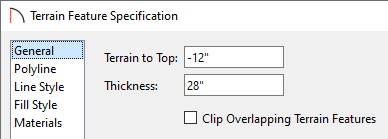
- On the General panel, set the Height and Thickness of the Terrain Feature.
For the purposes of this example, we used a Height of -12" and a Thickness of 28".
- On the Fill Style panel, you can choose to specify a Fill Style, which will be helpful when we add other Terrain features to the design.
For the purposes of this example, we are using the Hatch, Angle pattern. Change the Pattern Color to blue, and under Background color, drag the Transparency bar all the way up to 100%.
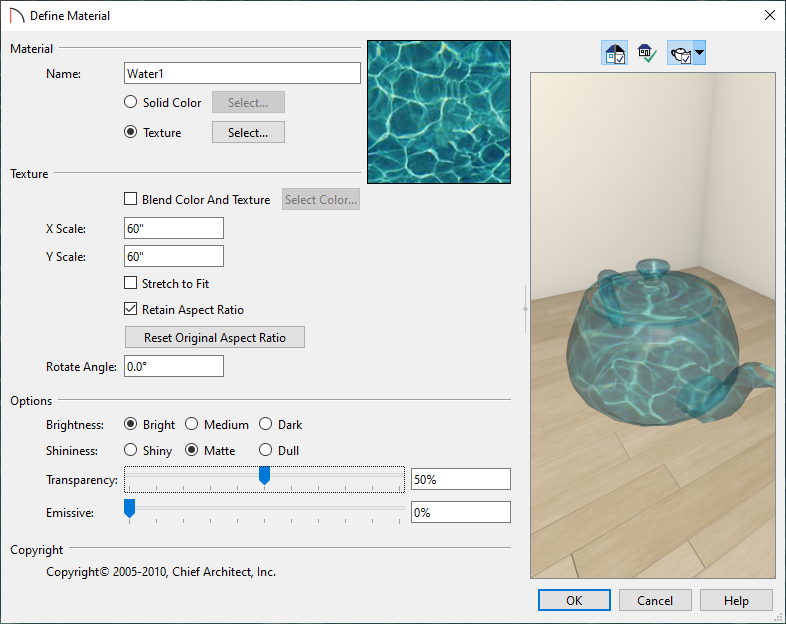
- On the Materials panel, you can choose the transparent water material that you want for your water feature.
- On the General panel, set the Height and Thickness of the Terrain Feature.
- Once you have completed making changes in this dialog, click OK to apply them.
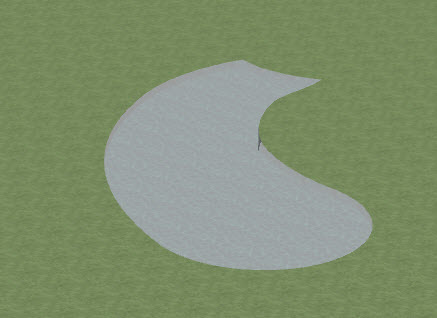
- Select 3D> Create Camera View> Perspective Full Overview
 to see the results so far.
In Home Designer Pro, go to 3D> Create Perspective View> Perspective Full overview instead.
To view the 2D floor plan view alongside your 3D Camera view, select Window> Tile Vertically.
To create the stream or pond bed
- First, activate your 2D floor plan view, and then use the Select Objects tool to select the Pond.
- Next, click on the Copy/ Paste
 edit tool to create a copy of the selected object(s), then click Paste Hold Position
  secondary tool.
The copy remains selected so you can perform additional operations.
- With the copy still selected, click on the Open Object edit tool.
- In the Terrain Feature Specification dialog:
- On the General panel, set the Height and Thickness for the pond bed.
For the purposes of this example, we will set the Height to -40" and the Thickness to 1".
- On the Fill Style panel, set the Fill Pattern to No Pattern (Transparent).
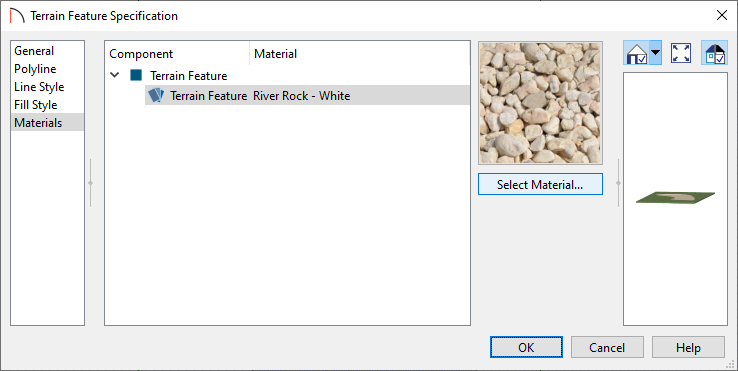
- On the Materials panel, click on the Select Material button to browse dialog for an appropriate pond bed material.
For the purposes of this example, we browsed to Materials> Landscaping> Decorative Rock> River Rock(white)
- Click OK when you have completed making changes in this dialog to apply them.
- On the General panel, set the Height and Thickness for the pond bed.
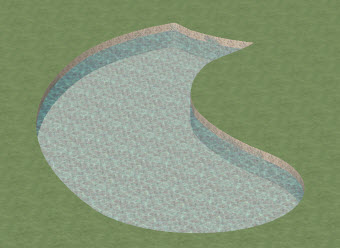
- You should now see the changes you have made update in the 3D view still tiled on your screen.
If you have closed the 3D view, create a new Perspective Full Overview to see the results of your changes this far.
Notice in your tiled view of the 3D Full Overview camera that the water is not necessarily as transparent as we would like to be in order to see the pond bed.
To increase the transparency of the water material
- Activate the 3D Camera view, then select 3D> Adjust Materials> Adjust Material Definition
 and click on the surface of the water.
- In the Adjust Material Definition dialog, we will increase the Transparency of the water to 50%.
In Home Design Pro and Architectural, the Transparency stetting can be found on the Properties panel.
- Click OK to apply the change and notice the 3D camera view update to reflect this change.
Now that the pond and pond bed have been created, it is time to create a border around this area.
To create a border around the pond
- Activate your 2D floor plan view, and select Terrain> Feature> Rectangular Feature
 , then click and drag to create a rectangular terrain feature around your pond.
- Next, use the Select Objects tool to select the Rectangular Feature, and use the Add Break and Change Line/Arc
 edit tools to create a border that encompasses the entire pond area.
- Once you have finished modifying its size and shape, click on the Open Object edit tool to display its Specification dialog.
- In the Terrain Feature Specification dialog:
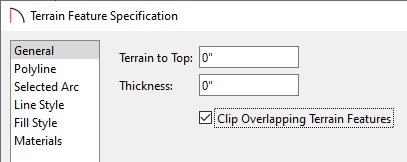
- On the General panel, you can set the Height and Thickness, however, for the purposes of this example, we will leave both of these set at 0".
Under Clipping, place a check-mark in the Clip Overlapping Terrain Features option to suppress the 3D display of any part of the selected Terrain Feature intersected by other Terrain Features with a lower Height value (such as our pond and pond bed).
- On the Materials panel, set an appropriate landscaping or terrain material to surround your pond area.
- Click OK to apply these changes.
- On the General panel, you can set the Height and Thickness, however, for the purposes of this example, we will leave both of these set at 0".
- Notice the border is now complete around your pond area in your Full Overview.
While the Stream  tool can be great for creating straight streams, if we want to create a curvy stream, we will want to use a Terrain Feature instead.
To create a curvy stream
- Activate your 2D floor plan view, and select Terrain> Feature> Rectangular Feature , then click and drag to create an initial rectangular terrain feature coming out of the pond.
- Next, use the Select Objects tool to select the Rectangular Feature, and use the Add Break and Change Line/Arc edit tools to reshape the stream.
- Once you have finished modifying its size and shape, click on the Open Object edit tool to display its Specification dialog.
- In the Terrain Feature Specification dialog, as before, you can set the Height, Thickness, Fill Style and Material for the curving stream.
- Repeat the prior procedure for creating a creek bed and border around the stream area.
Finally, after you have created your outdoor pool and creek area, you are ready to do any additional customization to your plan, such as adding exterior fixtures and furnishings.
To add plants and library objects
- To add objects, select View> Library Browser
 .
.
If searching for plants, you can also use the Plant Chooser .
.
- In the Library Browser, you can either browse through the different folders to locate appropriate objects, or you can search by keyword.
- Once you have located an item you want to place in your plan, select it, and click in your floor plan or camera view to place it, where you can then make modifications to this object, such as resizing or changing the materials.
- Continue customizing your plan with other library objects until you have completed your design.
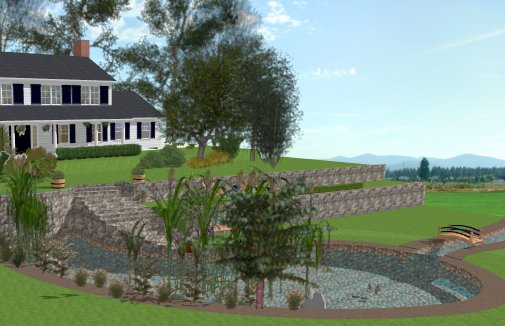
You can use these same basic steps to create other water features in your plan, such as in-ground custom shaped swimming pools.