Exporting a View as an Image
Reference Number:
KB-00246
Last Modified:
November 19, 2021
This article also applies to the following legacy products:
Pro | Architectural | Suite
Pro | Architectural | Suite
QUESTION
How do I export a floor plan or camera view as an image to send to someone who does not have a Home Designer software product?
ANSWER
You can export an image of your floor plan or camera view by navigating to File> Export> Export Picture from the menu.
To export an image of your floor plan in Home Designer
- Launch Home Designer and Open
 the plan you'd like to export an image from.
- Make sure that you are zoomed in on the area you want to export.
- Consider using Window> Fill Window
 or Fill Window Building Only
  to bring all content or your entire structure into view prior to exporting.
- Consider using Window> Fill Window
- Next, select File> Export> Export Picture (BMP, JPG, PNG)
 .
.
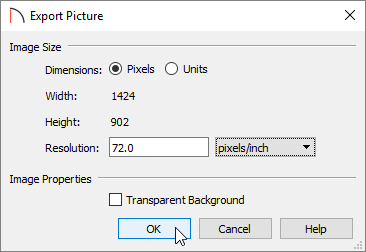
- In the Export Picture dialog, specify the image properties to your liking, then click OK.
- The Export Picture File dialog will follow. Enter in your preferred name in the File name field, choose the desired file type using the Save as type drop-down, choose a location to save the image to, then click Save.
- Repeat steps 1-5 for each additional floor level or floor plan view you'd like to create an image of.
To export a camera view image in Home Designer
- Launch Home Designer and chose to Open the plan file you'd like to export a camera view image from.
- Select 3D> Create Camera View> Full Camera
 , then click and drag to create a view of the interior, or exterior, of the structure.
In Home Designer Pro, select 3D> Create Perspective View> Full Camera .
.
- Once the view is created, select 3D> Edit Active Camera
 .
.
- In the Camera Specification dialog that displays, disable or enable additional camera view features such as Shadows and Reflections, then click OK.
- Next, select File> Export> Export Picture (BMP, JPG, PNG) from the menu.
- In the Export Picture dialog, specify the image properties to your liking, including the Width and Height, then click OK.
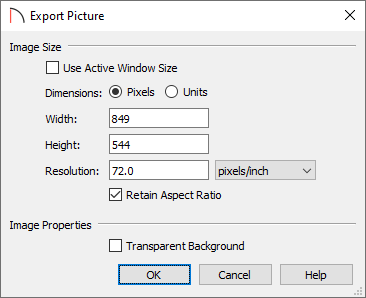
The Use Active Window Size box is checked by default, which takes the active window's resolution in to account. If you specify your own Width and Height values, this box will no longer contain a checkmark.
- In the Export Picture File dialog that appears next, enter the name in the File name field, choose the desired file type using the Save as type drop-down, specify the location where you'd like to save the image to, then click Save.
- Repeat steps 1-7 to export additional camera view images, as desired.
Related Articles