Creating a Prow Roof
Pro | Architectural | Suite
QUESTION
I would like to create a prow roof, where a gable-style wall juts out a few feet further than the rest of the structure. How can I use Home Designer's automatic roof tools to accomplish this task?

ANSWER
Creating a Prow style roof in Home Designer is easy by properly defining the correct walls as High Shed/Gable walls. To begin, start with a basic plan, such as the one shown in the image below.

Once you have your new plan created, you are ready to start defining the walls to create a prow style roof.
To create a prow style roof
- First, use the Select Objects
 tool to select the back horizontal wall, then click on the Open Object
  edit tool.
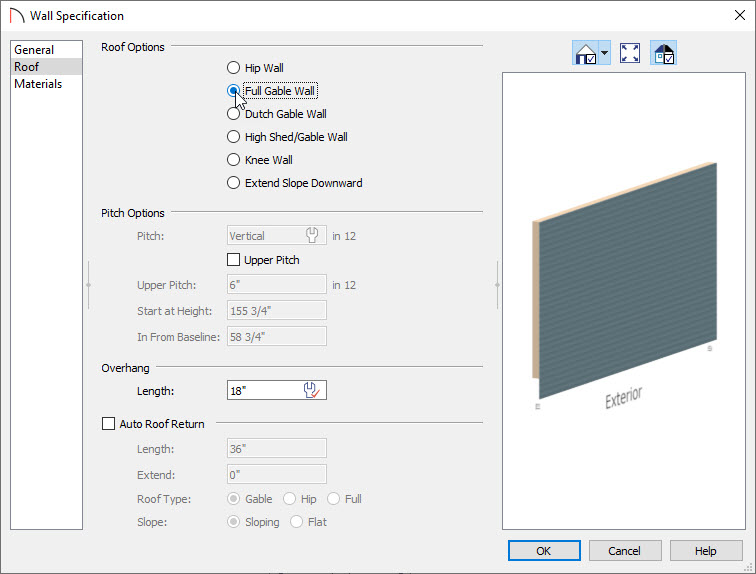
- On the Roof panel of the Wall Specification dialog that opens, select the Full Gable Wall option, then click OK.
- Next, use the Select Objects tool to select one of the angled front walls, then click on the Open Object edit tool.
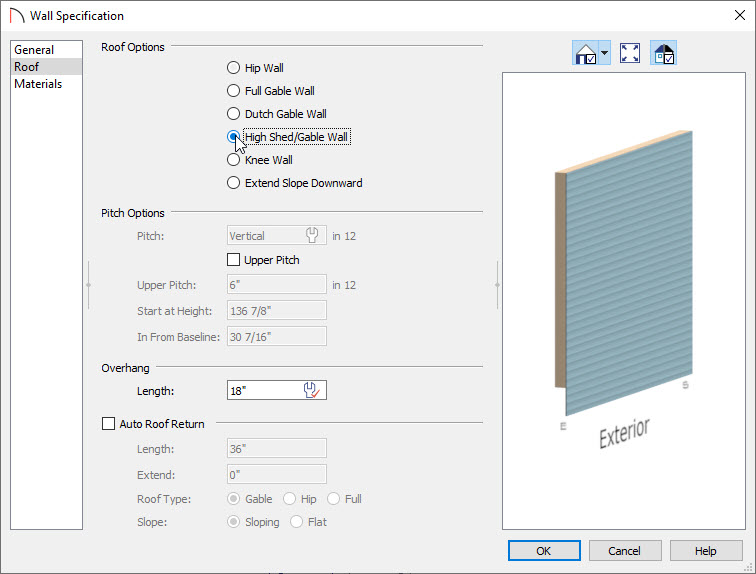
- This time, on the Roof panel of the Wall Specification dialog, select the High Shed/Gable Wall option.
- Repeat this process for the other front angled wall, so that both are defined as High Shed/Gable Walls.
- If Auto Rebuild Roofs is not enabled, select Build> Roof> Build Roof
 to open the Build Roof dialog, then click OK to generate a roof over the structure.
In Home Designer Pro, place a check in the Build Roof Planes box before clicking OK.
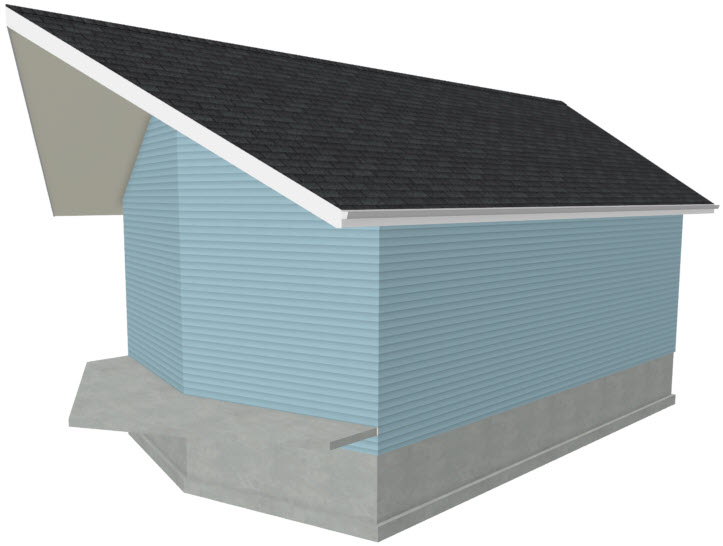
- Take a Camera
 view to see the results.

Now that you have a basic understanding of how to create this style of a roof, you can use invisible walls to create a room that will allow for extending the roof out further.
To extend the roof out further
- Select Build> Wall> Room Divider
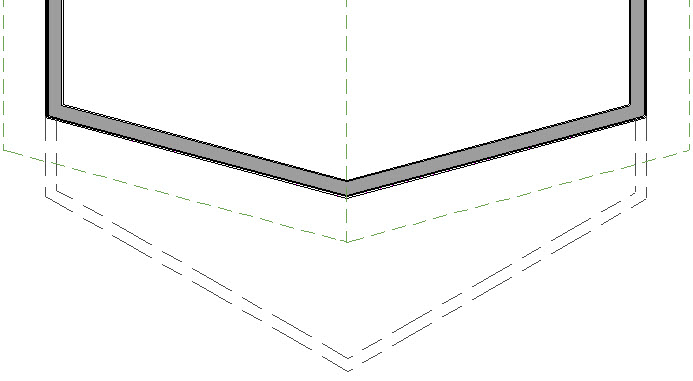
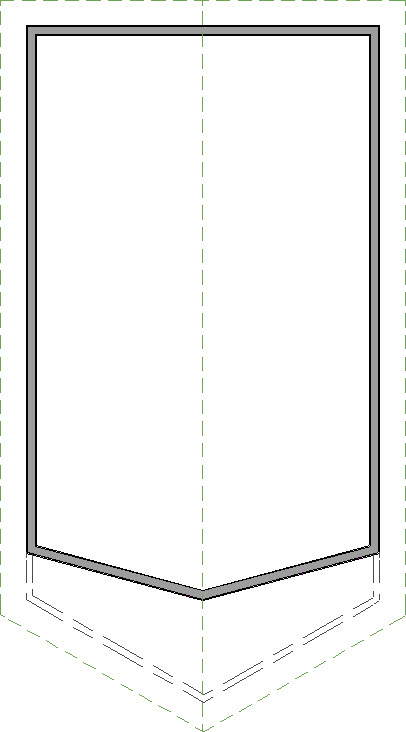
 , then in a clockwise fashion, click and drag out four invisible walls attached to the front of the structure, as shown in the image below.
- As you did with the front two walls in the last section, use the Select Objects tool to select one of the angled front Invisible walls, then click on the Open Object edit tool.
- In the Wall Specification dialog, select the High Shed/Gable Wall option located on the Roof panel, then click OK.
- Repeat this process for the other front angled Invisible wall, so that both are defined as High Shed/Gable Walls.
- If Auto Rebuild Roofs is not enabled, select Build> Roof> Build Roof to open the Build Roof dialog, then click OK to regenerate a roof over the structure.
Again, in Home Designer Pro, remember to place a check in Build Roof Planes before clicking OK.
Now that you have regenerated your roof, you will need to modify this room created with room divider walls so that it does not generate a ceiling over the room, allowing your structure to appear as though just the roof juts out over the area.
The Home Designer Pro version of the software, which allows for manual editing of roof planes, does not require creating a temporary room unless you would like to utilize the automatic roof tools for this process.
To remove the ceiling
- Next, use the Select Objects tool to click inside of the exterior room to select it, then click on the Open Object edit tool.
- On the General panel of the Room Specification dialog that opens, use the Room Type drop-down menu to select the Slab option.
- On the Structure panel, uncheck Flat Ceiling Over This Room, check Use Soffit Surface for Ceiling, but be sure to leave Roof Over This Room checked.
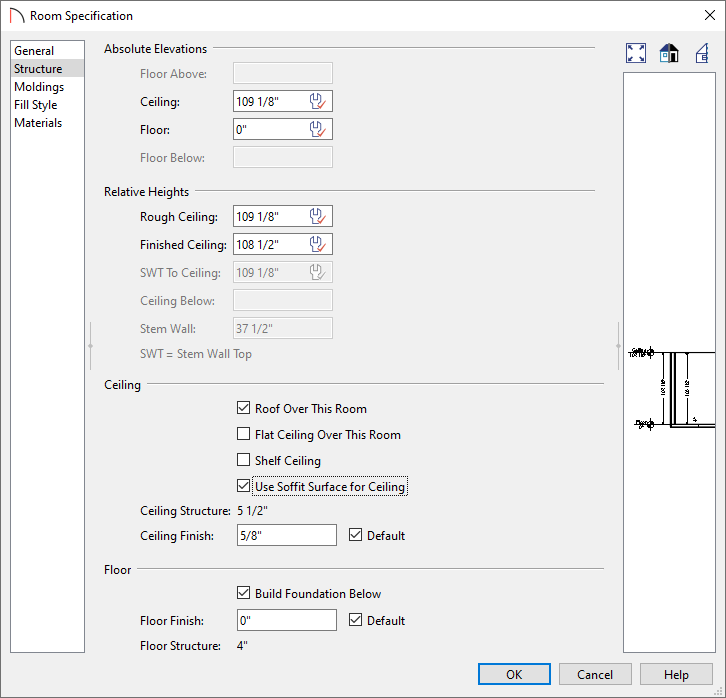
- Click OK to apply these changes and close the dialog.
- Finally, take another Camera view to see the results.
You are now ready to take the information you have learned in this article on how to create a prow style roof, and apply it to your own design.