Editing the Shape of a Window
Pro | Architectural | Suite
QUESTION
I would like to edit the shape of my windows. How can I accomplish this?

ANSWER
In Home Designer, any non-symbol, fixed glass window can have its shape customized, though the amount of customization will vary based upon which Home Designer product you're using.
Editing the shape of a window
- Navigate to Build> Window> Window
 from the menu, then click along a wall to place a window.
- Select the window, then click the Open Object
 edit tool to display the Window Specification dialog.
- On the Shape panel, use the options here to adjust the window's corners. You will notice that as you make changes, the preview of the cabinet in the dialog updates.
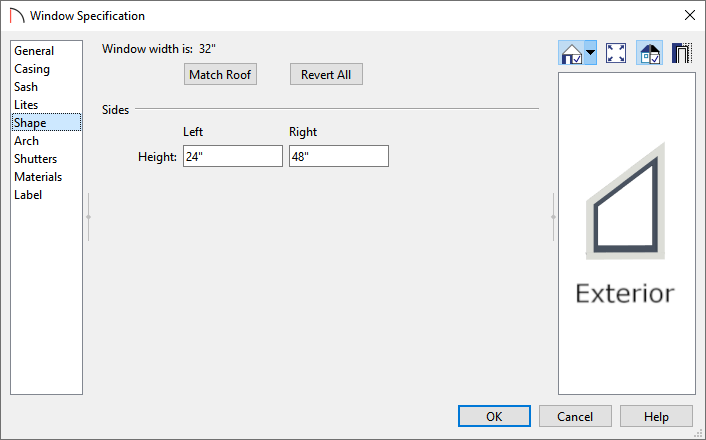
- The Match Roof button has the program match the angle of the top of the window to the pitch of the roof on a gable end. This setting does not work for curved roofs and is not available in the Window Defaults dialog.
- Click Revert All to restore the window to its original shape, type, and arch settings.
- Specify the Height of the window’s Left and Right sides, as measured from the bottom of the window. By default, these settings match the window’s height.
- In Home Designer Pro, a Top Inside Corners section is available, allowing you to create a second set of top corners with angled edges between them and the outside top corners. Additionally, a Bottom Corners section is available, allowing you to raise the heights of the bottom corners, as measured from the bottom of the window.
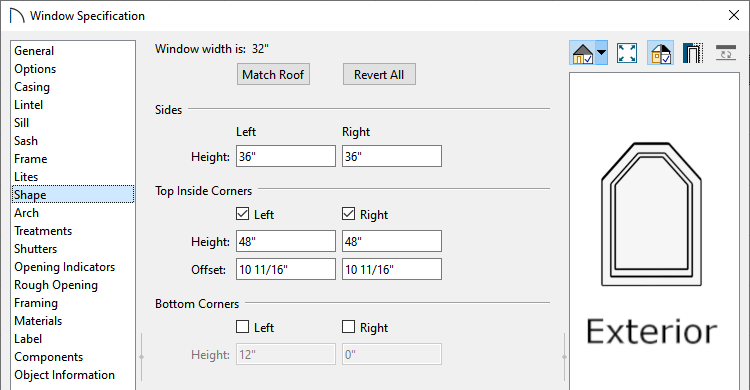
If any of these settings are used to create a custom shape, the window will be automatically specified as "Fixed Glass” on the General panel. If the selected window has an arch specified on the Arch panel, or lites specified on the Lites panel, they will be removed.
The Shape panel is not available for mulled units or window symbols from the library.
- The Match Roof button has the program match the angle of the top of the window to the pitch of the roof on a gable end. This setting does not work for curved roofs and is not available in the Window Defaults dialog.
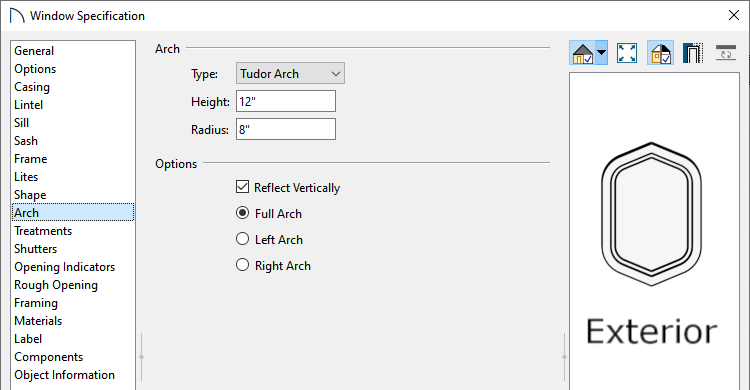
- On the Arch panel, adjust the arch, or top edge, of the window.
The settings located on the Shape panel take precedence and will override any properties set on the Arch panel. You may also notice that the settings on the Arch panel will be grayed out and inaccessible if modifications have been made on the Shape panel.

- Select a Type of arch using the drop-down menu.
- Specify the Height of the arch, as measured from the base of the arch to the top of the door. This setting is not available for Round Top and Octagonal* Arches.
* Octagonal arches are only available in Home Designer Pro.
- In Home Designer Pro, a Radius field is available, allowing you to define this value for Tudor and Double Arches.
- The orientation of the arch can also be defined in Home Designer Pro. Check the Reflect Vertically box to reflect the arch, and select between Full Arch, Left Arch, or Right Arch to determine the location of the arch's apex.
- Select a Type of arch using the drop-down menu.
- Once all desired changes have been made, click OK.