Creating Multiple Shed Roofs
Reference Number:
KB-01020
Last Modified:
August 23, 2022
This article also applies to the following legacy products:
Pro | Architectural | Suite
Pro | Architectural | Suite
QUESTION
I need to model a structure that has multiple shed roofs. How can I accomplish this in Home Designer?

ANSWER
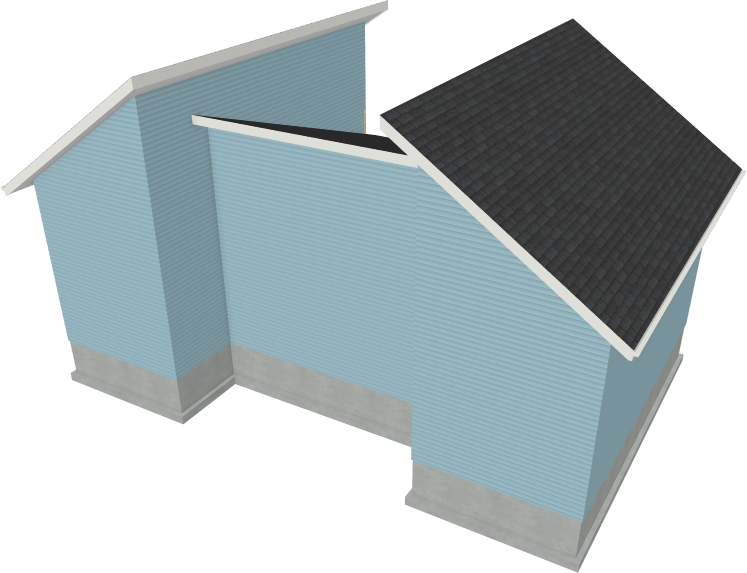
In this article, we walk you through creating the shed roof combination shown in the image above. Once you have completed these steps, you can then use the skills that you have learned and apply them to your own design.
To create the basic plan
- Launch your Home Designer program, and choose to start a New Plan
 using the default style template.
- Draw a basic outline of the structure, as shown in the image below.

- Using the Select Objects
 tool, select the bottom left wall that measures 11' in length and click on the Open Object
  edit button.
- On the Roof panel of the Wall Specification dialog that displays, specify the wall as Full Gable Wall, and click OK.

- Repeat this process for all of the walls that are indicated in green in the image below.
Note that you will need to use the Add Break edit button to add break points along the back wall where the two vertical walls intersect.

- Next, Open the two vertical walls that are on the inside of the structure, then select the High Shed/Gable Wall option located on the Roof panel.

These two walls displayed in blue in the image below.

- The remaining walls that have not yet been edited allow you to control the individual roof planes that will cover each section of the structure. In this example, select the middle wall segment that is located at the top of the structure, Open it to specification, and adjust its Pitch to be 4" in 12", then click OK.

-
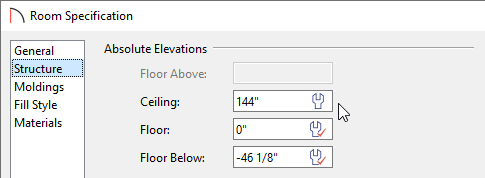
Open the room on the right side of the structure up to specification, increase the Ceiling value located on the Structure panel to 144", then click OK.
Repeat this procedure to the left room as well, leaving only the center room at the default value.
- If you do not have the Auto Rebuild Roofs option enabled, navigate to Build> Roof> Build Roof
 from the menu, then click OK to rebuild the roof and close the dialog.
In Home Designer Pro, check the Build Roof Planes box, then click OK to rebuild the roof.
- Finally, take a Camera
 view to see the results.