Creating a Saltbox Roof
Reference Number:
KB-00735
Last Modified:
January 16, 2025
This article also applies to the following legacy products:
Pro | Architectural | Suite
Pro | Architectural | Suite
QUESTION
I need to create a Saltbox style of roof in my Home Designer plan, where I have a long, pitched roof that slopes down to the back, which creates a single story in the back, and two stories in front. How can I create this?

ANSWER
Saltbox roofs can be created using the Knee Wall setting and manipulating how roof planes generate.
To create a basic saltbox style roof
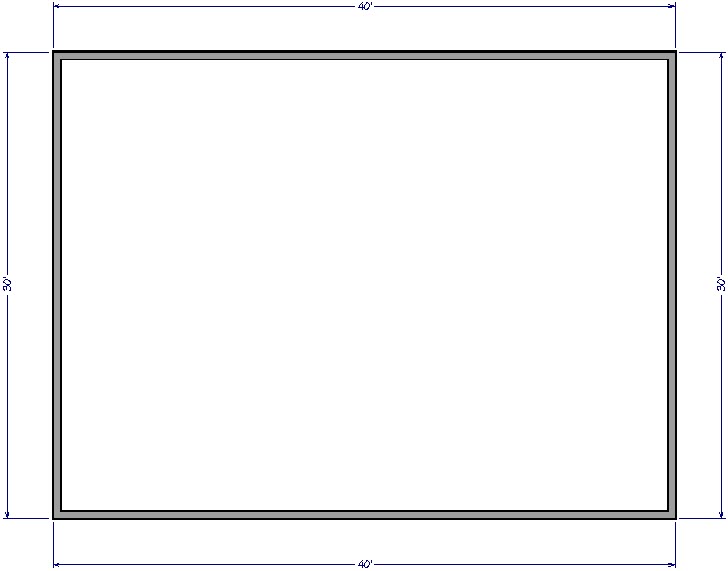
- In a new, blank plan, select Build> Wall> Straight Exterior Wall
 , then click and drag out 4 walls to create a basic 30' x 40' structure.
- Use the Select Objects
 tool to click on the vertical left 30' wall and click on the Change to Gable Wall
  edit button.
- Follow the same procedure for the opposite wall.
- Select Build> Floor> Build New Floor
 and choose the Derive new 2nd Floor plan from the 1st floor plan option, then click OK. Adjust the defaults in the dialog that appears next, then click OK.
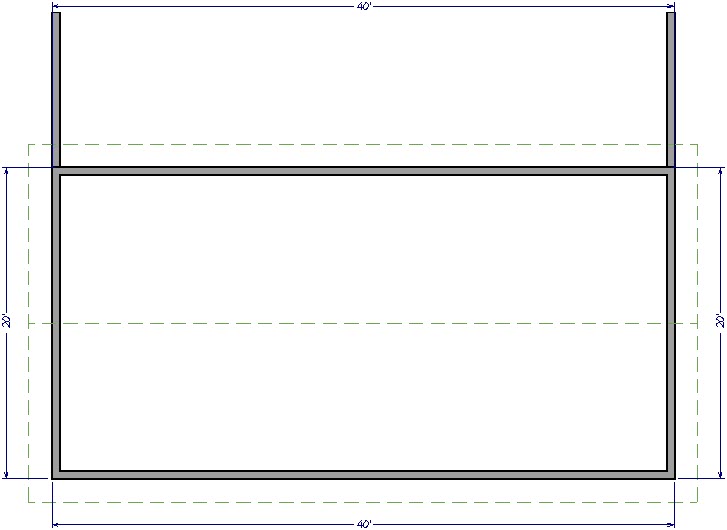
- On the newly created 2nd floor, select and move the top horizontal 40' wall in so that its distance from the opposing bottom horizontal wall goes from 30' down to 20', as demonstrated in the image below.
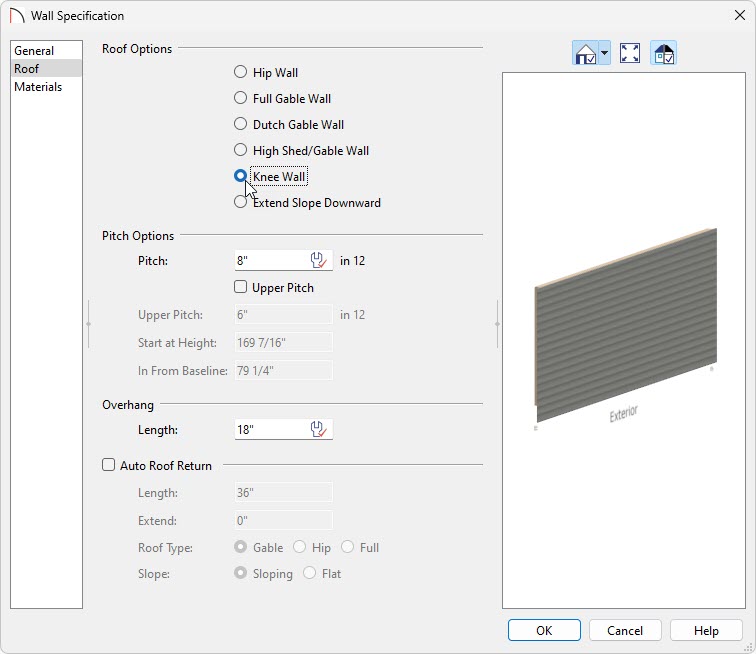
- With this top wall still selected, click the Open Object
 edit tool to display its specification dialog.
- Go to the Roof panel and select the Knee Wall option, then click OK.
- If you do not have the Auto Rebuild Roofs functionality enabled, select Build> Roof> Build Roof
 , then click OK to rebuild the roof planes to reflect the changes that you have made.
In Home Designer Pro, check the Build Roof Planes box within the Build Roof dialog, then click OK.
- Go to 3D> Create Camera View> Full Camera
 and then click and drag to see your results.
In Home Designer Pro, instead go to 3D> Create Perspective View> Full Camera and then click and drag to see your results.
Related Articles