Positioning Objects Precisely Using Dimensions
Pro | Architectural | Suite
QUESTION
I would like to position an object a specific distance from another object, how can I do this?
ANSWER
When drawing objects in Home Designer such as walls, doors, windows, etc., they may not draw in or be placed in an exact location, and may need to be moved more accurately so that it dimensions properly. This is especially important for walls. All drawn or placed objects can be easily moved to precise locations or distances from other objects by using dimension lines.
Since Auto Exterior Dimensions are generated automatically when a room area is defined, these dimension lines will be used for the purposes of this article, though all types of dimension lines, such as Manual Dimension or Interior Dimension lines can be used to position objects. It is important to note exactly what type of dimension line is being used, specifically while dimensioning walls, and what wall layers are being dimensioned to.
To move objects using dimensions
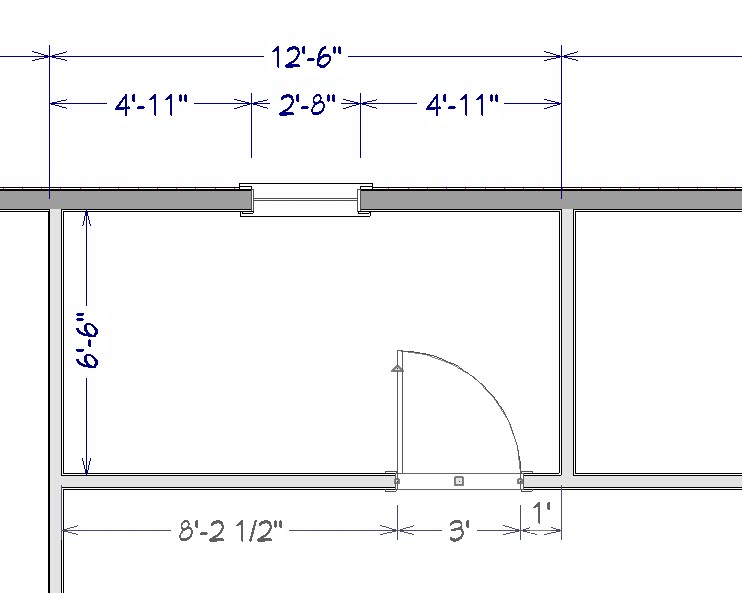
In the figure below, walls have been drawn, a window and a door have been placed, but the position of these objects is less than ideal.
- Using the Select Object
 tool, select the object you would like to move. In this example, the interior wall on the right was selected.
-
When moving the mouse cursor over an editable dimension line, your cursor will change to a Hand cursor
 , showing that the dimension is editable in conjunction with the currently selected object.
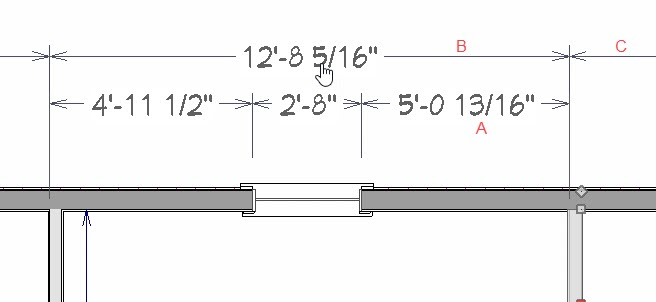
Here, a total of three dimension lines can be used to accurately position the selected wall: dimension A, between the wall and the window; dimension B, measuring the width of the room; and dimension C, extending off to the right. Here, the topmost dimension (B) will be used, allowing the width of the room to be accurately set.
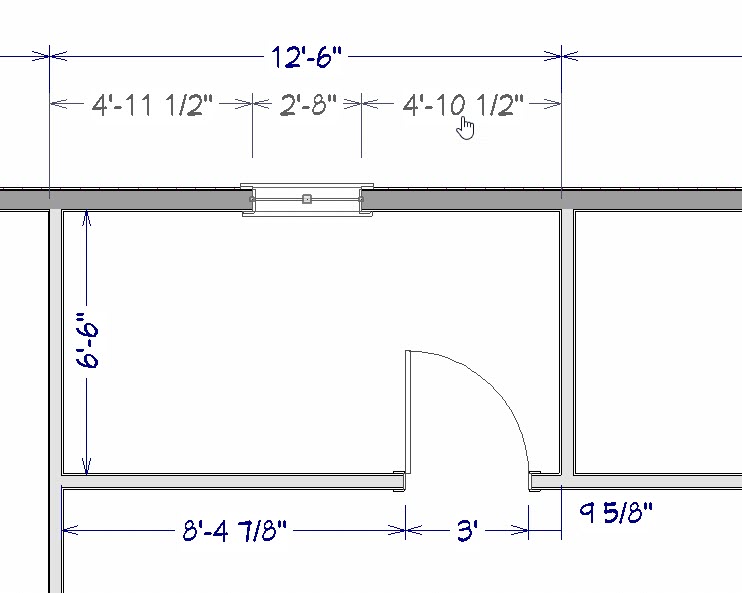
- Clicking on the desired dimension line will activate a text box allowing you to enter the exact distance you want the selected object to move to.

Entering 12' 6" here and pressing Enter will cause the selected wall to move 2 5/16" to the left, so that the overall wall-to-wall dimension of the room is exactly 12 '6".
Note: By default these dimension lines measure from the walls' default Wall Dimension Layer, as such, this dimension line is ignoring the wall surface layers. Manually drawn Interior Dimension lines measure surface to surface by default.
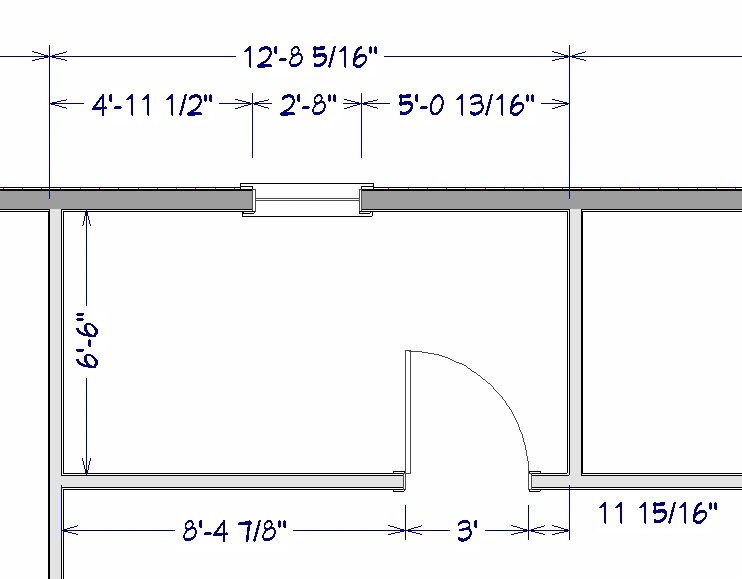
- By selecting the window, the two dimension lines measuring both sides of the window to the walls on each side can be used to accurately position this window.
Using the various temporary, automatic, and manually drawn dimension lines, a plan can be fine-tuned to your exact specifications.