Controlling Snap Settings
Pro | Architectural | Suite
QUESTION
When I try to move an object into place, it seems to bump and snap at locations that I don't want it to. How can I temporarily override these settings, or turn them off?
ANSWER
There are several snap settings in Home Designer that affect how objects are created and how they can be edited:
-
Object Snaps
 , which snap objects to other objects.
-
Angle Snaps
 , which snap objects at specific angles. Angle snaps allow you to draw walls, lines, and other objects at angles in 15 ° increments. Angle Snaps also affect the way objects rotate.
-
Grid Snaps
 , which snap objects to points on a grid. Each grid box is 1" x 1" (10mm x 10mm) by default.
-
Bumping/Pushing
 , which controls whether objects bump into each other.
To learn more about these snap settings, select Help> Launch Help ![]() , and search the keyword 'snap' to review your program's information on this topic.
, and search the keyword 'snap' to review your program's information on this topic.
To temporarily disable snap settings
- Using the Select Objects
 tool, click on the object you want to move.
- On your keyboard, press and hold down the Ctrl key if you are on Windows PC, or the Command key if you are on a Mac while dragging the Move
 edit handle.
- Once the object is placed where you want, you can release the Ctrl or Command key, and repeat this process for any other objects you want to position without restrictions.
This procedure works in either your 2D Floor Plan view, or in a 3D Camera view.
To toggle snap settings on/off
- Navigate to Edit> Snap Settings
 from the menu to see the available snap settings.
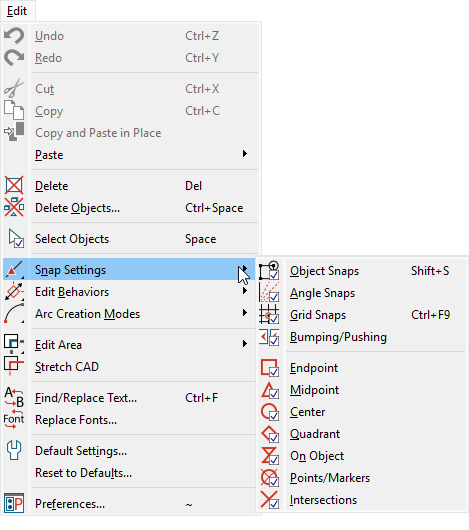
- Click on an option to toggle it on or off, depending on its current state.
Note: Legacy products Home Designer Suite and Home Designer Architectural will only have access to Object Snaps, Angle Snaps, and Grid Snaps.
It is recommended that Angle Snaps are only disabled while making a single change. Once that change has been completed, it is best to re-enable Angle Snaps.
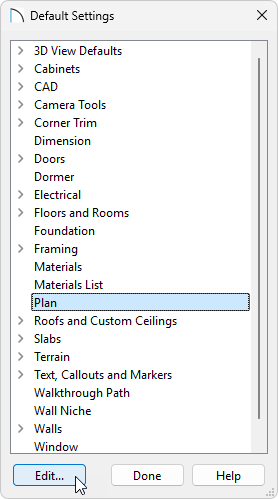
To change the grid snap unit
- Navigate to Edit> Default Settings
 from the menu.
- Select the Plan category and click the Edit button.
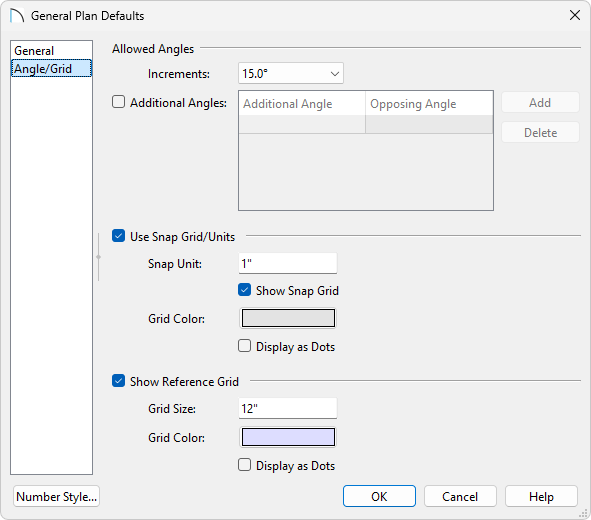
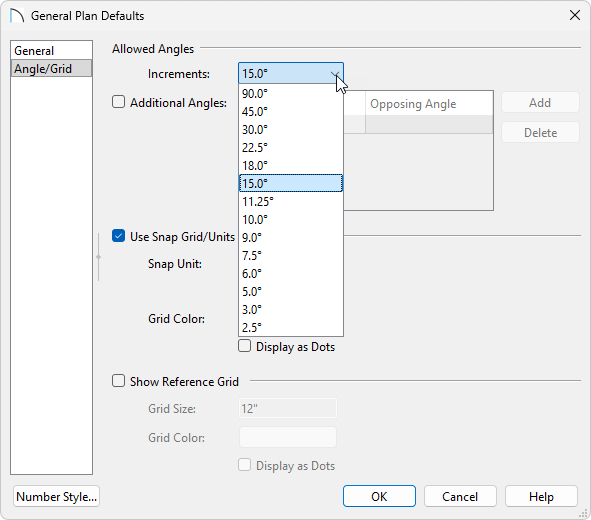
- In the General Plan Defaults dialog that displays, navigate to the Angle/Grid panel, and change the Snap Unit to your liking. By default, this is set to a value of 1" (10mm).
In Home Designer 2025 and prior, the Snap Unit setting is located in the General Plan Defaults dialog.
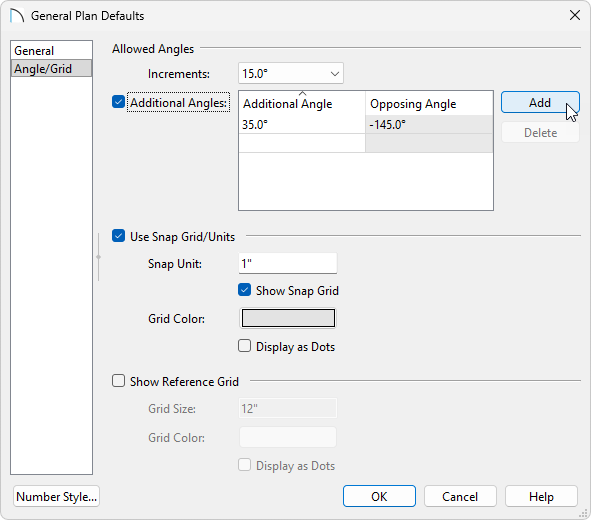
To add or change allowed angle values for Angle Snaps*
*Does not apply to legacy Home Designer Suite and Home Designer Architectural.
- Navigate to Edit> Default Settings from the menu.
- Select the Plan category, then click the Edit button.
- In the General Plan Defaults dialog, navigate to the Angle/Grid panel where you can control the Increments of your Angle Snaps.
In Home Designer Pro 2025 and prior, under the Allowed Angles section, you can switch between 15 Degrees and 7 1/2 Degrees.
- Check the Additional Angles checkbox and click Add if you'd like to add custom angle increments.
In Home Designer Pro 2025 and prior, check the box for Additional Angles, and type in your custom angle increments.