Incorporating Custom Colors in Home Designer
The information in this article appliesto:

QUESTION
There are colors in my digital photographs, or that I have found on websites, such as a particular paint manufacturer, that I would like to incorporate into my design. How can I accomplish this task?

ANSWER
Creating colors in Home Designer from various external files, such as webpages, can be accomplished using the Select Color dialog on a Windows computer or the Colors dialog on a Mac.
Begin by opening the plan in which you want to use the custom color, then open the source of the color you want to add, such as a webpage or a picture viewer program. Tile the two windows so that both can be seen on-screen at the same time.
To incorporate a custom color
- With the desired plan open, select View> Library Browser
 from the menu to open the Library Browser side window, then navigate to the User Catalog.
- Right-click on the User Catalog folder, select New> Folder, then give the folder an appropriate name, such as Custom Colors.
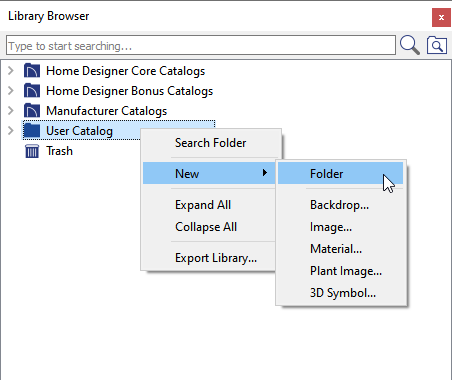
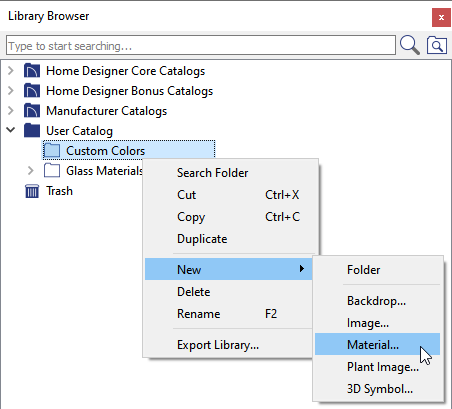
- Once this new folder is created, right-click on it and select New> Material.
- In the Define Material dialog that displays, specify a name for the custom material using the Material Name field at the top.
- In Home Designer Suite, make sure that the Solid Color radio button is selected, then click on the Select button.
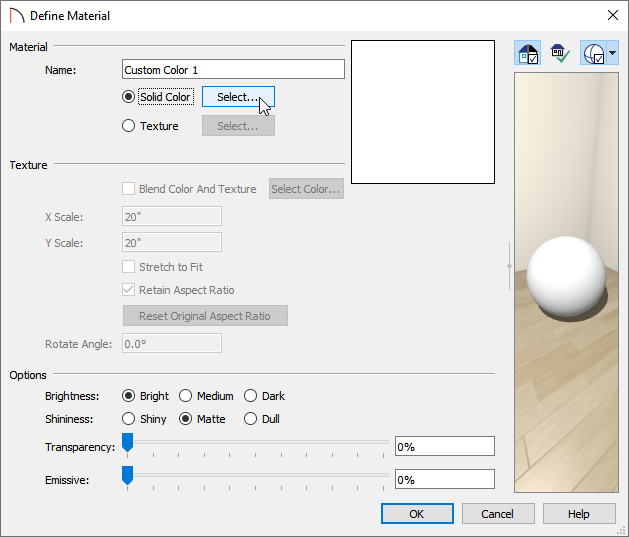
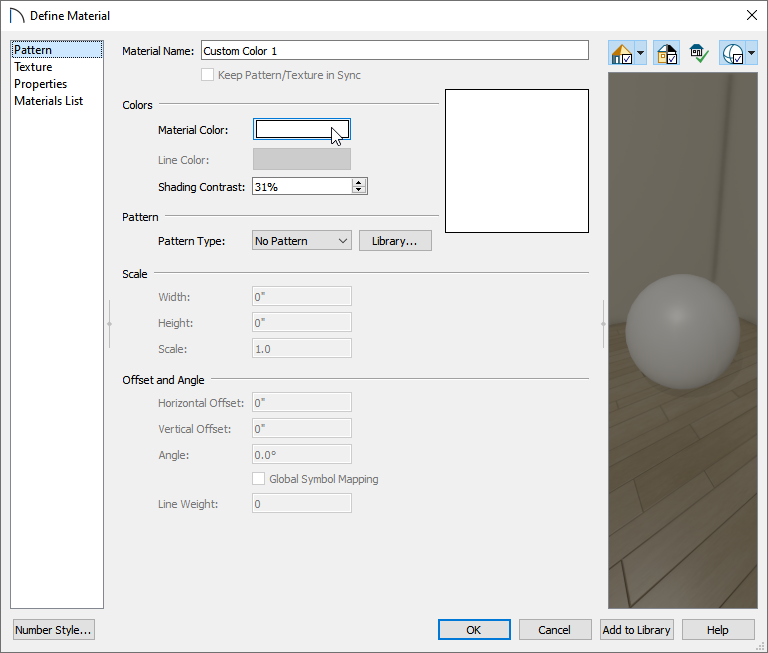
In Home Designer Architectural and Home Designer Pro, make sure that the Pattern panel is active on the left, then click on the color bar next to Material Color.
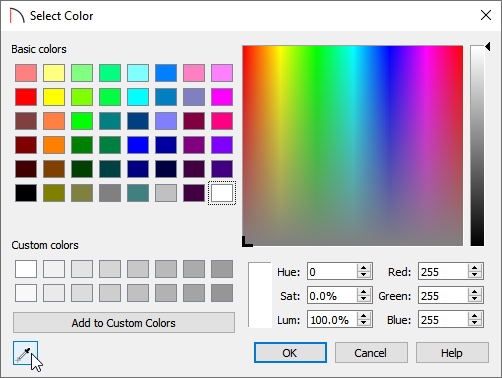
- On a Windows computer, the Select Color dialog will now display. Click on the Eyedropper tool located in the bottom left-hand corner.
On a Mac, the Colors dialog will display. Click on the Eyedropper tool located at the bottom.
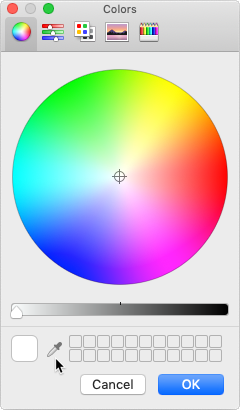
- Position the Eyedropper tool over any visible area of your computer screen, including digital photos and websites. As you drag the Eyedropper over a particular color on your screen, a preview of that color will display.
In this example, the Eyedropper has been dragged to a dark blue area located within the painting on the wall.

- When you have placed the Eyedropper over the desired color, click once with your mouse and that color will become selected.
Custom colors can be added to the custom color palette located at the bottom of the Select Color or Colors dialog. On a Windows computer, once a color is chosen, select the Add to Custom Colors button. If you're on a Mac, select the color present in the larger box located in the bottom left corner and drag it to one of the empty smaller boxes.
- Click OK and OK once more to close the dialogs and add the new color as a custom material to the Library Browser, where it can then be accessed from any Home Designer plan file.
To apply the custom color to objects in your design
- Materials, such as your new color, are only visible in 3D views, so proceed to create a Camera
 view looking at the object you'd like to apply the custom color to.
- To apply your new material to an object in your design in a 3D view, navigate to 3D> Material Painter> Material Painter
 .
.
- In the Select Material dialog that opens, browse for and select the custom color material that you created, then click OK to close the dialog.
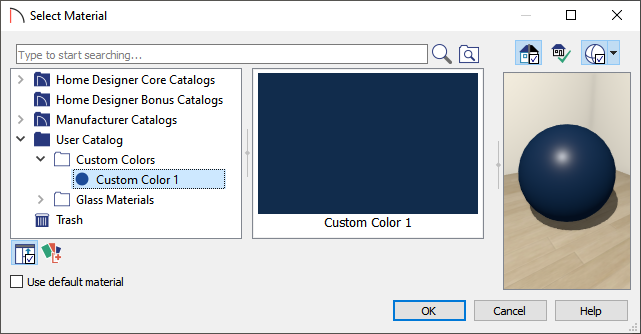
- Click on any object in the 3D view to apply your custom color to that object.
Note: When applying a custom material that only contains a solid color to an object using the Material Painter, Home Designer may blend the color with the texture that's already applied to the object. If you would instead like to override this behavior and apply just the solid color to the object's surface, you will want to disable the Blend Colors with Materials setting. For more information on the Blend Colors with Materials feature, please see the Related Articles section below.